MacBook storage filling up even when you haven’t added files usually means System Data — caches, old iPhone backups, Time Machine snapshots, and leftover app files — is the culprit. You can reclaim 10–30 GB or more by clearing caches, removing old device backups, deleting local Time Machine snapshots, and enabling iCloud Optimize Storage. No files you care about need to be deleted.
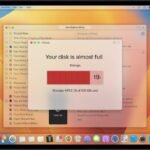
Your MacBook keeps throwing that dreaded “Your startup disk is almost full” message, yet when you look through your folders, nothing obvious jumps out. Sound familiar? You’re not alone — this is one of the most common complaints among Mac users, and it has very specific causes.
The good news: you can reclaim gigabytes of space without touching a single document, photo, or app you actually care about. This guide walks you through exactly how to do that.
Watch: Free Up MacBook Storage (Video Guide)
Prefer to follow along visually? Watch the step-by-step walkthrough below — we cover the most effective methods in just a few minutes.
Quick Fix: What to Do Right Now (Under 5 Minutes)
If you’re in a hurry, start here. These steps alone can recover anywhere from 5 GB to 30 GB on most Macs:
~/Library/Caches, and delete everything insideDone? Good. Now let’s dig deeper for lasting results.
Why Is Your Mac Storage Full When You Haven’t Added Anything?
This is the question that confuses most people. You haven’t downloaded a movie, you haven’t taken a thousand photos — so where did all the space go?
The short answer: your Mac is doing things in the background you probably don’t know about. Here’s what’s quietly eating your storage:
System Data — This is the biggest mystery category. It includes caches (temporary files apps create to work faster), log files, old iOS backups, Time Machine local snapshots, and leftover files from apps you already deleted. On some Macs, System Data alone can balloon past 50 GB.
Caches — Every app you use — Safari, Chrome, Spotify, Xcode, Final Cut Pro — builds up a cache over time. After a year or two, your cache folder can easily sit at 10–20 GB.
iOS and iPadOS Backups — Every time you back up your iPhone or iPad to your Mac via Finder, it stores a full device backup locally. A single backup can be 3 GB to 15 GB.
Time Machine Local Snapshots — macOS saves local snapshots directly to your drive between backups. These are supposed to delete themselves automatically, but they don’t always do so on schedule.
Temporary Files and Logs — macOS and third-party apps constantly write log files and temporary data that often pile up instead of being cleaned automatically.
Duplicate Download Files — Safari, Chrome, and apps like Slack often save files to your Downloads folder silently. It’s worth checking what’s sitting in there.
Step-by-Step: How to Free Up MacBook Storage Without Deleting Your Files
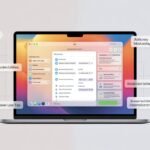
Step 1: Use Apple’s Built-In Storage Manager
Start HereApple includes a surprisingly useful storage tool right in macOS. Here’s how to use it:
You’ll now see a breakdown of what’s taking space. Pay attention to Documents → Large Files, Documents → Downloads, and iOS Files. For more detail, Apple’s official storage management guide is a reliable reference.
The “Recommendations” section at the top of Storage Manager suggests specific actions based on what it finds on your system. Read through it first — it often catches the biggest space wasters immediately.
Step 2: Clear App Caches Safely
Safe to DoClearing your cache is completely safe — apps simply rebuild it the next time they run. Think of it like clearing old sticky notes that apps no longer need.
To clear your user cache:
To clear Safari’s cache specifically:
For Chrome or Firefox, go to each browser’s settings and look for “Clear browsing data” or “Clear cache.”
Clearing caches won’t delete your passwords, bookmarks, login states, or any personal files. You might notice apps load slightly slower once — that’s just them rebuilding their cache, and it’s completely temporary.
Step 3: Delete Old iPhone and iPad Backups
Quick WinEvery time you’ve connected your iPhone or iPad and backed it up to your Mac, a full copy is sitting on your drive. A single iPhone backup can be anywhere from 3 GB to 15 GB — and most people have several.
If you back up to iCloud instead, there’s no reason to keep local backups on your Mac at all.
Step 4: Remove Time Machine Local Snapshots
AdvancedTime Machine stores local snapshots on your Mac’s drive whenever your external backup drive isn’t connected. These are supposed to clear themselves, but sometimes they need a nudge.
Command + Space and type “Terminal”tmutil listlocalsnapshots /sudo tmutil deletelocalsnapshots [DATE]To delete all local snapshots at once:
sudo tmutil deletelocalsnapshots /This only removes local snapshots stored on your internal drive. Your actual Time Machine backup on the external drive is completely unaffected.
Step 5: Enable iCloud Optimize Storage
No Files DeletedOne of the smartest ways to free up space without deleting anything is to let iCloud store the full versions of your files while keeping smaller, lightweight versions on your Mac. When you open a file, the full version downloads instantly.
For Photos, your Mac stores compressed thumbnails locally while iCloud holds the originals. You can still view, search, and share everything normally. This works best with a reliable internet connection — if you work offline often, mark critical files as “Download Always.”
Step 6: Find and Deal With Hidden Large Files
Hidden OffendersSometimes a single forgotten file is quietly taking up a huge chunk of space. Here’s how to surface it fast using Finder:
Command + FThis surfaces every file over 1 GB on your entire drive, including ones in hidden library folders.
Step 7: Clean Up Duplicate Files
Easy WinsIf you’ve moved files around, downloaded the same thing twice, or exported multiple versions of a document, duplicates are likely scattered across your Mac. The simplest free method:
Command + 2)Step 8: Remove Leftover App Data From Deleted Apps
Often OverlookedWhen you drag an app to the Trash on a Mac, the app itself is removed — but the support files, preferences, and caches it left behind stay put. Over time, these orphaned files add up significantly.
Shift + Command + G~/Library/Application Support and press Enter~/Library/Preferences and ~/Library/Caches for leftover filesPro Tips Most Blogs Won’t Tell You
Check “Recently Deleted” in Photos. Deleted photos sit in the Recently Deleted album for 30 days before being permanently removed. Go to Photos → Recently Deleted → Delete All to free that space immediately.
GarageBand and Logic carry huge sound libraries. Both apps ship with libraries that can reach 50 GB or more. Remove the library via GarageBand → Sound Library → Delete GarageBand Sound Library if you haven’t used it.
Xcode simulator files are massive. Check ~/Library/Developer/CoreSimulator/Devices — these can run into dozens of gigabytes and are safe to delete via Xcode → Settings → Platforms.
Force a Spotlight reindex to clear a bloated index. Go to System Settings → Siri & Spotlight → Spotlight Privacy, add your entire drive to the exclusion list, wait a moment, then remove it.
iMessage attachments quietly accumulate. Every photo, video, GIF, and file ever sent to you in Messages is stored on your Mac. Set “Keep Messages” to 1 Year in Messages → Settings → General, and check ~/Library/Messages/Attachments.
Your Mac has more built-in tricks than you think. Check out our guide on secret Mac features you probably don’t know about — some of them can genuinely change how you use your Mac day-to-day.
Common Mistakes to Avoid
These are core macOS system files. Removing them can break your Mac entirely and require a full reinstall. Only work inside your home folder (paths starting with ~).
Many of these are adware or scams. Apple’s built-in Storage Manager handles the essentials safely and for free.
Your apps will be slightly slower for a short time as they rebuild their cache. Pick a quiet moment to do it.
It’s the most neglected spot on almost every Mac — a single pass through it almost always turns up large forgotten files.
Enabling Optimize Mac Storage in iCloud doesn’t delete anything — it stores originals in iCloud and keeps smaller versions locally. Completely reversible.
FAQ: MacBook Storage Questions Answered
Why is my Mac storage full but nothing is there?
This almost always means System Data is consuming the space — caches, app logs, Time Machine local snapshots, old iOS device backups, and leftover files from deleted apps. None of these show up in your regular folders. Apple’s Storage Manager (About This Mac → Storage → Manage) is the best way to see a breakdown of what’s actually there.
What is System Data on a Mac, and can I delete it?
System Data is a catch-all category for caches, temporary files, log files, and background data. Some of it is deletable — caches, old iPhone backups, Time Machine snapshots — and some is actively needed by the system. The steps in this guide target only the safe, deletable portions.
How do I free up space on a Mac without deleting files?
Clear your app caches, enable Optimize Mac Storage in iCloud, remove old iPhone and iPad backups from Finder, delete Time Machine local snapshots via Terminal, and use Apple’s Storage Manager to identify large forgotten files. These steps together can free up 10–50 GB on most Macs.
Is it safe to clear the cache on a Mac?
Yes. Clearing the user cache in ~/Library/Caches is completely safe. Apps rebuild it automatically as needed. You won’t lose any personal files, photos, passwords, or settings. The only side effect is a slightly slower first launch for some apps — completely temporary.
What takes up the most space on a MacBook?
In most cases: System Data (caches + logs + snapshots), large video or project files, iPhone and iPad backups, unused GarageBand or Logic sound libraries, and iMessage photo and video attachments. Apple’s Storage Manager shows a ranked breakdown specific to your Mac.
Does emptying the Trash actually free up storage?
Yes — and it’s a step many people forget. Files in the Trash still take up drive space until it’s emptied. This includes photos in the “Recently Deleted” album and files in app-specific trash folders like Google Drive or Dropbox.
All 8 Steps at a Glance
- 1Use Apple’s built-in Storage Manager to see what’s taking space
- 2Clear app caches from ~/Library/Caches safely
- 3Delete old iPhone and iPad backups from Finder
- 4Remove Time Machine local snapshots via Terminal
- 5Enable iCloud Optimize Storage — no files deleted
- 6Hunt down hidden large files with Finder search
- 7Clean up duplicate files manually in Finder
- 8Remove leftover app data from deleted applications
One Last Thing
If you’ve worked through everything in this guide and your MacBook is still struggling for space — or if the storage keeps filling back up — there may be something more specific going on, like a corrupted cache that keeps rebuilding or an app generating unusually large log files. Feel free to reach out to the CrazyErrors team — we help Mac users troubleshoot exactly these kinds of stubborn issues.
Wrapping Up
A full Mac storage doesn’t always mean you need to delete things you care about. In most cases, the culprit is invisible background data — caches, snapshots, old backups, and leftover files from apps long gone. The fixes are straightforward, they’re free, and you won’t lose a single file that matters to you.
Start with Apple’s Storage Manager, clear your caches, clean up old iPhone backups, and enable iCloud’s Optimize Storage. Most people reclaim 10–30 GB doing just that. Your MacBook will thank you.
ⓘ Disclaimer: This article is for informational purposes only. CrazyErrors is not affiliated with Apple Inc. or Microsoft Corporation. Results may vary depending on your macOS version and device. Always back up your data before making system changes. For official support, visit apple.com/support.