
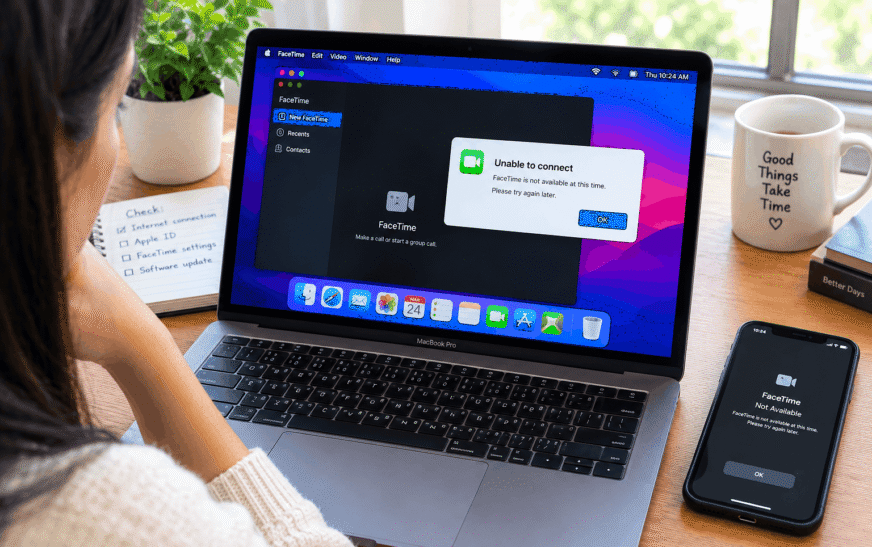
When FaceTime is not working on Mac, the most common fix is checking camera and microphone permissions: go to System Settings → Privacy & Security → Camera and confirm FaceTime is toggled on. Do the same for Microphone. If FaceTime shows a black screen, another app (Zoom, Teams, Chrome) is likely holding the camera — quit those apps and try again. For audio issues, go to FaceTime → Video in the menu bar and confirm the correct microphone and speaker are selected.
FaceTime is one of those apps you barely think about — until it stops working right when you need it. You open it up for a call with family, a job interview, a doctor’s appointment, and something’s wrong. The camera shows a black screen. The other person can’t hear you. The call rings out with no answer. Or FaceTime won’t even open properly.
The frustrating part is that these problems rarely announce themselves with a clear error message. FaceTime just… doesn’t work. And since the issues can come from half a dozen different places — permissions, another app hogging the camera, an Apple ID sign-in glitch, a wrong audio device — it can feel like guesswork figuring out where to start.
This guide goes through every real cause of Mac FaceTime not working, with specific fixes for camera problems, audio problems, and the cases where FaceTime won’t connect at all. Work through whichever section matches your situation.
What’s Actually Going Wrong? Start Here
Find Your Symptom First — Different Problems Have Different Causes📹 Black screen or camera not working during a FaceTime call
You can hear the other person but your camera feed shows black, frozen, or a spinning loader. Most likely another app is currently using the camera (Fix 3), or macOS hasn’t granted FaceTime camera permission (Fix 2). Less commonly, a system extension is blocking camera access (Fix 9).
🔇 Other person can’t hear you — microphone not working
You can see and hear them but your audio isn’t transmitting. Check the active microphone in FaceTime first (Fix 5) — it may be set to the wrong input. A muted system mic (Fix 4) or missing microphone permission (Fix 2) also causes this. If you’re using AirPods or an external mic, Fix 5 covers device selection.
🔊 You can’t hear the other person — no audio from FaceTime
Their video appears fine but you hear nothing. Most likely FaceTime’s output is set to a different speaker — check FaceTime → Video in the menu bar (Fix 5). Also check macOS system volume and whether Do Not Disturb is suppressing audio (Fix 6).
❌ FaceTime won’t connect — calls fail or ring with no answer
The call shows “Connecting…” indefinitely or rings out. This is usually a network issue (Fix 7), a firewall blocking FaceTime’s ports (Fix 8), or an Apple ID sign-in problem (Fix 10). Also check Apple’s FaceTime server status before anything else (Fix 1).
🚫 FaceTime not available or greyed out
The FaceTime app opens but shows “FaceTime is not available” or certain features are greyed out. Check whether you’re signed into your Apple ID in FaceTime (Fix 10) and confirm FaceTime isn’t restricted under Screen Time (Fix 11).
🔥 FaceTime echo, static, or poor call quality
The call connects but audio quality is bad — echoing, crackling, cutting in and out. Usually a network bandwidth issue (Fix 7) or the wrong audio device selected in FaceTime settings (Fix 5). If using a Bluetooth headset, interference can cause static (Fix 6).
What’s Actually Causing It — Root Causes at a Glance
11 Causes, Ordered by How Often They Come Up| Cause | How You’d Know | Fix |
|---|---|---|
| Apple’s FaceTime servers are down | Multiple users reporting problems; nothing works on your end either | Fix 1 |
| Camera or microphone permission denied | FaceTime shows black screen or no audio at all | Fix 2 |
| Another app is using the camera | Camera works in FaceTime sometimes but not always; black screen | Fix 3 |
| Mac microphone is muted at system level | No audio sent; mic works in other apps too | Fix 4 |
| Wrong audio device selected in FaceTime | Can’t hear other person or they can’t hear you | Fix 5 |
| Do Not Disturb or Focus mode active | Calls go silent or don’t ring; notifications suppressed | Fix 6 |
| Network issue or slow connection | Calls fail, freeze, or pixelate; other video apps also struggle | Fix 7 |
| Firewall blocking FaceTime ports | FaceTime fails on this network only; works on mobile hotspot | Fix 8 |
| macOS system extension or NVRAM conflict | Camera totally dead across all apps; started after an update | Fix 9 |
| Apple ID not signed in or account issue | FaceTime shows “not available” or asks to sign in repeatedly | Fix 10 |
| Screen Time restriction on FaceTime | FaceTime greyed out or blocked; often on managed/family Macs | Fix 11 |
Fix 1: Check Apple’s Server Status First
Takes 30 Seconds — Rules Out Apple’s Side ImmediatelyBefore touching any settings on your Mac, it’s worth a quick check to make sure the problem isn’t Apple’s. FaceTime connects through Apple’s servers, and when those servers have issues, there’s nothing you can do on your end until Apple fixes it. This happens a few times a year and usually lasts a couple of hours.
Fix 2: Check Camera and Microphone Permissions
Start Here for Camera or Mic Problems — This Is the Most Common CausemacOS requires apps to explicitly request and receive permission before they can access the camera or microphone. FaceTime usually gets these permissions automatically on first launch, but an update, a macOS upgrade, or accidentally clicking “Don’t Allow” on the permissions prompt can revoke them silently. When permission is denied, FaceTime shows a black screen and sends no audio — and gives you no clear indication why.
Major macOS updates — including Tahoe — occasionally reset app permissions back to default, which for camera and microphone means denied. If FaceTime was working fine and suddenly stopped working after an update, this is almost always the reason. The fix takes about 20 seconds: check Privacy & Security, re-enable camera and microphone for FaceTime, and restart the app.
Fix 3: Quit Other Apps Using the Camera
The Cause of Almost Every Black Screen During a FaceTime CallYour Mac’s built-in camera can only be used by one app at a time. If Zoom, Microsoft Teams, Google Meet in Chrome, or any other video app is running and has already claimed the camera — even if you’re not actively in a call — FaceTime gets a black screen because it literally cannot access the camera. The tricky part is that the other app doesn’t have to be in an active call. Just being open in the background with camera access is enough to block FaceTime.
On macOS Tahoe, when any app is actively using your camera, a small green dot appears in the menu bar next to the Control Centre icon. If you see that green dot but FaceTime is showing a black screen, another app has claimed the camera. Click the green dot — macOS shows you exactly which app is using it. Quit that app, and FaceTime should get camera access back.
Fix 4: Check Your Mac’s System Microphone Level
If the Other Person Can’t Hear You at AllIt’s a small thing that’s easy to miss — the Mac’s system microphone input level can get turned all the way down, which cuts audio from every app including FaceTime. This sometimes happens after connecting an external display with a built-in mic that gets selected automatically, or after plugging in headphones that shift the input device. Worth a 10-second check before going deeper.
Fix 5: Select the Right Camera, Microphone, and Speaker Inside FaceTime
FaceTime Has Its Own Audio and Video Device Settings — Check TheseFaceTime lets you choose which camera, microphone, and speaker to use independently of your system settings. If you’ve recently connected an external webcam, plugged in headphones, used AirPods, or changed your audio setup, FaceTime might still be pointing at a device that’s no longer connected — or pointing at the wrong one entirely. This is a very common reason for “they can’t hear me” and “I can’t hear them” situations that seem baffling at first.
- Camera — select your Mac’s built-in camera or an external USB webcam
- Microphone — choose the correct input; if you’re using AirPods, select them here
- Output — this controls what you hear; if you’re wearing AirPods and hearing nothing, make sure they’re selected here and not “Internal Speakers”
When AirPods connect to a Mac, they initially connect in a high-quality audio playback mode. The moment you open FaceTime or any app that requests the microphone, the AirPods switch to a different mode that supports both playback and recording — which temporarily reduces audio quality. This switch usually takes 2–4 seconds, and during that time FaceTime may show no audio. Give it a moment after the call connects before assuming something’s broken. If the switch never completes, disconnecting and reconnecting the AirPods via the menu bar usually fixes it.
Fix 6: Check Focus Mode, Do Not Disturb, and Notification Settings
For Calls That Don’t Ring or Appear to Go SilentFaceTime calls are delivered as notifications. When Focus mode or Do Not Disturb is active on your Mac, incoming FaceTime calls can be completely silenced — the call rings on the other person’s end, but your Mac makes no sound and shows no alert. You might miss a call entirely and have no idea it came in. If people are telling you they tried FaceTime and got no answer, this is often why.
Fix 7: Test and Improve Your Network Connection
For Calls That Fail to Connect, Freeze, or Have Poor QualityFaceTime is a video call — it needs a reasonably stable internet connection to work. On a slow or unstable connection, calls fail to connect, pixelate heavily, cut in and out, or drop entirely. FaceTime needs a minimum of about 1 Mbps up and down for a standard call, and around 3–5 Mbps for FaceTime HD on a Mac. If your connection is borderline, FaceTime will often be the first thing to show it.
sudo dscacheutil -flushcache; sudo killall -HUP mDNSResponderFix 8: Check Your Firewall Settings
If FaceTime Fails on One Network But Works Fine ElsewhereFaceTime uses specific network ports to make calls. Some routers — particularly office networks, school networks, and certain home routers with aggressive security settings — block these ports by default, which prevents FaceTime from connecting. The classic sign: FaceTime works perfectly on your phone’s mobile data but fails every time on a specific WiFi network.
If you’re running a VPN, that may be what’s blocking FaceTime. Some VPNs route all traffic through their servers and block certain ports that FaceTime needs. Try disconnecting the VPN and attempting a FaceTime call — if it works without the VPN, the VPN was the cause. Some VPN apps have a “split tunneling” feature that lets you exclude FaceTime from the VPN tunnel so both can run together.
Fix 9: Reset NVRAM If the Camera Is Completely Dead
For Camera That Stopped Working Across All Apps After an UpdateNVRAM (Non-Volatile RAM) on your Mac stores certain system settings that persist even after a restart. Occasionally — particularly after a major macOS update — the camera-related settings stored in NVRAM become corrupted, causing the camera to appear completely dead not just in FaceTime but in every app. Resetting NVRAM clears these stored settings and forces macOS to rebuild them fresh.
⚠ Before doing this — verify the camera is actually dead in other apps too
Open the Photo Booth app. If Photo Booth also shows a black screen or an error saying no camera is detected, the camera truly isn’t working at the system level. If Photo Booth works but FaceTime doesn’t — the issue is FaceTime-specific (likely a permission or app conflict, not NVRAM). Only proceed with NVRAM reset if the camera is dead in multiple apps.
For Intel Mac:
For Apple Silicon Mac (M1, M2, M3, M4):
Photo Booth is the fastest way to isolate a camera problem. It uses the camera directly with no network requirements, no Apple ID, and no audio settings involved. Open it right now — if you see yourself in Photo Booth, your Mac’s camera is physically working. Whatever’s wrong is in FaceTime’s configuration, not the camera hardware. If Photo Booth shows a black screen with an error, the camera itself has a problem that goes beyond FaceTime.
Fix 10: Sign Out of FaceTime and Sign Back In
For “FaceTime Not Available” or Repeated Sign-In PromptsFaceTime is tied to your Apple ID, and occasionally that connection breaks — the account appears signed in but FaceTime can’t actually communicate with Apple’s servers because the authentication token has expired or become invalid. This tends to happen after an Apple ID password change, after moving to a new Mac, or after a major macOS update. The fix is simple: sign out of FaceTime and back in to get a fresh session.
FaceTime and iMessage use the same Apple ID sign-in infrastructure. If one is having account issues, the other often is too. After re-signing into FaceTime, open Messages and check whether it’s also signed in properly (Messages → Settings → iMessage tab). If Messages shows similar issues, signing out and back in there as well tends to resolve both at once.
Fix 11: Check Screen Time Restrictions
If FaceTime Is Greyed Out or Blocked — Especially on Family or Managed MacsmacOS Screen Time lets administrators (parents or IT departments) restrict or completely block FaceTime. If you’re on a family-shared Mac or a company-managed device and FaceTime appears greyed out, won’t open, or shows a message about restrictions — Screen Time is blocking it. This also affects Macs where the owner previously set up Screen Time restrictions and forgot about them.
Pro Tips for Fewer FaceTime Problems Going Forward
Keep FaceTime’s reachable addresses up to date. When people try to FaceTime you and it doesn’t ring, it’s sometimes because they’re calling an old email address that’s no longer listed in your FaceTime settings. Open FaceTime → Settings and check the “You Can Be Reached At FaceTime At” section. Make sure all the emails and phone numbers you want people to use are ticked. If you recently changed your Apple ID email, old contacts may need to update their contact card for you too.
Handoff can route calls to the wrong device. Apple’s Handoff feature lets FaceTime calls ring on all your Apple devices simultaneously. The first device to answer gets the call. If you’re trying to take a call on your Mac but your iPhone keeps answering it first, you can control which devices ring on a per-device basis through FaceTime settings on each device. You don’t have to turn Handoff off entirely — just adjust which devices participate.
A fresh macOS user account is the fastest way to isolate a persistent problem. If FaceTime is broken in ways that none of these fixes resolve, the quickest diagnostic is to create a new user account in System Settings → Users & Groups and test FaceTime from there. New accounts start with clean settings. If FaceTime works perfectly in the new account, something in your regular account’s settings, login items, or extensions is causing the conflict — not the Mac itself.
External webcams and USB microphones often outlast the built-in hardware. If your MacBook’s built-in camera or microphone is showing physical signs of age — works intermittently, goes dead after heat, produces distorted audio — an external USB webcam or desktop mic is a practical and relatively affordable upgrade. Both are plug-and-play on macOS and show up automatically in FaceTime’s Video menu as selectable options. Check recommended Mac gear on Amazon if you’re looking for something that works reliably.
Mistakes That Make FaceTime Problems Worse
When a call is glitchy, the instinct is to force-quit FaceTime and reopen it. Doing this repeatedly can leave ghost processes running that hold onto the camera, making subsequent calls worse. Use Command + Q to quit properly first. If FaceTime is frozen completely, wait 10–15 seconds before force-quitting — it often recovers on its own from a temporary freeze.
That green dot means something is actively using your camera. If FaceTime is showing black and that dot is lit — another app has the camera. Ignoring the dot and restarting FaceTime over and over won’t help. Find and quit the app that’s holding the camera first.
Poor call quality has multiple causes — and slow internet is just one of them. A wrong microphone selection, Bluetooth audio switching modes, or the other person’s connection can all produce the same choppy, low-quality experience. Before blaming your internet, check the FaceTime audio device settings and ask the other person how the call sounds from their end. If it’s only bad one way, the issue is on that side.
Spending 20 minutes troubleshooting FaceTime camera permissions and NVRAM only to discover the camera hardware has physically failed is a frustrating waste of time. Open Photo Booth first — takes 5 seconds, tells you immediately whether it’s a hardware problem or a software problem. Everything else follows from that answer.
Common Questions About Mac FaceTime Problems
Why is FaceTime showing a black screen on my Mac?
A black screen in FaceTime on Mac almost always means one of two things: either another app currently has exclusive access to the camera (Zoom, Google Meet in Chrome, Teams, Loom — any app that uses video), or macOS has denied FaceTime camera permission. Check Privacy & Security → Camera in System Settings and make sure FaceTime is toggled on. Then quit all other video apps and try again. If the camera is black in Photo Booth too, the issue is hardware-level — not a FaceTime setting.
Why can the other person see me on FaceTime but not hear me?
If your video is working but audio isn’t transmitting, the most common causes are: FaceTime is using the wrong microphone (click Video in the Mac menu bar and check the Microphone selection), the system input level is turned down (System Settings → Sound → Input), or macOS has denied FaceTime microphone permission (Privacy & Security → Microphone). Try all three in that order — the microphone selection in FaceTime’s Video menu is the one most people miss.
Why does FaceTime keep disconnecting or dropping calls on Mac?
Repeated dropped calls are typically a network issue. FaceTime needs a stable connection — even brief WiFi instability causes drops. Move closer to the router, restart it, or test on a wired connection. If drops happen only on one specific network (like work or school WiFi) but not on others, a firewall on that network is likely blocking FaceTime’s ports. Also check whether a VPN is active — VPNs frequently cause FaceTime instability.
Why won’t FaceTime ring on my Mac when someone calls?
Several things can prevent incoming FaceTime calls from ringing: Do Not Disturb or a Focus mode is active (check the menu bar clock area), FaceTime notifications are turned off (System Settings → Notifications → FaceTime), or another device like your iPhone answered the call first. Also confirm that your phone number and email are listed under “You Can Be Reached At” in FaceTime Settings — if the caller is using an address that’s not listed there, the call won’t come through on your Mac.
How do I fix FaceTime audio echo on Mac?
Echo in FaceTime usually happens when your Mac’s speakers are playing the call audio loud enough for the built-in microphone to pick it up — which then sends that audio back to the other person, creating an echo loop. The fix: use headphones or AirPods instead of the Mac’s speakers, or lower the speaker volume. If you’re already using headphones and there’s still echo, check that FaceTime’s microphone is set to the headset mic (Video → Microphone in menu bar) rather than the MacBook’s built-in mic, which might still be picking up room sound.
FaceTime says “Not Available” on my Mac — how do I fix it?
“FaceTime is not available” typically means one of three things: your Apple ID isn’t signed into FaceTime (open FaceTime → Settings and sign in), FaceTime is restricted by Screen Time (System Settings → Screen Time → App Limits or Content & Privacy), or you’re in a country or region where FaceTime is restricted by local laws. Check your Apple ID sign-in first — that resolves it in the majority of cases.
Mac FaceTime Not Working — 11 Fixes Checklist
- 1Check Apple’s server status — apple.com/support/systemstatus; confirm FaceTime is green before troubleshooting your Mac
- 2Check camera and microphone permissions — System Settings → Privacy & Security → Camera and Microphone; make sure FaceTime is toggled on for both
- 3Quit all other apps using the camera — Zoom, Teams, Chrome with Meet tabs, Loom; look for the green camera dot in the menu bar to identify what’s holding it
- 4Check the system microphone level — System Settings → Sound → Input; confirm volume isn’t at zero and the correct device is selected
- 5Select the right devices inside FaceTime — click Video in the menu bar; set Camera, Microphone, and Output to what you’re actually using
- 6Check Focus mode and notification settings — turn off Do Not Disturb; confirm FaceTime notifications are on and set to Alerts in System Settings
- 7Test and improve your network connection — check upload speed; restart the router; close bandwidth-heavy apps; try mobile hotspot to isolate the issue
- 8Check firewall settings — System Settings → Network → Firewall; add FaceTime to allowed apps; disconnect VPN and test
- 9Reset NVRAM if camera is dead in all apps — test in Photo Booth first; Intel: Command + Option + P + R on startup; Apple Silicon: full shutdown and restart
- 10Sign out of FaceTime and sign back in — FaceTime → Settings → Sign Out; wait 10 seconds; sign back in with Apple ID; re-enable your reachable addresses
- 11Check Screen Time restrictions — System Settings → Screen Time → Content & Privacy → Apps; confirm FaceTime isn’t blocked
Last Thing
Most FaceTime problems on Mac come down to one of three things: a permission that got revoked quietly, another app holding onto the camera, or the wrong audio device selected in FaceTime’s own settings. Start with those three — they account for the majority of cases. The Photo Booth test is your fastest diagnostic tool: five seconds to open it tells you immediately whether you’re dealing with a camera hardware issue or a software configuration issue, which completely changes where you look next.
If you’ve worked through all of this and FaceTime is still misbehaving, creating a new macOS user account to test FaceTime from there is the next logical step. When a new account works, you know the problem is isolated to your account’s settings — not the Mac itself. That’s a much easier thing to fix.
ⓘ Disclaimer: CrazyErrors is an independent site and is not affiliated with Apple Inc. The steps in this article are based on macOS Tahoe and the current version of FaceTime as of October 2026. Software interfaces and settings may change with future updates. This content is for informational purposes only — for official Apple support, visit support.apple.com/facetime.