
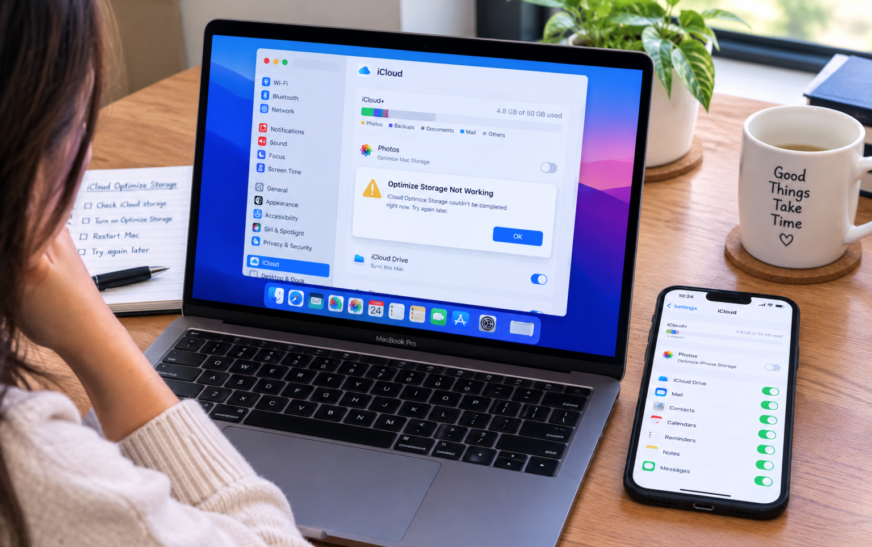
When iCloud Optimize Storage is not working on Mac, the most common cause is a conflict between two separate settings: the iCloud panel in System Settings may show Optimise Storage as on, but the Photos app itself is set to “Download Originals to this Mac” — which overrides everything else. Check this at Photos → Settings → iCloud → Optimise Mac Storage. The second most common cause is a full iCloud account — uploads are blocked when there’s no room, so local files can never be replaced. Check your iCloud storage at System Settings → [Your Name] → iCloud → Manage Account Storage.
You enable iCloud Optimize Storage on your Mac expecting to see meaningful space freed up — and nothing happens. The toggle is on, iCloud Photos is running, the Mac stays connected to WiFi, and yet that storage bar in System Settings barely moves. No error appears. No warning. The feature just silently fails to deliver the savings you expected.
This particular problem frustrates people precisely because there’s nothing obviously wrong. The optimisation looks active. Photos is syncing. And still, weeks later, the Mac’s storage is unchanged. The reasons are specific, the fixes are straightforward, and understanding how the feature actually works is the first step to getting it working properly.
This guide covers every cause — from the most common configuration conflict to the less obvious edge cases — and walks through each fix in order of likelihood.
What “Optimise Mac Storage” Actually Does (And Why It Seems to Do Nothing)
Read This First — Misunderstanding the Feature Is Half the ProblemOptimise Mac Storage is not a one-time cleanup. It’s a continuous background process that works in two phases, and both phases must complete before you see any storage freed.
☁️ Phase 1 — Upload
Every photo and video in your library uploads to iCloud at full resolution. Until a file is confirmed safe in iCloud, macOS will not remove the local copy. For a large library on a typical home connection, this phase alone can take 2–5 days of continuous uploading.
🖼️ Phase 2 — Optimise
After a file is confirmed in iCloud, macOS replaces the full-resolution local copy with a small compressed preview — typically 5–15% of the original file size. The full version remains in iCloud and downloads automatically when you open the photo. This replacement happens gradually and is triggered primarily by storage pressure: if the Mac has plenty of free space, optimisation happens slowly. If storage is tight, it happens faster.
🚫 What the feature does NOT do
It doesn’t run immediately after being enabled. It doesn’t work if iCloud storage is full. It doesn’t activate on cellular — only WiFi. It won’t offload files that haven’t finished uploading yet. And it won’t reduce storage at all if the Photos app’s own setting is on “Download Originals” — that setting takes precedence over everything in the iCloud panel.
Feature 1 — iCloud Photos Optimise Storage: specifically manages your Photos library. The correct place to enable it is Photos app → Settings → iCloud tab → Optimise Mac Storage. This is what most people are trying to fix and what this guide primarily covers.
Feature 2 — macOS Storage Recommendations: the broader Optimise Storage option in System Settings → General → Storage. This handles Apple TV movie cleanup and email attachments — it’s a different feature with minimal effect on most storage situations. Both should be configured, but they solve different problems.
Which Symptom Are You Seeing?
Match Your Situation Before Choosing a Fix📊 Optimise Storage is on but Mac storage hasn’t changed
The setting appears active but checking System Settings shows the same storage used as before. Most likely: the Photos app is set to “Download Originals” (Fix 2), iCloud account is full blocking uploads (Fix 3), or the Mac has too much free space for aggressive offloading to trigger yet (Fix 6).
🔄 Photos sync indicator is stuck — spinning but never finishing
The Photos app shows “X items remaining” that barely decreases, or the spinner runs indefinitely. Most commonly caused by full iCloud storage (Fix 3), slow upload speed (Fix 4), or a corrupted Photos library database (Fix 9).
🚫 “Optimise Mac Storage” option is greyed out in Photos
The radio button is unselectable or missing entirely. This happens when iCloud Photos is not enabled in System Settings, or there’s an Apple ID authentication issue. Fix 1 and Fix 8 address this.
☁️ Photos appear in the library but won’t load when opened
Thumbnails are visible but tapping a photo produces a loading spinner that never completes. Optimise Storage removed the local copies but on-demand downloads aren’t working. Check Fix 4 (connection), Fix 5 (iCloud status), and Fix 8 (sign out/in).
💾 macOS “Optimise Storage” in Storage Recommendations does nothing
You clicked the button in System Settings → General → Storage but nothing changed. This macOS-level feature removes only watched Apple TV content and manages email attachments — it has minimal impact for most users. The Photos optimise feature (separate) is the one that produces meaningful storage savings.
Root Causes at a Glance
Ordered by How Frequently Each One Causes the Problem| Root Cause | How to Recognise It | Fix |
|---|---|---|
| iCloud Photos not properly enabled or syncing paused | Sync shows “Paused” in Photos app bottom bar | Fix 1 |
| “Download Originals” selected in Photos app | Photos → Settings → iCloud shows wrong radio button | Fix 2 |
| iCloud storage is full — uploads blocked | iCloud storage bar is orange/red in System Settings | Fix 3 |
| Slow or interrupted internet connection | Sync count barely moves; Photos stuck for days | Fix 4 |
| Apple’s iCloud servers are slow or degraded | Multiple Apple services flagged on Apple status page | Fix 5 |
| Mac has plenty of storage — offloading not triggered | Optimise on but Mac has 50+ GB free; Photos fully synced | Fix 6 |
| Photos app closed — sync running at minimal priority | Sync indicator never visible; Photos app is quit | Fix 7 |
| Stale iCloud authentication session | iCloud shows signed in but features are non-functional | Fix 8 |
| Corrupted Photos library database | Photos crashes on launch or shows persistent errors | Fix 9 |
| VPN throttling or blocking iCloud uploads | Problem began after enabling a VPN | Fix 10 |
| macOS Storage Management not fully configured | Storage Recommendations section shows actions untaken | Fix 11 |
Fix 1: Verify iCloud Photos Is Properly Enabled and Not Paused
Start Here — Optimise Storage Cannot Work Without ThisOptimise Mac Storage is a feature that lives inside iCloud Photos — it doesn’t function as a standalone toggle. If iCloud Photos is off, or if syncing has silently paused, no optimisation happens regardless of what any other setting shows.
iCloud Photos sync pauses automatically under several conditions — full iCloud storage, poor connection, or the system deciding to deprioritise background uploads. The pause indicator appears at the bottom of the Photos library, but it’s easy to miss. Many users assume syncing is running because Photos is open, when it’s actually been paused for days. Always check before moving to other fixes.
Fix 2: Confirm “Optimise Mac Storage” Is Selected Inside the Photos App
The Most Common Configuration Conflict — Check This Before Anything ElseThe Photos app has its own storage setting that directly controls whether optimisation activates — and this setting overrides the iCloud System Settings panel. If Photos is set to “Download Originals to this Mac,” full-resolution files are kept locally always, regardless of any other toggle. Enabling Optimise Storage in System Settings without changing this Photos-level setting is the single most common reason the feature appears to be on but produces no storage savings.
- “Download Originals to this Mac” — keeps full-resolution files on the Mac at all times; optimisation never runs
- “Optimise Mac Storage” — uploads full-resolution to iCloud and keeps small previews locally; this is the setting you need
Switching from “Download Originals” to “Optimise Mac Storage” in the Photos app is the most impactful single change. The Photos app setting is authoritative — it controls what actually happens to your files, not the iCloud System Settings toggle. After switching, allow 24–72 hours for meaningful storage savings to appear, particularly on a large library. The sync progress indicator at the bottom of Photos shows upload activity in real time.
Fix 3: Check and Free Up Your iCloud Storage
The Most Commonly Overlooked Root CauseOptimise Mac Storage works by uploading full-resolution photos and videos to iCloud, then replacing local copies with smaller previews. If your iCloud account is full, the uploads stall — nothing can be offloaded because there’s nowhere for the originals to go. The feature appears broken when it’s actually waiting for space that doesn’t exist. iCloud’s free 5 GB fills quickly, and many users don’t check their quota until something stops working.
- Delete old device backups: tap Backups in Manage Storage — backups from old iPhones or iPads you no longer use can be 5–10 GB each and serve no purpose. Delete them
- Clear large email attachments: if iCloud Mail is using significant space, delete emails with large file attachments
- Remove stale app data: apps that haven’t been used in months but retain iCloud data can be cleared individually from Manage Storage
A common planning error: if your Photos library is 80 GB on your Mac, you need at least 80 GB of iCloud storage to hold the uploaded originals. The local previews are much smaller, but the originals have to live somewhere — and that place is iCloud. Apple’s free 5 GB cannot hold a typical multi-year iPhone photo library. For most active iPhone users, iCloud+ 200 GB ($2.99/month in the US) or 2 TB ($9.99/month) is the practical minimum for Photos optimisation to work at all.
Fix 4: Check Your Internet Connection and Upload Speed
Slow Uploads Can Make Optimise Storage Look Completely BrokeniCloud Photos only uploads on WiFi — cellular is excluded by design. Beyond needing WiFi, upload speed matters a lot: a library being uploaded for the first time over a slow connection can take days to weeks, during which the optimisation appears entirely stuck. Testing and improving the connection often gets a stalled sync moving quickly.
Open Photos and scroll to the very bottom of the library — the sync indicator shows exactly how many items remain to upload. If it shows “8,000 items remaining,” the feature is working but will take several days. On a 10 Mbps upload connection, 8,000 smartphone photos might take 2–4 days to upload in total. This is normal behaviour — the feature is working, just slowly. Optimisation of local files begins only after each photo is confirmed uploaded to iCloud.
Fix 5: Check iCloud Server Status
Rule Out Apple’s Infrastructure in Under a MinuteiCloud Photos uploads depend on Apple’s servers being available. During high-demand periods or maintenance windows, sync can slow dramatically or appear completely frozen — producing identical symptoms to a local configuration issue. Checking Apple’s status page takes less than 60 seconds.
Fix 6: Understand That Optimisation Requires Storage Pressure to Trigger
Why the Feature Can Look Broken When It’s Actually Working NormallyThis is the most important behavioural detail Apple doesn’t clearly explain anywhere: the feature only aggressively replaces local files with previews when the Mac genuinely needs the space. If your Mac has 80 GB free, macOS may decide storage isn’t critical yet — photos are uploading to iCloud (so the feature is technically running), but the local full-resolution copies aren’t being replaced because there’s no urgency. The optimisation becomes more aggressive as available storage decreases.
Storage savings depend on your library composition. A library heavy with 4K video might see 80–90% of that video storage freed (preview files are tiny compared to 4K originals). A mostly-photo library from a recent iPhone shooting HEIC might see 30–60% savings. The most dramatic savings always come from video content. First meaningful storage reductions typically appear 24–72 hours after the initial upload completes — not before.
Fix 7: Keep the Photos App Open to Speed Up Syncing
For Sync That Appears Completely StalledWhen Photos is closed, iCloud sync runs as a low-priority background daemon — uploads are significantly throttled. When Photos is actively open, sync runs at higher priority and uploads proceed much faster. For a library that appears permanently stuck, keeping Photos open for several hours can clear a backlog that would otherwise sit for days.
Fix 8: Sign Out of iCloud and Sign Back In
Refreshes a Stale Authentication Session That’s Blocking UploadsiCloud Photos uploads require a continuously valid authentication session. After a password change, an extended offline period, or certain macOS updates, the authentication token can expire silently. The Mac appears signed into iCloud but photo uploads fail behind the scenes because the credential is stale. Signing out and back in forces a fresh token and typically restores stalled sync immediately.
Signing out of iCloud and back in frequently resets the Photos storage setting to “Download Originals to this Mac.” This is a known behaviour that catches many users — they sign back in, assume the problem is fixed, and don’t realise that Photos has silently switched back to keeping full-resolution files locally. Always verify Photos app → Settings → iCloud → Optimise Mac Storage after every sign-out/in cycle.
Fix 9: Rebuild the Photos Library Database
For Persistent Sync Issues and Photos App ErrorsPhotos stores sync state, metadata, and library organisation in a local database. If this database becomes corrupted — after an unexpected shutdown during a sync, a disk error, or certain macOS update sequences — Photos may fail to correctly track which photos have been uploaded and which still need to be offloaded. Rebuilding the library forces a fresh verification against iCloud.
The Photos Library Repair rebuilds the database files (indexes, metadata, sync records) without touching your actual photo and video files. No photos are deleted, moved, or altered during this process. Running it is safe even on a library that appears to be working, and it can resolve subtle sync inconsistencies that produce no obvious error messages.
Fix 10: Disable VPN While iCloud Photos Uploads
VPNs Can Throttle or Block iCloud Upload TrafficVPN services route all internet traffic through their servers, including iCloud Photos uploads. Many VPNs throttle sustained high-bandwidth upload sessions, and some actively block upload traffic to cloud storage services. If your sync stalled around the same time you enabled a VPN, temporarily disabling it is worth testing.
Fix 11: Configure macOS Storage Management Recommendations
The Second Optimise Storage Feature — Often Left Partially ConfiguredSeparate from iCloud Photos, macOS has broader storage management recommendations that cover different content types. Configuring these alongside iCloud Photos optimisation provides additional storage recovery from categories that photos optimisation doesn’t touch.
- Store in iCloud — moves Desktop and Documents folders to iCloud Drive, making them available on demand while freeing local space
- Optimise Storage — removes Apple TV movies and shows you’ve already watched (they remain available to stream). Click Optimise to enable
- Empty Trash Automatically — permanently deletes items that have been in the Bin for more than 30 days. Turn this on
- Reduce Clutter — shows large files sorted by size for manual review and deletion
The biggest storage gains come from combining iCloud Photos Optimise Mac Storage (for the photo/video library) with a manual Clutter review (for downloads, old documents, and large forgotten files). Many Macs have 5–20 GB of recoverable clutter in the Downloads folder alone — a single large file deleted manually can free more space than a week of background optimisation. More storage management strategies are covered in our MacBook storage full guide and our hidden Mac features guide.
How to Confirm Optimise Mac Storage Is Actually Working
Verify Progress Before Concluding It’s Fixed or BrokenAfter applying fixes, use these checkpoints to verify the feature is genuinely working rather than assuming it is or isn’t based on a one-time storage check:
Pro Tips: Getting More From Mac iCloud Optimise Storage
Let the initial upload run overnight for fastest results. The single most effective thing you can do after enabling Optimise Mac Storage is leave the Mac running overnight — Photos open, plugged into power, connected to WiFi. iCloud uploads run at significantly higher priority when the Mac is plugged in and idle compared to during active use. A library that appears completely stuck during the day often makes dramatic progress while you sleep. Check the remaining item count in Photos in the morning — a substantial drop confirms the feature is working exactly as intended.
iCloud Family Sharing resolves storage limits across multiple devices. If you and family members all run into iCloud storage limits that prevent Photos optimisation from working, iCloud+ with Family Sharing gives everyone access to a shared storage pool — 200 GB, 2 TB, 6 TB, or 12 TB. Each family member’s library uploads and optimises independently from that shared pool. For households where multiple people hit storage limits, this is more economical than each person maintaining separate paid iCloud subscriptions. Set up Family Sharing at System Settings → [Your Name] → Family Sharing.
Check your iCloud storage bar periodically as your library grows. Even when Optimise Storage is working correctly, your library grows continuously as you take new photos and videos. Over time it can exceed your iCloud storage tier, causing the feature to silently stall again. Making a habit of checking System Settings → [Name] → iCloud storage bar every few months catches a filling account before a multi-day sync backlog develops.
Common Mistakes to Avoid
Enabling Optimise Mac Storage and checking System Settings ten minutes later expecting dramatic savings is the most common source of “it’s not working” reports. The feature runs in two phases — upload (days for large libraries) then optimisation (hours to days after upload). Checking before the upload completes guarantees no visible savings. Give the feature 24–72 hours before drawing any conclusions.
iCloud Photos can be on with “Download Originals” selected — in this mode, files upload to iCloud AND remain locally at full resolution. Storage doesn’t decrease because both copies are full-size. “Optimise Mac Storage” only activates when the specific radio button in Photos → Settings → iCloud is set to that option — not just when iCloud Photos is enabled.
Deleting photos from the Photos app while iCloud Photos is active also deletes them from iCloud and all your other devices — the deletion syncs everywhere. iCloud Photos is a two-way sync, not a backup of local files. To free storage without losing photos, rely on the Optimise feature rather than manually deleting content you intend to keep. There’s a 30-day recovery window via the Recently Deleted album, but the deletion is real.
Moving the Photos Library.photoslibrary file to an external drive while iCloud Photos is actively syncing can corrupt the database and cause permanent sync failures. If you want to move the library to external storage permanently, complete the current iCloud sync first, quit Photos completely, then move the file via Finder. Only use external storage as the primary Photos library location if the drive is always connected when Photos is open.
FAQ: Mac iCloud Optimize Storage Not Working
Why is iCloud Optimize Storage not working on my Mac?
The most common reasons are: the Photos app is set to “Download Originals to this Mac” instead of “Optimise Mac Storage” (check Photos → Settings → iCloud — this overrides the System Settings toggle), iCloud storage is full with no room for photo uploads (check System Settings → [Name] → iCloud storage bar), the Mac has enough free storage that aggressive offloading hasn’t been triggered yet, the initial upload hasn’t completed (Photos sync indicator still shows items remaining), or a stale iCloud authentication session is blocking uploads (resolved by signing out of iCloud and back in). Work through these in order — one of them is almost always the cause.
How long does iCloud Optimize Storage take to free up space on Mac?
The feature works in two phases. Phase 1 — upload: every photo and video uploads to iCloud before local copies can be optimised. For a library of 20,000 photos and videos on a standard home connection, this typically takes 1–5 days of continuous uploading. Phase 2 — optimisation: after upload, macOS gradually replaces full-resolution local files with small previews. This begins within hours of upload completion but continues over several days. For most users, meaningful storage savings first appear 3–5 days after enabling the feature — not hours.
Why does iCloud Photos say “All photos and videos are synced” but storage hasn’t decreased?
“All photos and videos are synced with iCloud” means the upload phase is complete — originals exist in iCloud. It doesn’t mean optimisation (local file replacement) is complete. After the sync message appears, macOS begins replacing full-resolution local copies with smaller previews over the following hours to days. This replacement is driven partly by storage pressure — a Mac with more free space sees slower optimisation because the system considers it less urgent. Check back 24–48 hours after the sync completes. If storage still hasn’t changed at all, verify the Photos app is set to “Optimise Mac Storage” rather than “Download Originals.”
Will Optimize Mac Storage delete my photos from my Mac?
No. Optimise Mac Storage doesn’t delete your photos — it replaces full-resolution local files with smaller compressed previews, while the originals remain safely stored in iCloud. Every photo still appears in your library, can be viewed, shared, and organised normally. When you need the full-resolution version (for editing, export, or printing), the Mac downloads it automatically on demand when you open it. If you’re offline, the full-resolution version isn’t accessible until you reconnect — but it’s never gone.
Can I force Mac to immediately replace full-resolution photos with smaller previews?
There’s no single button to force immediate optimisation of the entire library. However, you can accelerate the process significantly: keep the Photos app open (increases sync priority), plug the Mac into power (increases background process priority), ensure a fast WiFi connection, and reduce available Mac storage below 15 GB (creates the pressure that triggers aggressive offloading). Under all four conditions simultaneously, optimisation runs at maximum speed and noticeable storage savings typically appear within 24 hours of the upload completing.
What’s the difference between “Optimize Storage” in System Settings and in the Photos app?
They’re two completely separate features. The Photos app setting (Photos → Settings → iCloud → Optimise Mac Storage) controls whether your photo and video library is stored as full-resolution files or as small previews with originals in iCloud — this is the one that produces the largest storage savings. The macOS Storage Recommendations setting (System Settings → General → Storage) removes watched Apple TV movies and manages email attachments — it’s a different, less impactful feature. Both should be configured, but the Photos app setting is the one most users are looking for.
Mac iCloud Optimize Storage Not Working — 11 Proven Fixes
- 1Verify iCloud Photos is enabled and not paused — System Settings → [Name] → iCloud → Photos → On; check for “Paused” in the Photos app bottom bar and click Resume
- 2Set “Optimise Mac Storage” in the Photos app — Photos → Settings → iCloud → select “Optimise Mac Storage” (not “Download Originals”) — this setting overrides the iCloud panel
- 3Check and free iCloud storage — System Settings → [Name] → iCloud storage bar; delete old device backups; upgrade iCloud+ if library is large
- 4Check internet connection and upload speed — WiFi required; test upload speed; restart router; leave Mac plugged in overnight
- 5Check iCloud server status — apple.com/support/systemstatus; confirm iCloud Photos is green before troubleshooting locally
- 6Understand optimisation needs storage pressure — feature is gradual; becomes aggressive when storage drops below ~15 GB free; allow 24–72 hours
- 7Keep Photos app open while syncing — leave Photos open, plugged into power, on WiFi overnight; watch sync indicator count decrease
- 8Sign out of iCloud and back in — System Settings → [Name] → Sign Out (keep local copies); wait 30 seconds; sign back in; recheck Photos Optimise setting afterwards
- 9Rebuild Photos library database — quit Photos; hold Command + Option; click Photos icon; select Repair Library; wait for completion
- 10Disable VPN while uploading — disconnect VPN; confirm Photos uploads resume; use split tunneling to exclude iCloud if VPN is required
- 11Configure macOS Storage Recommendations — System Settings → General → Storage; enable Optimise, Empty Trash Automatically; use Reduce Clutter to manually remove large files
Final Thoughts
Most cases of Mac iCloud Optimize Storage not working come down to one of three things: the Photos app is set to “Download Originals” (Fix 2), iCloud storage is full (Fix 3), or the feature is actually working — just more slowly than expected (Fix 6 and Fix 7). Fix 2 alone solves the problem for the majority of users who discover they never changed the Photos-level setting after enabling iCloud Photos.
The rest is a matter of patience and the right conditions. The initial upload is the slowest and most critical part of the whole process — once it’s complete and the Mac knows every photo is safe in iCloud, the local file replacement happens automatically and continuously. Give it the right setup (Photos open, plugged in, good WiFi, some storage pressure) and the feature delivers exactly what it promises: your full photo library accessible on every device, with the Mac’s internal storage freed up for everything else.
ⓘ Disclaimer: This article is for informational purposes only. CrazyErrors is an independent site not affiliated with Apple Inc. iCloud storage pricing, feature availability, and navigation paths reflect macOS Tahoe and iCloud as of October 2026 and may change with future updates. For official Apple iCloud support, visit support.apple.com/icloud.