
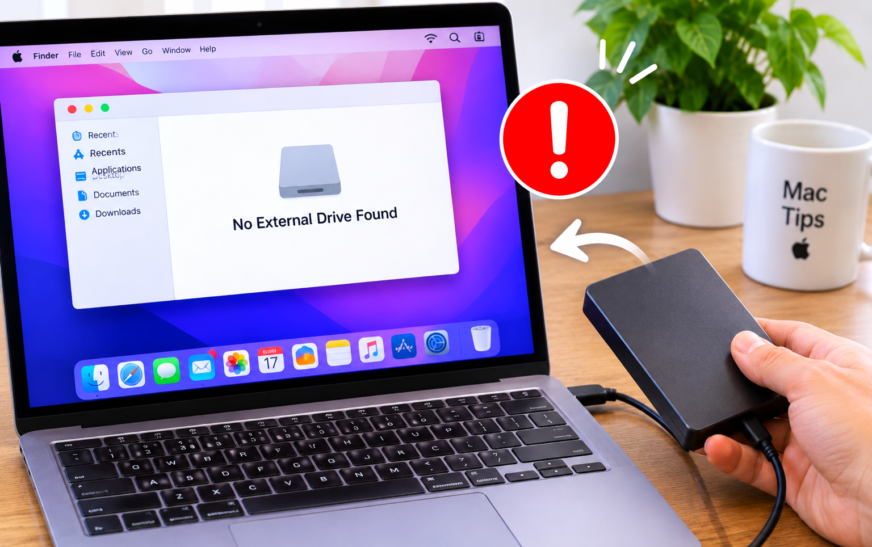
When an external drive isn’t showing up on Mac, first check Finder → Settings (or Preferences) → General and make sure “External disks” is ticked — if this box is unchecked, drives connect fine but never appear on the desktop or in the sidebar. If that setting is already on, open Disk Utility (Applications → Utilities → Disk Utility) and see whether the drive appears in the left panel. If it shows there but is greyed out or unmounted, select it and click Mount. If it doesn’t appear in Disk Utility at all, the issue is almost always the cable, the USB port, or insufficient power to the drive.
An external drive that refuses to appear on your Mac is one of the more stressful tech problems, mostly because of what might be on it. Photos, backups, project files, work documents — the moment a drive goes invisible, the first thought is always whether the data is gone. That fear makes the problem feel bigger than it usually is.
Here’s the reassuring part: the vast majority of external drives that “disappear” on Mac have nothing wrong with the data on them at all. The drive is fine. What’s broken is the connection between the drive and macOS — a setting that got switched off, a cable that’s underperforming, a port that’s having a bad day, or a filesystem format that macOS doesn’t mount automatically. Fix the connection issue and the files come right back.
This guide walks through every real cause of an external drive not showing up on Mac, in order of how often each one actually causes this. Work through them in sequence — most people find their fix before reaching the halfway point.
What Exactly Is Happening With Your Drive?
🔍 Find Your Situation🖥️ The drive doesn’t appear anywhere — not on the desktop, not in Finder, not in Disk Utility
macOS has no awareness of the drive at all. This points to a hardware connection problem — the cable, the USB port, the hub, or the drive itself isn’t being detected at the system level. Start with Fix 1 and Fix 2.
💿 The drive appears in Disk Utility but not in Finder or on the desktop
macOS can see the drive hardware but isn’t mounting it as a usable volume. This is often a filesystem issue, a drive that needs to be mounted manually, or a format macOS doesn’t support natively. Fix 5 and Fix 6 cover this directly.
📁 The drive was showing up before and suddenly stopped
Something changed — it could be a macOS update, a setting that got switched, or the drive developing an error. Finder’s display settings (Fix 3) and Disk Utility’s Mount option (Fix 5) are the most likely solutions.
⚡ The drive spins up (you can hear/feel it) but still doesn’t appear
The drive is receiving power and spinning, but macOS isn’t mounting it. This is typically a filesystem error or format compatibility issue rather than a hardware problem. Fix 5, Fix 6, and Fix 7 apply here.
🔧 The drive only appears on some USB ports, not others
Port-specific behaviour usually means a power delivery issue or a USB port fault on the Mac. Some drives need more power than certain ports provide. Fix 2 covers port and hub troubleshooting.
📅 Drive not showing up after a macOS update
Post-update drive visibility problems are often caused by a change to how macOS handles external volume display settings, or a preference file becoming stale. Fix 3 and Fix 4 address these specifically.
🧠 Why Mac Sometimes Ignores External Drives
macOS goes through several steps before an external drive becomes visible: it detects the hardware connection, reads the drive’s partition map, identifies the filesystem format, and then decides whether to mount it. Any problem at any of these stages means the drive won’t appear — but the symptom looks the same from the outside regardless of where the chain broke.
A drive that doesn’t appear in Disk Utility means the hardware detection step failed (cable/port/power). A drive that appears in Disk Utility but not Finder means the hardware was detected but the mounting step failed (filesystem, format, or volume error). A drive that appears nowhere after a macOS update often means a display setting changed. Knowing which of these describes your situation is what makes this fixable quickly rather than after hours of guessing.
Fix 1: Check the Physical Connection First
🔥 Start Here — Rules Out the Most Common Cause in 2 MinutesBefore touching any settings, run through the physical connection. This takes two minutes and eliminates the most common cause of drives not appearing — a cable that’s partially seated, degraded, or simply not providing a reliable enough connection for the Mac to detect the drive.
Older portable hard drives use Micro-B USB connectors — the small trapezoidal port on the drive itself. These connectors are physically fragile and develop hairline breaks inside the plug after years of use, even when they look fine. If the drive worked before but stopped being detected, the Micro-B end of the cable is a very common fault point. Try a replacement cable before assuming the drive has failed.
Fix 2: Try Different USB Ports and Remove the Hub
🔥 Power Delivery Issues Are More Common Than They LookNot all USB ports on a Mac deliver equal power — and not all at the same time. On MacBooks especially, when the battery is low or multiple devices are connected, USB power output can drop below what a bus-powered hard drive needs to spin up and be detected. USB hubs add another layer: a hub that isn’t externally powered may not pass enough power to a hard drive even when individual flash drives work through it fine.
2.5-inch portable hard drives (the kind without a separate power adapter) draw significantly more power than SSDs or flash drives. They’re designed to run off a single USB connection, but they need that connection to deliver the full USB power specification. Anything that reduces the available power — a hub, a low battery, a worn cable, a USB port fault — can prevent the drive from spinning up fully, which means macOS never sees it. If a bus-powered HDD is your problem, connecting it directly to the Mac while plugged into power is the most reliable configuration.
Fix 3: Check Finder Settings for External Disk Display
⚡ 30-Second Fix — Often the Cause After macOS UpdatesmacOS has a straightforward setting that controls whether external drives appear on the desktop and in the Finder sidebar. It’s easy to overlook because the drive can be fully connected and functioning while this setting is off — macOS knows the drive is there, it just isn’t displaying it anywhere. This setting occasionally gets switched off during macOS updates.
The drive was connected and mounted correctly the whole time — it was just hidden from view. You don’t need to do anything else. If you want the drive to always appear automatically in future, leave both “External disks” checkboxes ticked.
Fix 4: Restart the Mac and Reset the Disk Arbitration Daemon
🔄 When the Drive Was Working Before and Suddenly DisappearedmacOS uses a background process called diskarbitrationd — the disk arbitration daemon — to manage when drives get mounted and made available to the system. If this process runs into an error during a session, drives that were previously visible can disappear or fail to mount even though the hardware connection is fine. A full Mac restart is the cleanest way to reset it. There’s also a Terminal command that restarts just this service without rebooting the whole Mac.
sudo killall -SIGTERM diskarbitrationd
Open Terminal and run diskutil list — this prints every disk and partition macOS is currently aware of, including ones that aren’t visible in Finder or Disk Utility’s sidebar. If your external drive appears in this list (usually as /disk2, /disk3, or similar), macOS detects it at the hardware level but isn’t mounting it for some reason. Note the disk identifier (e.g. disk2s1) for use in the next fix.
Fix 5: Mount the Drive Manually in Disk Utility
🔥 When the Drive Appears in Disk Utility But Not in FinderDisk Utility is the Mac’s built-in disk management tool, and it often shows drives that Finder doesn’t. A drive visible in Disk Utility but greyed out or unmounted means macOS detected the hardware but didn’t automatically mount the volume — this happens with drives that have minor filesystem inconsistencies, certain partition types, or drives that were last ejected unexpectedly. Manually mounting from Disk Utility usually brings them right back.
If Disk Utility’s Mount button isn’t responding, Terminal gives you more control. First run diskutil list to find the drive’s identifier (something like disk2s1), then run:
diskutil mount /dev/disk2s1
Replace disk2s1 with the actual identifier for your drive. If the drive has multiple partitions, try mounting each one individually.
Fix 6: Check the Drive’s Filesystem Format
📄 When macOS Detects the Drive But Won’t Mount ItmacOS mounts some filesystem formats automatically and others not at all — at least not without third-party software. Understanding which format your drive uses tells you whether this is the issue and what to do about it.
APFS / HFS+
Apple’s own formats. macOS mounts these automatically. If a drive with APFS or HFS+ isn’t mounting, the issue is a connection problem or filesystem error, not format incompatibility.
exFAT
Works on both Mac and Windows. macOS mounts exFAT drives automatically with full read-write access. If it’s not mounting, a First Aid check in Disk Utility usually fixes it.
NTFS
Windows’ native format. macOS can read NTFS drives but cannot write to them without third-party tools. The drive should still appear in Finder as a read-only volume — if it doesn’t, the drive may need reformatting or a third-party NTFS driver.
Linux / Other Formats
Ext4, Ext3, Btrfs, and other Linux filesystems aren’t supported natively by macOS. A drive formatted this way won’t mount on Mac without additional software (like FUSE for macOS / ExtFS).
To check what format your drive uses: open Disk Utility, select the drive in the sidebar (it may not mount, but Disk Utility can still read the partition info), and look at the format listed in the bottom info panel. If the drive isn’t visible even in Disk Utility, run diskutil list in Terminal — the format column shows the filesystem type for each partition.
If the drive is NTFS and not appearing: macOS should still show it as a read-only volume. Try a different cable and port first. If it shows in Disk Utility but won’t mount, running First Aid on it sometimes helps. If you regularly use the drive between Mac and Windows, reformatting to exFAT is the most reliable long-term solution (back up the data first).
Reformatting a drive erases everything on it. If you need to reformat to fix a compatibility issue, copy the files off the drive first — to another drive, to cloud storage, anywhere — before reformatting. Reformatting without a backup means permanent data loss with no recovery path.
Fix 7: Run First Aid on the Drive
🔧 When the Drive Appears in Disk Utility But Shows ErrorsDrives develop filesystem errors from improper ejection, power interruptions mid-write, or just regular use over time. macOS sometimes refuses to mount a drive with filesystem errors as a protective measure — mounting a drive with a corrupted directory structure could make data recovery harder. First Aid scans the drive’s filesystem and repairs what it can.
If Disk Utility’s First Aid finds errors it can’t repair, do not run additional repair attempts on the drive before copying your important files off it. Each failed repair attempt writes to the drive and can overwrite data that a recovery tool might otherwise retrieve. Connect the drive, use whatever access you have to copy what you can, then deal with the repair or replacement. When data matters more than the drive itself, data recovery software or a professional data recovery service is the path forward — not repeated repair attempts.
Fix 8: Check if the Drive Needs Its Own Power Supply
⚡ For Drives That Spin Up Then Cut OffDesktop external hard drives — the larger 3.5-inch units used for backups and storage — always require their own power supply. They can’t run off USB bus power alone. If a desktop drive isn’t showing up, confirming the power adapter is working is a basic step that sometimes gets overlooked, especially if the drive was previously stored and the power cable was separated from it.
Fix 9: Reset NVRAM (Intel Macs) — Clears Stored Drive Mount Preferences
🔄 When No Other Fix Has Made a DifferenceOn Intel-based Macs, NVRAM (Non-Volatile RAM) stores certain system preferences including some storage-related settings. A corrupted NVRAM entry can occasionally cause external drives to fail mounting even when everything else looks correct. Resetting it clears these stored values and lets macOS rebuild them from scratch. The same reset also resolves other hardware-related oddities — if you’re dealing with a Mac mouse left-click not working issue alongside this, NVRAM is a good step to try for both at once.
Apple Silicon Macs (M1 and later) don’t use NVRAM in the same way — on those machines, a clean restart with the drive disconnected and then reconnected after full boot usually achieves the equivalent effect.
Fix 10: Use Terminal to Force Mount or Diagnose Further
💻 For Drives That Appear in diskutil list But Still Won’t MountIf a drive shows up in diskutil list but won’t mount through Disk Utility’s interface, Terminal gives you more precise control. These commands let you attempt a mount directly, check the drive’s health status, and see error messages that Disk Utility’s UI doesn’t always surface clearly.
diskutil list to identify the drive. Note the disk identifier — for example, /dev/disk2 with a volume at /dev/disk2s1diskutil mount /dev/disk2s1
diskutil repairVolume /dev/disk2s1
diskutil info /dev/disk2
SMART (Self-Monitoring, Analysis, and Reporting Technology) is a feature built into most hard drives and SSDs that monitors their own health. macOS reads SMART data via the diskutil info command. A SMART status of “Verified” means the drive’s built-in sensors report no hardware problems. “Failing” means the drive is actively reporting hardware errors — which is a strong sign the drive will fail soon. Note that SMART only works over USB for some drives; some USB enclosures don’t pass SMART data through, in which case diskutil info will show “Not Supported” rather than giving a health reading.
Things Worth Knowing About External Drives on Mac
Always eject drives before unplugging them. The most common cause of drives developing filesystem errors that prevent future mounting is unplugging them without ejecting first. When a drive is ejected properly (right-click → Eject, or drag to Trash, or click the eject icon in Finder sidebar), macOS flushes any pending writes to the drive and closes the filesystem cleanly. Pulling the cable mid-write — even if it seems like nothing is happening — can leave the filesystem in a state that requires First Aid to fix, and occasionally leaves it in a state that’s harder to recover from.
exFAT is the best format for drives used on both Mac and Windows. If you share drives between Mac and Windows computers, exFAT gives you full read-write access on both without needing any additional software. NTFS is read-only on Mac without third-party tools; HFS+ isn’t supported on Windows without third-party tools. For cross-platform drives, exFAT is the pragmatic choice.
Disk Utility’s “Show All Devices” view is more useful than the default view. The default Disk Utility view only shows mounted volumes — which means a drive that’s connected but not mounting won’t appear at all in the default view. After opening Disk Utility, always click View → Show All Devices to see everything macOS is aware of, including unmounted and partially-detected drives. Getting into this habit saves significant troubleshooting time.
Some USB-C hubs have known compatibility issues with specific drives. Certain third-party USB-C docks and hubs — particularly cheaper ones with USB 3.2 Gen 2 controllers — have known firmware issues that cause drives to not be detected consistently. If a drive works when plugged directly into the Mac but not through a specific hub, that hub is likely the problem. Checking the hub manufacturer’s website for a firmware update can fix this; otherwise, a different hub is the practical solution. USB 3.0 devices and hubs can also emit interference that affects nearby wireless peripherals — if you’re also noticing a Mac mouse left-click not working around the same USB port area, the two issues can share the same root cause.
What Not to Do When an External Drive Won’t Show Up
When a drive isn’t appearing, Disk Utility offers an Erase option that can look like a fix path. Erasing is not a fix — it’s a data wipe. Erasing a drive that won’t mount will delete everything on it without recovering any files. Always work through connection and mounting fixes before considering any destructive options like erasing or reformatting.
If First Aid reports errors it can’t fix, running First Aid again (or third-party repair tools repeatedly) on the same drive isn’t going to change the outcome — and each write operation to a degrading drive risks further overwriting data that recovery tools might still retrieve. When First Aid can’t repair a drive, the next step is data recovery, not more repair attempts.
A drive reporting SMART Failing status is a hardware warning that should be taken seriously. It doesn’t mean the drive has already died — but it does mean it’s heading there, sometimes quickly. If a drive shows SMART Failing, copy everything important off it immediately, before it becomes completely unreadable. Using it as a primary storage drive after this warning is a data risk that compounds with every passing day.
Most drives that “disappear” on Mac are not dead — they have a connection issue, a setting problem, a filesystem error, or a format incompatibility. Before writing off a drive, work through the fixes in this guide. Particularly for drives with important data, a data recovery specialist can often retrieve files from drives that appear completely undetectable on a home Mac setup.
Frequently Asked Questions
Why is my external hard drive not showing up on Mac?
The most common reasons are: “External disks” is unchecked in Finder Settings → General (drive is connected but hidden from view), a connection issue with the cable or USB port, the drive not receiving enough power (especially bus-powered 2.5″ drives through a hub), a filesystem error preventing automatic mounting, or a filesystem format macOS doesn’t support natively. Check Finder Settings first (30 seconds), then open Disk Utility to see whether the drive appears there even if it doesn’t appear on the desktop.
External drive shows in Disk Utility but not in Finder — what do I do?
Select the drive (or its volume) in Disk Utility’s left panel and click the Mount button in the toolbar. If Mount is greyed out, run First Aid on the volume first — filesystem errors can prevent automatic mounting. After First Aid repairs the errors, the Mount button should become available. If First Aid can’t repair the errors, copy any accessible files off the drive before attempting further fixes.
My external drive worked before but now my Mac doesn’t recognise it
Try the physical fixes first: a different cable, a different USB port, directly into the Mac rather than through a hub. Then check whether it appears in Disk Utility (View → Show All Devices). If it does, run First Aid — a drive that worked before and suddenly stopped mounting usually has a filesystem error from an improper ejection or power interruption. If it doesn’t appear in Disk Utility at all, the connection or the drive hardware itself is the issue.
How do I mount an external drive that won’t mount on Mac?
Open Disk Utility, click View → Show All Devices, find the drive in the left panel (even if greyed out), select its volume, and click Mount. If Mount doesn’t work, run First Aid first then try Mount again. For drives that appear in Terminal’s diskutil list but not in Disk Utility’s interface, run diskutil mount /dev/disk2s1 in Terminal (replacing disk2s1 with your drive’s actual identifier from the diskutil list output).
External SSD not showing up on Mac — is it different from an HDD?
The fixes are largely the same, but power is less of a concern with SSDs since they draw significantly less power than spinning hard drives. If an external SSD isn’t appearing, focus on the cable, the port, Finder Settings, and Disk Utility checks. SSDs also tend to fail differently from HDDs — rather than gradual degradation, they can fail suddenly and completely, so if a previously working SSD disappears and no connection fix helps, data recovery may be needed sooner than it would be for a struggling HDD.
Can I recover files from an external drive that won’t mount on Mac?
Often yes, even when the drive won’t mount normally. If the drive appears in Disk Utility or in Terminal’s diskutil list but won’t mount, data recovery software like Disk Drill, R-Studio, or TestDisk can often access the raw drive data and copy files off it without needing the drive to mount first. If the drive doesn’t appear at all in Disk Utility, professional data recovery services have hardware-level tools to access drives that macOS can’t read. The sooner you attempt recovery — before writing more data to the drive or running more repair attempts — the better the chances.
External Drive Not Showing Up on Mac — Fix Checklist
- 1Check the physical connection — unplug and replug firmly; try a different cable; remove any adapters or dongles
- 2Try different USB ports — unplug from any hub and connect directly to the Mac; plug in the power adapter if on battery
- 3Check Finder Settings — Finder → Settings → General; tick “External disks” for both desktop and sidebar display
- 4Restart the Mac — resets the disk arbitration daemon; unplug drive before restart and replug after full boot
- 5Open Disk Utility — View → Show All Devices; find the drive and click Mount; run First Aid if Mount is unavailable
- 6Check the filesystem format — NTFS is read-only; Linux formats need third-party software; exFAT and APFS mount natively
- 7Run First Aid — repairs filesystem errors preventing mounting; don’t run repeatedly if errors can’t be repaired
- 8Verify power supply — desktop drives need their own adapter; check indicator light; portable drives may need direct Mac connection
- 9Use Terminal —
diskutil listto confirm detection;diskutil mountto force-mount;diskutil infoto check SMART status - 10Reset NVRAM (Intel Macs) — for persistent issues that nothing else resolves; holds Option + Command + P + R at startup
The Finder Settings check (Fix 3) and the Disk Utility mount attempt (Fix 5) are worth doing in the first two minutes — together they resolve most external drive visibility problems that aren’t caused by a hardware connection fault. If neither of those applies, a cable swap and a direct-to-Mac connection (Fix 1 and Fix 2) cover the bulk of what’s left. Working in that order gets most drives visible again without needing to go further down the list. And if you’re troubleshooting other Mac hardware issues at the same time, the guide on Mac mouse left-click not working covers several overlapping fixes — including NVRAM, USB interference, and Accessibility permission checks — that apply across hardware problems.
ⓘ Disclaimer: CrazyErrors is an independent informational site not affiliated with Apple Inc. or any drive manufacturer. The steps in this guide are based on current macOS versions and best practices for external storage troubleshooting. Behaviour may vary between macOS versions, drive types, and Mac models. If your drive contains irreplaceable data and none of these steps resolve the issue, consult a professional data recovery service rather than attempting further repairs. Content on this site is for informational purposes only.