
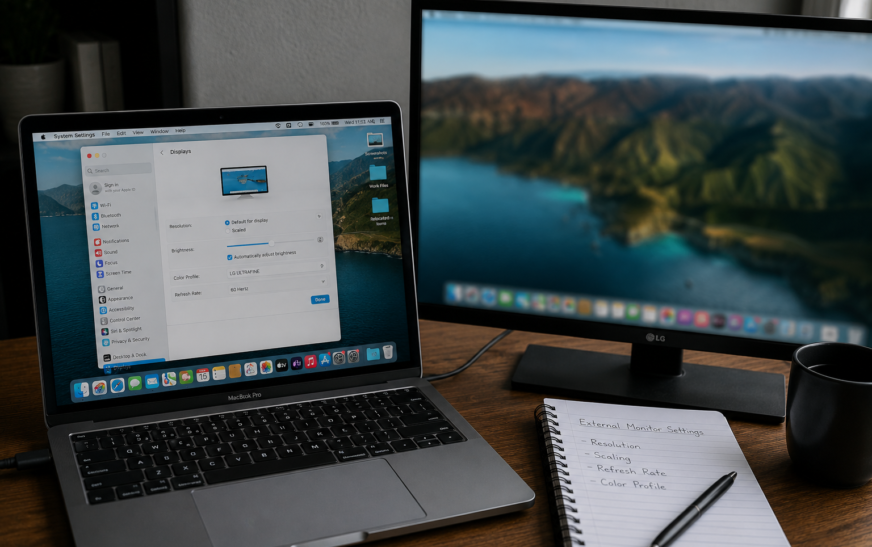
Mac external monitor blurry text and images are almost always caused by macOS not running the display at its native resolution, or HiDPI (Retina-style scaling) not being enabled for a non-Apple monitor. Go to System Settings → Displays, click your external monitor, and select “Default for display” — this applies the monitor’s native resolution instantly. If the display still looks soft after that, hold Option while clicking “Scaled” to reveal all available resolutions and select the highest one matching your monitor’s native spec. For 1080p monitors connected to Apple Silicon Macs, enabling HiDPI mode via Terminal or BetterDisplay is the most impactful fix for blurry text.
A Mac external monitor blurry display is one of the most jarring things you can encounter after setting up a new screen — everything looks slightly smudged, text has a fuzzy halo around it, and even moving the cursor feels like it’s rendering through frosted glass. The Mac’s own screen looks perfect, but the moment you look at the external display, the difference is immediately obvious.
This isn’t a defective monitor in most cases, and it’s not a hardware problem with the Mac either. It’s almost always a resolution, scaling, or colour format setting that macOS got wrong when it first detected the monitor — sometimes because it applied a compatibility-safe default rather than the optimal display settings, and sometimes because HiDPI mode isn’t active and a 1080p or 1440p monitor is being rendered without the pixel-doubling that makes text look sharp. Every fix in this guide is non-destructive and reversible — you can test each one and undo it instantly if it doesn’t help.
Which Blurry Problem Are You Seeing?
Different Causes Depending on Your Symptom📝 Text is blurry or soft — images look acceptable
Text-specific blurriness is almost always a font rendering or HiDPI issue. macOS is rendering text without subpixel antialiasing or without Retina-style pixel doubling. Fix 3 (HiDPI mode) and Fix 7 (font rendering) address this directly.
🖼️ Everything looks blurry — text and images both
When the entire display looks soft or out-of-focus, the resolution is almost certainly set incorrectly — probably lower than the monitor’s native resolution. Fix 1 and Fix 2 (resolution settings) resolve this in most cases.
🌈 Colours look washed out and blurry simultaneously
Washed-out colours combined with blurriness usually means macOS is outputting in YCbCr colour format instead of RGB — a common issue over HDMI connections. Fix 8 (force RGB colour output) is the specific fix.
🔌 Blurry only on one side when using multiple monitors
When one display looks sharp and a second looks blurry, the issue is specific to how macOS detected and configured that particular display. Check Fix 1 to confirm each display’s resolution settings are independent and correctly applied.
🧵 Blurry after changing from one cable to another
A cable change that introduced blurriness usually means the new cable has lower bandwidth than the old one — particularly noticeable when switching from DisplayPort to a cheap HDMI cable, or from HDMI 2.0 to HDMI 1.4. Fix 5 (cable and adapter check) covers this.
💻 Was sharp before a macOS Tahoe update, blurry now
macOS updates occasionally reset display configurations or change how HiDPI is handled for non-Apple monitors. Fix 1, Fix 3, and Fix 9 (reset display preferences) restore the previous sharp configuration.
Open System Settings → Displays and click your external monitor. Look at the resolution currently selected. If it says anything other than your monitor’s native resolution (e.g. 1920×1080 for a 1080p monitor, 2560×1440 for a 1440p monitor, 3840×2160 for a 4K monitor), that’s your primary issue — the display is running at a scaled resolution that doesn’t match the panel’s pixel grid. Fix 1 addresses this immediately.
Why Mac External Monitor Blurriness Happens
Understanding the Root CauseApple’s own displays — the Pro Display XDR, Studio Display, and built-in MacBook screens — are Retina displays. They have extremely high pixel density (200+ PPI) and macOS renders content at double the resolution then scales it down, producing incredibly sharp output. This is called HiDPI mode.
Most external monitors are 1080p or 1440p at screen sizes of 24–27 inches — which puts them at 80–110 PPI. At this pixel density, macOS’s default rendering strategy produces visibly soft text because there aren’t enough pixels per inch to render fonts crisply without HiDPI pixel doubling. When you connect a non-Apple monitor to a Mac, macOS has to decide how to handle it — and its default choice isn’t always the sharpest option.
| Monitor Type | Resolution | HiDPI Behaviour | Typical Blurriness Risk |
|---|---|---|---|
| Apple Studio Display / Pro Display XDR | 5K / 6K | Native HiDPI, always sharp | None — designed for Mac |
| 4K UHD (3840×2160) at 27″ | 4K | HiDPI available, usually auto-enabled | Low — 4K has enough pixels |
| 1440p QHD (2560×1440) at 27″ | 1440p | HiDPI not auto-enabled, must be forced | High without HiDPI enabled |
| 1080p Full HD (1920×1080) at 24″ | 1080p | No HiDPI possible at native res | High — text will look soft |
| 1080p at 21″ | 1080p | Slightly higher PPI, still no HiDPI | Medium — manageable |
Fix 1: Set the Monitor to Its Native Resolution
Start Here — Wrong Resolution Is the Most Common CauseWhen macOS first detects an external monitor, it sometimes selects a “safe” resolution rather than the monitor’s actual native resolution — particularly with monitors connected over HDMI adapters where macOS can’t fully read the display’s EDID (the monitor’s self-identification data). Running a 1440p monitor at 1080p, or a 4K monitor at 1440p, produces exactly the kind of overall blurriness where nothing looks truly in focus.
- 1080p monitor: 1920 × 1080
- 1440p monitor: 2560 × 1440
- 4K monitor: 3840 × 2160
- Ultrawide 1440p: 3440 × 1440
Setting a 32″ 4K monitor to its native 3840×2160 resolution without HiDPI scaling means macOS renders everything at full 4K density — which makes text and UI elements very small. The correct setup for a large 4K monitor is not native resolution but HiDPI at a comfortable scaled size — typically “Looks like 2560×1440″ on a 27” 4K display. Fix 3 covers HiDPI setup which provides sharpness plus comfortable UI scaling simultaneously.
Fix 2: Use “Looks Like” Scaling for the Right Balance
The Correct Approach for 4K and 5K MonitorsThe resolution presets in macOS Display settings don’t just change the pixel count — they apply intelligent HiDPI scaling where possible. The descriptions like “Looks like 1920×1080” on a 4K monitor don’t mean the display is running at 1920×1080 — they mean macOS renders content as if the screen were 1920×1080 but uses the full 3840×2160 pixel count to do it, producing Retina-quality sharpness at a comfortable size. This is the sharp setup most people want.
When macOS says a 4K monitor “Looks like 1920×1080,” it internally renders a 3840×2160 frame (four times as many pixels as 1920×1080) and maps four physical pixels to every logical pixel. This is exactly how a MacBook Retina display works. The result is that every pixel of text and UI is rendered with four times the detail, eliminating the softness that comes from low pixel density. The key requirement is that the monitor has at least 4x the pixel count of the “looks like” resolution — which is why this works on 4K monitors but not on 1080p monitors.
Fix 3: Enable HiDPI Mode for 1440p Monitors
The Most Impactful Fix for 1440p BlurrinessA 1440p (2560×1440) monitor is a tricky middle ground for macOS. It has twice the pixels of a 1080p display but isn’t quite 4K — so macOS doesn’t automatically enable HiDPI mode for it. The result is that a 1440p monitor connected to a Mac often looks noticeably softer than the same monitor connected to a Windows PC, not because of any hardware difference but because macOS isn’t doing the pixel-doubling rendering that would make it sharp. Forcing HiDPI mode for a 1440p display transforms it.
Method A — BetterDisplay (Recommended, no Terminal required):
Method B — Terminal command (macOS Sonoma and earlier; may require SIP modification on Tahoe):
sudo defaults write /Library/Preferences/com.apple.windowserver.plist DisplayResolutionEnabled -bool trueWhen HiDPI mode is active on a 1440p monitor, macOS renders the display content at 5120×2880 internally and downscales to 2560×1440 — using four physical pixels for every logical pixel. The result is text and UI rendering that looks almost as sharp as a Retina MacBook display. Many users who switch from Windows to Mac specifically notice this blurriness difference, and enabling HiDPI is what closes that gap.
Fix 4: Set the Correct Refresh Rate
Wrong Refresh Rate Causes Motion Blur and Soft AppearanceAn incorrect refresh rate doesn’t cause static blurriness but creates a persistent soft or motion-blur effect — particularly noticeable when scrolling text or moving windows. If your 144Hz gaming monitor is connected to a Mac and showing at 60Hz, you’ll notice scrolling looks less crisp than it should. Conversely, if macOS sets a refresh rate the monitor can’t fully support at the connected bandwidth, you may see visual artefacts alongside the soft appearance.
Running a 4K monitor at 144Hz requires either DisplayPort 1.4 or HDMI 2.1 — older cable standards can’t carry enough bandwidth. If you’re using an HDMI 2.0 cable (or HDMI 1.4), you may be limited to 60Hz at 4K or 144Hz only at lower resolutions. Check the cable packaging or product listing for the supported bandwidth specification before assuming the Mac or monitor is at fault.
Fix 5: Check Your Cable and Adapter
The Most Underestimated Cause of Persistent BlurrinessNot all display cables deliver the same signal quality, and adapters add another potential point of failure. A low-quality USB-C to HDMI adapter, an HDMI 1.4 cable used with a 4K monitor, or a fraying DisplayPort cable can all produce blurry output that looks identical to a resolution setting issue — but won’t be fixed by any software change. If you’ve tried Fix 1 through Fix 4 and the display still looks soft, the cable or adapter is the next thing to check.
| Connection Type | Max Bandwidth | Max Supported | Notes |
|---|---|---|---|
| Thunderbolt 4 / USB4 | 40 Gbps | 8K @ 60Hz | Best option for Mac — native protocol |
| DisplayPort 2.1 | 80 Gbps | 16K @ 60Hz | Highest bandwidth, ideal for 4K/144Hz |
| DisplayPort 1.4 | 32 Gbps | 4K @ 120Hz / 8K @ 30Hz | Good for 4K gaming monitors |
| HDMI 2.1 | 48 Gbps | 4K @ 144Hz / 8K @ 30Hz | Required for 4K + high refresh |
| HDMI 2.0 | 18 Gbps | 4K @ 60Hz | Common but limits 4K to 60Hz |
| HDMI 1.4 | 10 Gbps | 4K @ 30Hz / 1080p @ 144Hz | Causes blurriness at 4K — upgrade cable |
USB-C hubs that include a display output port often downgrade the signal through their internal chipset — particularly inexpensive hubs that convert the Thunderbolt 3/4 signal to a lower-bandwidth HDMI or DisplayPort output internally. If your Mac is connected to the monitor through a USB-C hub, try connecting directly using a single cable and see whether sharpness improves. A dock or hub that produces a blurry signal on a monitor that looks sharp when directly connected is a display signal quality issue with the hub, not the Mac or monitor.
Fix 6: Re-detect the Monitor to Reset Display Configuration
Quick Reset When Resolution Changes Don’t Apply CorrectlySometimes macOS caches an incorrect display configuration from a previous connection — particularly if the monitor was previously connected at a different resolution or via a different cable. Forcing macOS to re-detect the display clears this cached configuration and applies fresh auto-detection, which often picks up the correct native resolution the second time.
Fix 7: Fix Blurry Text Specifically — Font Rendering on Mac
For Soft-Looking Text When Everything Else Looks FineText blurriness on Mac external monitors has an additional layer beyond resolution — font smoothing. macOS uses antialiasing to render text, and the strength of this antialiasing significantly affects how text looks on non-Retina displays. Apple removed the “Font Smoothing” slider from System Settings in macOS Mojave, but you can still adjust it via Terminal. Tuning this setting is often the difference between text that looks slightly smudged and text that looks crisp.
defaults -currentHost write -g AppleFontSmoothing -int 0defaults -currentHost write -g AppleFontSmoothing -int 1defaults -currentHost write -g AppleFontSmoothing -int 2defaults -currentHost delete -g AppleFontSmoothingFor a 4K monitor with HiDPI enabled: set smoothing to 0 (off) — the high pixel density already produces sharp text without antialiasing. For a 1440p monitor with HiDPI enabled: value 0 or 1 usually produces the crispest results. For a 1080p monitor without HiDPI: value 1 (light) prevents text from appearing jagged while minimising the halo effect that heavier smoothing causes. The “correct” value depends on your specific monitor’s pixel density — test all three and pick the sharpest.
Fix 8: Force RGB Colour Output Over HDMI
For Washed-Out Colours and Soft Appearance CombinedOver HDMI connections, macOS sometimes outputs in YCbCr colour format (used for video) instead of RGB colour format (used for computer displays). YCbCr encodes colour with less precision than RGB and is designed for video content — when a computer UI is rendered in YCbCr, it appears slightly washed out and text looks soft because the colour boundaries are less sharp. This is one of the most dramatic fixes when it applies — switching from YCbCr to RGB can make a display look completely different.
ioreg -l -d0 -w 0 | grep IODisplayEDIDOpen System Information (press Command + Space, type “System Information,” press Enter), expand Hardware → Graphics/Displays, and find your external monitor. Look for a “Pixel Encoding” field — if it says “YCbCr420” or “YCbCr444” your Mac is outputting video colour format. If it says “RGB” you’re already in the correct mode. This confirmation step tells you whether Fix 8 applies before you spend time on it.
Fix 9: Reset Display Preferences
For Blurriness That Started After a macOS UpdatemacOS stores per-display configuration — resolution, colour profile, refresh rate, arrangement — in preference files. After a macOS Tahoe update, these files can contain settings that don’t correctly apply to the new OS version, resulting in display output that looks different (and often worse) than before the update. Deleting these preference files forces macOS to rebuild the display configuration from scratch on the next restart.
/Library/Preferences/SystemConfigurationcom.apple.displays.plistcom.apple.windowserver.displays.plist
~/Library/Preferencescom.apple.windowserver.plist to your Desktop
Fix 10: Use BetterDisplay for Full Control
The Most Comprehensive Tool for Mac External Monitor BlurrinessBetterDisplay is a third-party utility that gives Mac users access to display settings that macOS deliberately restricts — including forcing HiDPI for any monitor, overriding colour format to RGB, setting custom resolutions that System Settings won’t show, and adjusting display brightness and contrast via software when the monitor’s hardware controls are inaccessible. For persistent Mac external monitor blurry issues that software settings alone don’t fix, BetterDisplay is the most practical solution.
- Enable HiDPI — forces Retina-style rendering for any monitor regardless of resolution
- Force RGB — overrides YCbCr output to RGB for sharper colour and text
- Custom resolution — allows resolutions not normally listed in System Settings
- Disconnect and reconnect virtual display — equivalent to a hardware reconnection without unplugging the cable
Among Mac users with external monitors, BetterDisplay has become the standard recommendation for persistent blurriness issues. It solves in two clicks what otherwise requires Terminal commands, EDID overrides, and macOS preference file editing. The free version covers HiDPI and RGB forcing — the features that fix blurriness for most users. The Pro version adds advanced colour calibration, custom resolutions, and per-app display profiles.
Fix 11: Check the Monitor’s Own Settings
Hardware-Side Settings That Affect SharpnessExternal monitors have their own on-screen display (OSD) menu with settings that affect sharpness independently of what macOS sends. A monitor’s built-in sharpness or edge enhancement setting, the input label (PC vs AV/Game mode), and the colour preset can all make an otherwise correctly configured display look blurry or over-processed.
Samsung and LG monitors have a specific setting where each input port can be labelled as “PC” or “AV” (or similar). When labelled as “AV,” the monitor applies video-optimised processing — including colour space conversion and edge softening — which makes computer UI look blurry. Find this in the monitor’s OSD under Input or Source settings, select the port your Mac is connected to, and change its label to “PC.” This single setting change often produces a dramatic improvement on Samsung and LG displays connected via HDMI.
Pro Tips: Getting the Sharpest Possible Image on an External Mac Monitor
A 4K monitor is dramatically sharper than a 1440p monitor on Mac. If you’re buying a monitor specifically for a Mac, the jump from 1440p to 4K makes a more visible difference on macOS than it does on Windows. This is because 4K enables proper HiDPI rendering without any workarounds, while 1440p requires BetterDisplay or Terminal commands to achieve comparable sharpness. At 27 inches, a 4K monitor connected to an Apple Silicon Mac with “Looks like 1920×1080” scaling is visually comparable to a MacBook Pro Retina screen.
Use a USB-C to DisplayPort cable instead of USB-C to HDMI wherever possible. DisplayPort over USB-C uses the Mac’s Thunderbolt/USB4 output natively without signal conversion — it’s a direct digital connection. USB-C to HDMI adapters convert the signal through an internal chip, adding a conversion step that can introduce subtle signal degradation. For the sharpest image, particularly at 4K and above, a USB-C to DisplayPort cable is the best choice for monitors with a DisplayPort input.
Calibrate your monitor’s colour after fixing the resolution. Once sharpness is resolved, colour accuracy is the next biggest factor in display quality. macOS has a built-in Display Calibrator in System Settings → Displays → Color Profile → Calibrate — running through it takes about 10 minutes and produces a custom colour profile tuned to your specific unit. The result is noticeably more accurate colours, which also contributes to perceived sharpness because correct colour contrast makes text edges appear crisper. Our guide to hidden Mac features covers the Display Calibrator and other built-in display tools most users never access.
Keep the Mac’s storage healthy for smooth display rendering. Display rendering — including the pixel-doubled frames used in HiDPI mode — uses GPU resources that depend on the Mac having healthy system performance overall. A Mac with critically low storage runs more frequent disk-swap operations that can compete with display rendering tasks, occasionally causing frame drops that look like a display issue. Our guide on freeing up MacBook storage without deleting files covers the fastest ways to keep storage healthy.
Common Mistakes to Avoid
Reducing a 1080p monitor’s resolution from 1920×1080 to 1280×720 makes everything larger but significantly blurrier — you’re scaling non-native pixels across the panel’s pixel grid, which produces the worst image quality the monitor is capable of. Always run any monitor at its native resolution and address blurriness through HiDPI settings and font smoothing, not by reducing resolution.
The “More Space” scaling preset in macOS Displays settings gives you more screen real estate but renders at a lower effective pixel density — making everything slightly smaller and noticeably softer. If someone suggested using “More Space” to fix blurriness, that’s the opposite of what you want. For sharpness, “Default for display” or “Looks like [native equivalent]” are the correct presets.
A 4K monitor that looks blurry over HDMI might look perfectly sharp over DisplayPort or Thunderbolt — the monitor’s panel is fine, but the signal being delivered to it is bandwidth-limited by the cable or adapter. Before returning a monitor or assuming it’s defective, test it with a different connection type. This is especially relevant for USB-C hub connections where a cheap hub’s display chipset is the actual bottleneck.
A 1080p external monitor at 24 inches has approximately 92 PPI. A MacBook Pro 14″ Retina display has 254 PPI. No software setting can make a 92 PPI display look as sharp as a 254 PPI display — the physical pixel density simply isn’t there. HiDPI and font smoothing improvements bring 1080p monitors to a comfortable, usable sharpness level, but they can’t replicate the clarity of a high-DPI panel. If you need Retina-quality sharpness on an external display, a 4K monitor at 27″ or larger (approximately 163 PPI before HiDPI) is the hardware solution.
FAQ: Mac External Monitor Blurry
Why is my Mac external monitor blurry when my MacBook screen looks sharp?
Mac external monitor blurry appearances compared to a sharp MacBook screen are caused by the difference in pixel density and rendering mode between the two. A MacBook Retina display has 200+ PPI and macOS renders content in HiDPI mode, using four pixels for every logical pixel. Most external monitors have 80–110 PPI and macOS doesn’t automatically enable HiDPI rendering for them — so text and UI are rendered at the full lower pixel density without the pixel-doubling that makes the MacBook screen look so crisp. The fix is to enable HiDPI mode for the external monitor, either via BetterDisplay, a Terminal command, or by using a 4K monitor which macOS enables HiDPI for automatically.
How do I enable HiDPI on an external monitor connected to a Mac?
The easiest way to enable HiDPI on a Mac external monitor is with BetterDisplay (betterdisplay.app) — open the app, select your monitor, and enable HiDPI with one click. The Terminal method requires running sudo defaults write /Library/Preferences/com.apple.windowserver.plist DisplayResolutionEnabled -bool true, restarting, then selecting an HiDPI resolution from the expanded list in System Settings → Displays (hold Option while clicking “Scaled”). HiDPI is automatically available on 4K and higher monitors — it mainly needs to be forced for 1440p and 1080p monitors.
Why does text look blurry on my external monitor but images look okay?
Text-specific blurriness on an external Mac monitor is almost always a font rendering issue — specifically the font smoothing setting and whether HiDPI mode is active. Text is rendered differently from images: text goes through macOS’s font antialiasing engine, while images are displayed pixel-for-pixel. If HiDPI isn’t active, the antialiasing algorithm produces a soft halo around character edges that makes text look fuzzy while images still appear acceptably sharp. Enable HiDPI via BetterDisplay and adjust font smoothing via Terminal (defaults -currentHost write -g AppleFontSmoothing -int 1) — these two changes together typically make text dramatically crisper.
Will a 4K monitor fix the blurry text problem on Mac?
Yes — a 4K (3840×2160) monitor resolves the blurriness problem that plagues 1080p and 1440p monitors on Mac. At 4K resolution, macOS automatically enables HiDPI mode and renders content at “Looks like 1920×1080” using all 8.3 million pixels, producing Retina-equivalent sharpness without any Terminal commands or third-party tools. At 27 inches, a 4K monitor connected to an Apple Silicon Mac via USB-C/DisplayPort with HiDPI scaling produces text quality that closely matches a MacBook Pro Retina display.
Why does my external monitor look blurry over HDMI but sharp over DisplayPort?
HDMI connections to Mac sometimes cause macOS to output in YCbCr colour format (used for video) rather than RGB (used for computer displays). YCbCr encoding has lower colour precision and produces a slightly washed-out, softer appearance for computer UI. DisplayPort connections typically force RGB output because the DisplayPort protocol is designed for computer displays rather than video. If switching from HDMI to DisplayPort sharpens the display, the issue was YCbCr colour output over HDMI — you can also force RGB over HDMI using BetterDisplay’s “Force RGB” option without changing cables.
Does the type of USB-C adapter affect monitor sharpness on Mac?
Yes, significantly. A cheap USB-C to HDMI adapter that only supports HDMI 1.4 limits bandwidth to approximately 10 Gbps — enough for 1080p at 60Hz or 4K at 30Hz, but not enough for 4K at 60Hz. At limited bandwidth, macOS may output at a reduced colour depth or resolution, producing blurry results on a 4K monitor. A quality USB-C to HDMI 2.0 adapter supports up to 18 Gbps and handles 4K at 60Hz correctly. A USB-C to DisplayPort cable bypasses this issue entirely by using the Thunderbolt port’s native display output path without any protocol conversion.
Mac External Monitor Blurry — Complete Fix Checklist
- 1Set to native resolution — System Settings → Displays → Default for display; hold Option for full resolution list
- 2Use correct “Looks Like” scaling — on 4K monitors select “Looks like 1920×1080” for Retina-quality HiDPI
- 3Enable HiDPI for 1440p monitors — use BetterDisplay or Terminal DisplayResolutionEnabled command
- 4Set correct refresh rate — match monitor’s maximum supported rate in Displays → Refresh Rate
- 5Upgrade cable or adapter — use USB-C to DisplayPort or HDMI 2.0+ for 4K; avoid cheap USB-C hubs
- 6Re-detect the monitor — hold Option in Displays to show Detect Displays button
- 7Adjust font smoothing — Terminal AppleFontSmoothing command (value 0, 1, or 2)
- 8Force RGB colour output — fix YCbCr over HDMI via BetterDisplay or colour profile selection
- 9Reset display preferences — delete com.apple.displays.plist and com.apple.windowserver.plist
- 10Use BetterDisplay — one-click HiDPI, RGB forcing, and custom resolutions for any monitor
- 11Check monitor OSD settings — set input label to PC, sharpness to 50%, disable motion blur reduction
One Last Thing
Mac external monitor blurry output is one of the most fixable display issues — and one of the most satisfying to resolve, because the difference between a blurry 1440p monitor and the same monitor with HiDPI enabled is immediately and dramatically visible. Most users who work through the first three fixes in this guide go from frustrated to impressed within minutes.
The long-term solution for anyone who wants the sharpest possible external display without workarounds is a 4K monitor — macOS handles 4K natively and beautifully without requiring BetterDisplay or Terminal commands. But if a 4K monitor isn’t in the budget, BetterDisplay on a 1440p monitor comes remarkably close to the same result.
Wrapping Up
Blurry external monitor output on a Mac is almost never a permanent problem or a hardware defect. It’s a gap between what macOS assumes about non-Apple displays and what those displays actually need to look their best. Close that gap with the right resolution setting, HiDPI mode, the correct cable, and a font smoothing adjustment, and the result is a sharp, comfortable display that holds up well through daily use.
ⓘ Disclaimer: This article is for informational purposes only. CrazyErrors is not affiliated with Apple Inc. Terminal commands in this guide modify display preference files — all changes can be reversed by deleting the modified preference file and restarting. BetterDisplay is a third-party application; CrazyErrors has no commercial relationship with its developer. Results vary depending on monitor model, cable type, and Mac hardware generation. For official Apple display guidance, visit support.apple.com.