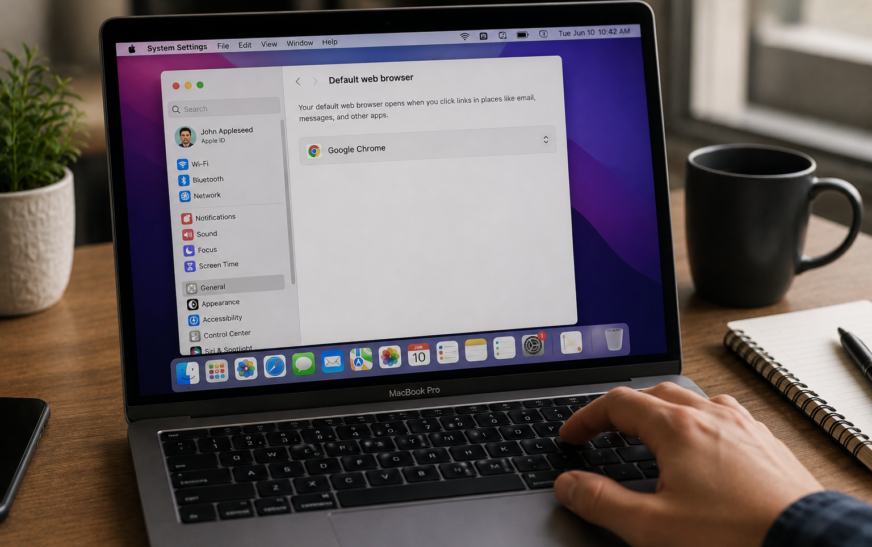

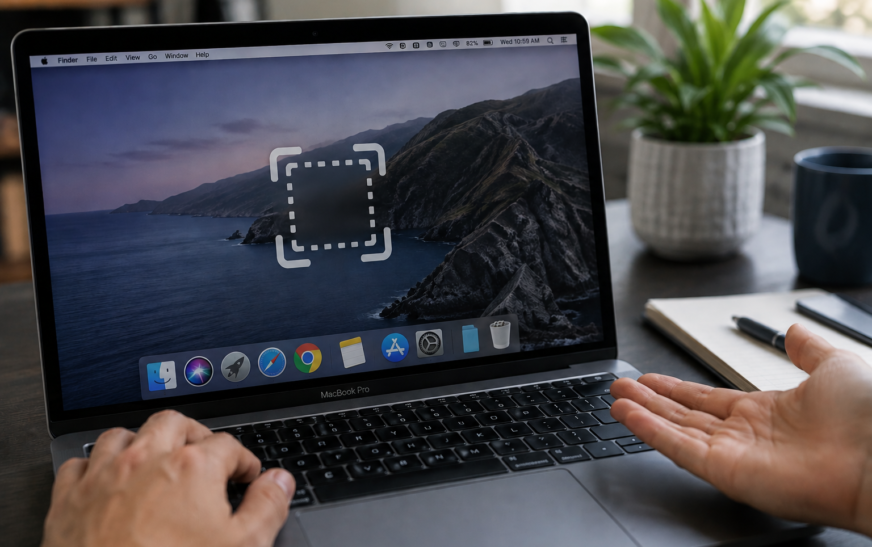
Mac screenshot not working with Command + Shift + 3 or 4 is almost always caused by one of three things: the screenshot shortcuts have been reassigned or disabled in System Settings, the Screenshot app is missing Screen Recording permission, or the screenshots are saving to a location you’re not checking (not the Desktop). Go to System Settings → Keyboard → Keyboard Shortcuts → Screenshots and confirm all screenshot shortcuts are checked and show the correct key combinations. Then check System Settings → Privacy & Security → Screen Recording and confirm Screenshot is allowed. These two checks fix the issue for the overwhelming majority of users.
When your Mac screenshot is not working, the keyboard shortcut you’ve pressed hundreds of times suddenly produces nothing — no thumbnail preview in the corner, no sound, no file appearing on the Desktop. It’s disorienting precisely because screenshots are so fundamental. You press Command + Shift + 3 and the Mac simply ignores you, or the shortcut does something unexpected because another app has claimed it.
The causes are well defined — a reassigned shortcut, a missing Screen Recording permission, screenshots saving somewhere other than the Desktop, a third-party app intercepting the key combination, or a macOS process that needs restarting. Every one of them has a specific and fast fix. This guide works through all of them, starting with the ones that resolve it for most users in under two minutes.
Every Mac Screenshot Shortcut — Quick Reference
Know What Should Work📸 Built-In Mac Screenshot Shortcuts
Before diagnosing why Command + Shift + 3 isn’t working, press Command + Shift + 5 to open the Screenshot app directly. If this opens the Screenshot toolbar, the Screenshot app itself is functional — the problem is specifically the keyboard shortcut mapping for the 3 and 4 keys. If Command + Shift + 5 also does nothing, the issue is deeper — permissions or a system process problem.
What Exactly Are You Seeing?
Match Your Symptom to the Right Fix🔇 Shortcut produces no response — no sound, no thumbnail, nothing
The keyboard shortcut is completely silent and ignored. Either the shortcut is disabled, reassigned to another action, or the Screenshot process isn’t running. Fix 1, Fix 2, and Fix 7 apply.
🖼️ Screenshot sound plays but no file appears on Desktop
The screenshot is being taken but saved somewhere other than the Desktop — a custom save location is set, storage is full, or the file is going to a folder you’re not checking. Fix 3 and Fix 4 resolve this immediately.
📋 Screenshot copies to clipboard instead of saving a file
Not broken — this is the Control modifier behaviour. Adding Control to any screenshot shortcut sends it to the clipboard instead of saving a file. Check whether you’re accidentally holding Control. Fix 1 clarifies the shortcut mapping.
📷 Screenshot thumbnail appears briefly then disappears — no file
The thumbnail preview shows in the bottom-right corner but clicking it does nothing and no file saves. The save location folder may have been deleted or become inaccessible. Fix 3 fixes the save location.
⚠️ Shortcuts work on the Desktop but not inside specific apps
Certain apps — especially games, video players, remote desktop tools, and DRM-protected content apps — capture keyboard input before macOS can intercept it, or block screenshot capture for content protection reasons. Fix 8 and Fix 9 address app-level conflicts.
🔄 Worked fine before macOS Tahoe update, broken now
macOS updates occasionally reset screenshot shortcut assignments and Screen Recording permissions. Fix 1 (re-enable shortcuts) and Fix 5 (Screen Recording permission) together resolve the majority of post-update screenshot failures.
Fix 1: Check and Reset Screenshot Keyboard Shortcuts
Start Here — Shortcuts Are Disabled More Often Than You’d ThinkmacOS screenshot shortcuts can be disabled individually or collectively — either deliberately by a user, by a macOS update resetting preferences, or by a third-party app that modifies System Settings during installation. When a screenshot shortcut is unchecked in System Settings, pressing it produces absolutely no response — no error, no sound, nothing at all.
- Save picture of screen as a file → ⌘⇧3
- Copy picture of screen to clipboard → ⌘Ctrl⇧3
- Save picture of selected area as a file → ⌘⇧4
- Copy picture of selected area to clipboard → ⌘Ctrl⇧4
- Screenshot and recording options → ⌘⇧5
If the shortcut was simply unchecked and re-enabling it restored screenshot functionality, keep an eye on whether it gets disabled again after future macOS updates. A third-party app may be modifying this setting during its installation or update process — if it recurs, check which apps were installed or updated around the time it last broke.
Fix 2: Check Screen Recording Permission for Screenshot
Required Since macOS Catalina — Often Reset by UpdatesSince macOS Catalina, the Screenshot app requires explicit Screen Recording permission to capture screen content. Without this permission, screenshot shortcuts either do nothing or capture a black/blank image. macOS Tahoe updates have been known to reset this permission for some users — a quick check and re-grant takes under 30 seconds.
If you use a third-party screenshot tool like CleanShot X, Snagit, or Greenshot, those apps also need Screen Recording permission — and they maintain separate entries in the Screen Recording list. If a third-party tool stopped capturing after a macOS update, check its toggle in Screen Recording permission. Also note that removing a third-party capture app’s permission doesn’t restore the built-in Screenshot shortcut behaviour — both can be enabled simultaneously.
Fix 3: Fix the Screenshot Save Location
Screenshot Sound Plays but File Never AppearsScreenshots don’t always save to the Desktop. macOS lets you change where screenshots go — and once changed, screenshots save silently to the new location with no indication of where that is. If you’ve changed this setting (or if a third-party app changed it) and then forgotten, your screenshots are being taken correctly but landing in a folder you’re not checking.
- Desktop — the default; files appear directly on your Desktop
- Documents — files go into ~/Documents
- Clipboard — no file is saved at all; screenshot goes to clipboard only
- Mail / Messages — screenshot opens directly in a compose window
- Other Location — files save to a custom folder chosen previously
If you’re not sure where screenshots have been going, press Command + Space to open Spotlight and search for “Screenshot” — recent screenshot files will appear in the results regardless of where they were saved. Click any result and press Command + Return to open the folder containing it, which reveals the save location.
Fix 4: Free Up Disk Space — Screenshots Need Room
If Mac Storage Is Below 1–2 GB FreeWhen your Mac’s internal storage is critically full, macOS cannot write new files — including screenshot files. The shortcut triggers and the screenshot process runs, but the file write fails silently. No error message appears and no file is created. This is an edge case but it catches people off guard because screenshots are small files and it seems impossible that a 500 KB PNG would fail to save.
Fix 5: Check for Conflicting Third-Party Shortcuts
The Most Common Cause After a New App InstallMany productivity apps, screen recording tools, window managers, and communication apps register their own global keyboard shortcuts — and some of them claim the same key combinations as Mac’s built-in screenshots. When two apps both want Command + Shift + 3, the one that registered first (or most recently) wins, and the other does nothing. This is the most common reason screenshots suddenly stop working immediately after installing a new app.
- Dropbox — has been known to claim screenshot shortcuts for its own screen capture
- Skype, Zoom, Teams — register screenshot shortcuts for meeting capture
- CleanShot X, Snagit, Lightshot — screen capture apps that replace built-in shortcuts
- Alfred, Raycast — productivity launchers that can map Cmd+Shift combos
- Window managers (Magnet, Rectangle, Moom) — use Cmd+Shift combinations for window snapping
- Remote Desktop, Parallels, VMware — capture keyboard input before macOS can process it
During a Zoom or Microsoft Teams call, Command + Shift + 3 may trigger an in-app screenshot or annotation feature rather than macOS’s native screenshot. These apps capture the shortcut when they have focus. To take a macOS screenshot during a call: switch focus away from the meeting app briefly (click the Desktop), take the screenshot, then switch back — or use the Touch Bar screenshot button if available on your Mac.
Fix 6: Disable and Re-enable the Floating Thumbnail
For Thumbnails That Disappear InstantlyAfter taking a screenshot, macOS shows a small floating thumbnail in the bottom-right corner for about five seconds — clicking it opens the screenshot for markup, swiping it left dismisses it and saves the file immediately. If this thumbnail appears and disappears before you can interact with it, or if it’s not appearing at all, the setting can be toggled in the Screenshot app options.
The floating thumbnail is a preview feature — not a confirmation that the file was saved. Whether you click the thumbnail, dismiss it, or let it time out, the screenshot file is saved to your chosen location. If you don’t see the thumbnail but a screenshot file appears on the Desktop, everything is working correctly and the thumbnail display is simply disabled.
Fix 7: Restart the Screenshot and SystemUIServer Processes
When Shortcuts Are Configured Correctly but Still Do NothingThe screenshot functionality on Mac is handled by two background processes: the Screenshot app process and SystemUIServer — the process responsible for the menu bar and many macOS UI elements including screenshot keyboard shortcut interception. When either of these processes crashes or gets into an inconsistent state, screenshot shortcuts stop working even though all settings appear correct. Restarting them takes under 30 seconds and doesn’t require a full Mac restart.
killall SystemUIServerkillall ScreenshotSystemUIServer registers macOS’s global keyboard shortcuts — including all screenshot shortcuts — when it starts. If it enters a crashed or hung state, the shortcuts registered to it stop responding even though System Settings still shows them as enabled. Restarting SystemUIServer re-registers all shortcuts from scratch, which instantly restores screenshot functionality without needing to change any settings.
Fix 8: Take a Screenshot Using Terminal to Test
Confirms Whether the Screenshot Capability Itself Is WorkingIf you’re unsure whether the screenshot system is broken or just the keyboard shortcut, Terminal provides a direct way to trigger a screenshot command that bypasses the shortcut entirely. If Terminal can take a screenshot successfully, the screenshot capability is intact and only the keyboard shortcut path is broken. If Terminal also fails, the issue is deeper — permissions or the Screenshot app itself.
screencapture ~/Desktop/test-screenshot.pngtest-screenshot.png appears and opens correctly, the screenshot capability works. The issue is in the keyboard shortcut or SystemUIServer (Fix 1 and Fix 7)# Screenshot with a 5-second delay
screencapture -T 5 ~/Desktop/test-delayed.png
# Screenshot of a specific window (interactive selection)
screencapture -W ~/Desktop/test-window.png
# Screenshot to clipboard instead of file
screencapture -cThe screencapture Terminal command supports every feature the Screenshot app has — full screen, selected area (-s), specific window (-W), timed delay (-T), clipboard output (-c), and multiple file format options (-t jpg, -t pdf). If you ever find yourself in a situation where the Screenshot app is completely broken, screencapture is a fully functional alternative that requires only Terminal access.
Fix 9: Fix Screenshots in Specific Apps — Remote Desktop, Games, and DRM Content
When Screenshots Work on Desktop but Fail Inside Certain AppsSome apps are deliberately designed to prevent screenshots — either because they capture keyboard input at a lower level than macOS shortcuts operate, or because they enforce content protection that blocks screen capture for DRM-protected material. Understanding which situation you’re in determines the appropriate workaround.
Remote Desktop and Virtual Machines
Apps like Microsoft Remote Desktop, Apple Remote Desktop, Parallels Desktop, and VMware Fusion capture all keyboard input — including macOS shortcuts — and forward it to the remote machine or virtual machine. When these apps have focus, Command + Shift + 3 is sent to the remote system, not intercepted by macOS.
DRM-Protected Content (Netflix, Apple TV+, Disney+)
Streaming services enforce HDCP-style content protection that prevents screenshots of video playback. This is a deliberate security measure, not a bug — the video player renders into a protected surface that macOS’s screenshot system cannot capture.
Full-Screen Games
Fix 10: Reset Screenshot Preferences via Terminal
For Persistent Issues That Survive Settings ChangesThe Screenshot app stores its configuration — save location, thumbnail settings, timer preferences, and last-used mode — in a preference file. When this file becomes corrupted (most often after an abrupt Mac shutdown while a screenshot was being processed), the Screenshot app can behave erratically despite all settings appearing correct in System Settings.
killall Screenshotrm ~/Library/Preferences/com.apple.screencapture.plistrm -rf ~/Library/Containers/com.apple.ScreenShotkillall SystemUIServerFix 11: Restart Your Mac
The Simplest Fix That’s Often SkippedIf you’ve tried the Terminal process restart in Fix 7 and screenshot shortcuts are still unresponsive, a full Mac restart accomplishes a more thorough reset of all system processes — including ones that the killall command can’t reach due to permission constraints. Many Mac screenshot not working reports are resolved by a restart that users postponed for days or weeks.
Fix 12: Check for Keyboard Hardware Issues
If Only Screenshot Shortcuts Fail but Other Shortcuts WorkAn unlikely but real cause of screenshot shortcuts not working is a hardware problem with the specific keys involved — a sticky or partially failed Shift key, or a Command key that registers intermittently. This is worth ruling out before concluding the issue is software.
If keyboard shortcuts are unreliable, the Screenshot toolbar (Command + Shift + 5, or launched from Applications → Utilities → Screenshot) provides full screenshot functionality via mouse clicks — no keyboard shortcuts required. You can also add the Screenshot app to your Dock for one-click access whenever the keyboard route isn’t working.
Pro Tips: Getting the Most From Mac Screenshots
Hold Control to copy to clipboard instead of saving a file. Adding Control to any screenshot shortcut (Command + Control + Shift + 3) sends the screenshot to your clipboard instead of saving a file. This is the fastest way to paste a screenshot directly into an email, message, or document without cluttering your Desktop with PNG files.
Use Command + Shift + 4, then Space for perfect window screenshots. The Space bar modifier after activating the area selection tool switches to window capture mode — the cursor becomes a camera, and clicking any window captures it with a clean shadow and transparent background, perfectly cropped to the window’s edges. No manual selection required and the result is always pixel-perfect.
Set a timer for screenshots that need you in the frame. Open the Screenshot toolbar (Command + Shift + 5), click Options, and set a 5 or 10 second timer. This gives you time to set up the screen state you want captured before the screenshot fires — useful for capturing menus, tooltips, or hover states that disappear when you move the mouse to trigger a shortcut.
Screenshots save as PNG by default — change to JPG for smaller files. PNG screenshots are lossless and large, which is ideal for accuracy but inefficient for sharing. To change the default format to JPG, open Terminal and run:
defaults write com.apple.screencapture type jpgRestart SystemUIServer after (killall SystemUIServer) for the change to take effect. JPG screenshots are typically 60–80% smaller than PNG equivalents for screen content.
Explore the hidden features your Mac has built in. Screenshot is one of many Apple utilities that’s far more capable than most users realise. Our guide on hidden Mac features most users never discover covers dozens of built-in tools with similar depth that go largely unused.
Common Mistakes to Avoid
If you’re pressing Command + Control + Shift + 3 (with the Control key), the screenshot goes to your clipboard and no file is saved — which can feel like the shortcut “isn’t working” because nothing appears on the Desktop. This is correct behaviour. Check your clipboard immediately by pressing Command + V in an image editor, Notes, or Messages — if the screenshot pastes, it was captured correctly and went to clipboard as intended.
Having CleanShot X, Snagit, and the built-in Screenshot all enabled at once creates shortcut conflicts where none of them work reliably. Each app tries to own the same keyboard shortcuts. Choose one screen capture tool and disable the shortcut interception in the others — most third-party capture apps have an option to not override macOS’s built-in shortcuts.
The floating thumbnail times out after 5 seconds and disappears on its own — but the screenshot file was already saved to your chosen location when the shortcut fired. A disappearing thumbnail is not a failed screenshot. If you want more time to interact with the thumbnail, open Command + Shift + 5 → Options and make sure “Show Floating Thumbnail” is enabled — but even with it disabled, the file is always saved.
FAQ: Mac Screenshot Not Working
Why is my Mac screenshot not working with Command + Shift + 3?
Mac screenshot not working with Command + Shift + 3 is most commonly caused by the shortcut being disabled or reassigned in System Settings, or another app intercepting the key combination. Go to System Settings → Keyboard → Keyboard Shortcuts → Screenshots and confirm “Save picture of screen as a file” is checked with the Command + Shift + 3 combination. If it’s already checked and correct, restart SystemUIServer by opening Terminal and running killall SystemUIServer — this re-registers all keyboard shortcuts and restores screenshot functionality in most cases.
Why does Mac screenshot not save to Desktop?
Screenshots not appearing on the Desktop means the save location has been changed. Press Command + Shift + 5 to open the Screenshot toolbar, click Options, and look at the Save To section — the checkmark shows where screenshots are currently going. Click Desktop to restore the default location. If “Clipboard” is selected, no file is saved at all and screenshots go directly to the clipboard instead.
How do I take a screenshot on Mac without the keyboard shortcut?
Open the Screenshot app directly from Applications → Utilities → Screenshot, or press Command + Shift + 5 to open the toolbar — all screenshot options are accessible by clicking rather than using keyboard combinations. You can also use Terminal with screencapture ~/Desktop/screenshot.png for a full-screen capture, or add the Screenshot app to your Dock for one-click access from the toolbar.
Why do screenshots show a black screen or blank image on Mac?
A black or blank screenshot file means the Screenshot app captured the screen but Screen Recording permission was denied at the moment of capture. Go to System Settings → Privacy & Security → Screen Recording, confirm Screenshot is enabled, then toggle it off and back on and restart your Mac. If black screenshots only occur for specific content — streaming video on Netflix or Apple TV+ — that’s DRM content protection blocking the capture, which cannot be worked around through settings changes.
Why does Command + Shift + 4 not let me select an area?
If pressing Command + Shift + 4 doesn’t change the cursor to the crosshair for area selection, the shortcut is either disabled or intercepted by another app. Check System Settings → Keyboard → Shortcuts → Screenshots and confirm “Save picture of selected area as a file” is enabled. If a third-party app has claimed this shortcut, that app’s preferences need to have the conflicting shortcut reassigned or disabled. Dropbox, Skype, and some window management apps are the most frequent causes of this specific conflict.
Can I change where Mac screenshots are saved?
Yes — open the Screenshot toolbar with Command + Shift + 5, click Options, and select your preferred save location from the Save To list. Options include Desktop (default), Documents, clipboard, Mail, Messages, or any custom folder you choose. The location you select applies to all screenshot shortcuts — Command + Shift + 3, 4, and 5 all save to the same place.
Mac Screenshot Not Working — Complete Fix Checklist
- 1Check and re-enable screenshot shortcuts — System Settings → Keyboard → Shortcuts → Screenshots; restore defaults if needed
- 2Grant Screen Recording permission — System Settings → Privacy & Security → Screen Recording → Screenshot: On
- 3Fix the save location — Command + Shift + 5 → Options → Save To → Desktop
- 4Free up disk space — need at least 2–5 GB free for file writes to succeed
- 5Find the conflicting third-party app — Dropbox, Zoom, Teams, CleanShot, window managers; disable or reassign their shortcuts
- 6Toggle floating thumbnail — Command + Shift + 5 → Options → Show Floating Thumbnail: off and on
- 7Restart SystemUIServer and Screenshot —
killall SystemUIServerandkillall Screenshotin Terminal - 8Test via Terminal —
screencapture ~/Desktop/test.pngto confirm screenshot capability works independently of shortcuts - 9Fix app-specific conflicts — Remote Desktop, games, DRM content each need specific workarounds
- 10Reset Screenshot preferences — delete com.apple.screencapture.plist via Terminal
- 11Restart Mac — full restart clears all process state that
killallcan’t reach - 12Check keyboard hardware — verify Shift and Command keys register; test with external keyboard
One Last Thing
Mac screenshot not working is almost always a settings or permissions issue — not a hardware problem, not a macOS bug, and not something that requires reinstalling anything. The shortcut checkbox in Keyboard Settings and the SystemUIServer restart together resolve it for the large majority of users in under three minutes. The save location check covers most of the remaining cases where the shortcut works but nothing appears on the Desktop.
Screenshots are one of the most frequently used Mac features, and once they’re working again, the Control-modifier clipboard trick and the window-capture Space bar mode are both worth bookmarking — they make the screenshot workflow significantly faster for sharing and documentation.
Wrapping Up
Mac screenshots are deceptively simple on the surface — press a key combination, get a file. The system is actually well-designed and reliable when correctly configured. Getting back to that reliable state after something breaks it is a matter of checking three things in sequence: the shortcut is enabled, Screenshot has Screen Recording permission, and the save location is where you expect. In most cases, one of those three is the answer.
ⓘ Disclaimer: This article is for informational purposes only. CrazyErrors is not affiliated with Apple Inc. Terminal commands should be followed as written — all commands listed here affect only macOS preference files and running processes, not personal data. Screenshot functionality for DRM-protected content is intentionally restricted by content providers and cannot be restored through software changes. For official Apple screenshot guidance, visit support.apple.com.