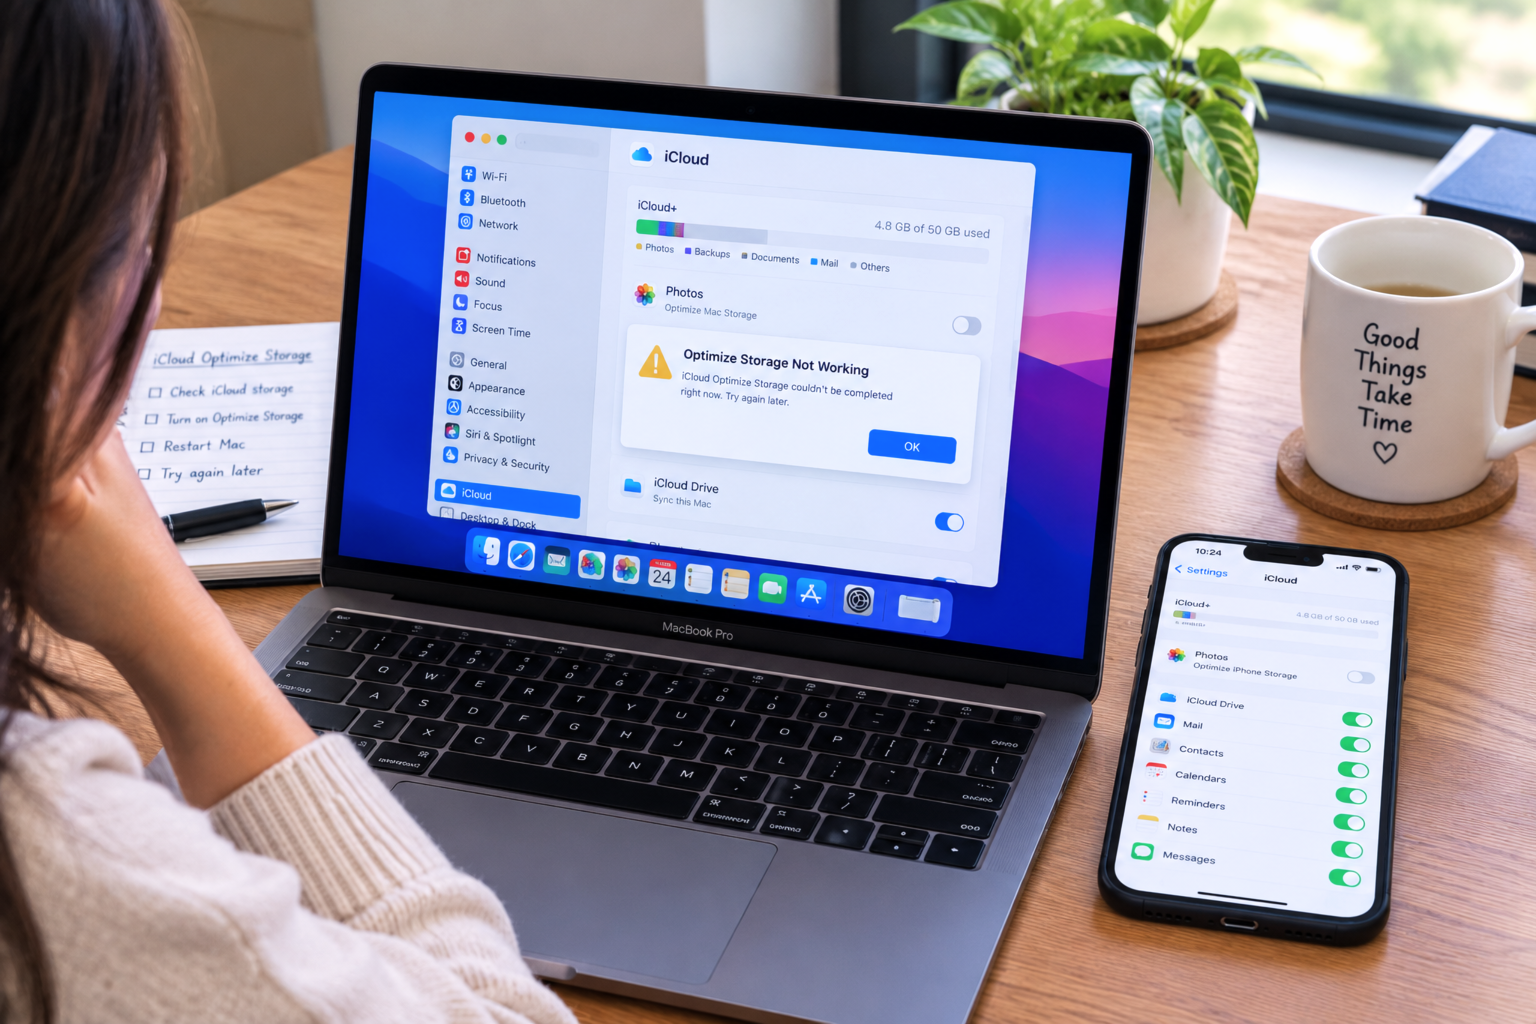

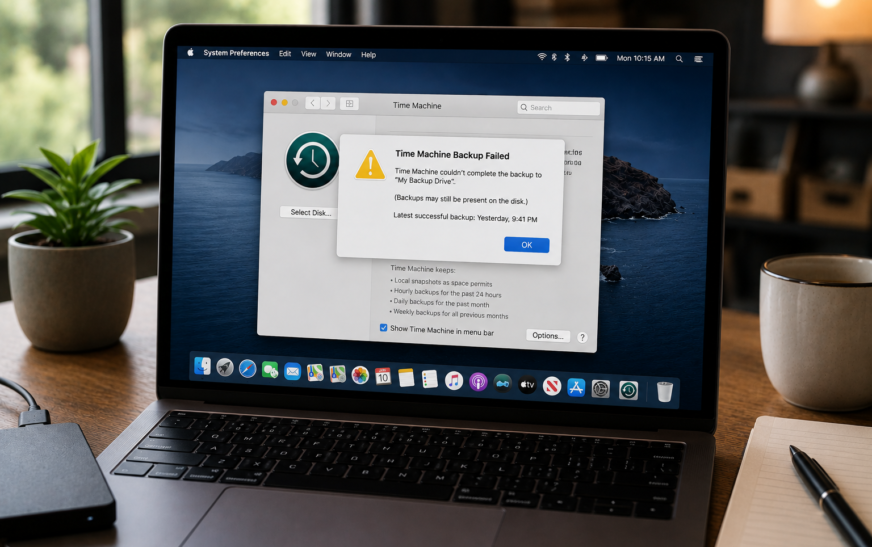
When a Mac Time Machine backup failed message appears, the most common causes are a full backup disk, a lost connection to the backup drive, a corrupted backup database, or insufficient free space on your Mac itself. The fastest starting fix is to open System Settings → General → Time Machine, check the status shown under your backup disk, then disconnect and reconnect the drive before clicking Back Up Now. If the Mac Time Machine backup failed error persists after reconnecting, deleting the oldest backup snapshot and retrying resolves the majority of cases.
A Mac Time Machine backup failed error is one of the most anxiety-inducing notifications your Mac can throw at you — because Time Machine is the safety net that’s supposed to prevent data loss, not cause confusion. When this message appears in the menu bar, it usually means the backup hasn’t completed in days — sometimes weeks — without you realising. Some users discover the problem only when they actually need to restore a file and find the backup is months out of date. Whether it says “Backup failed”, “Unable to complete backup”, or “The backup disk is not available”, all of these are variations of the same core issue: something interrupted the backup process and it hasn’t recovered on its own. The cause could be a connection problem, a full disk, a corrupted backup bundle, or a macOS update that disrupted the backup service. Understanding exactly which one applies to your situation is what makes the fix fast — and this guide covers all of them in the right order so you don’t waste time on steps that don’t apply. One important thing before you start: treat this as urgent and address it the same day, because every hour without a working backup is an hour of unprotected data.
The good news is that most Time Machine backup failures are fixable without losing any existing backup data, and the fixes covered here work for both external drive backups and network backups (NAS, Time Capsule).
What Error or Symptom Are You Seeing?
Find Your Scenario First💾 “The backup disk is full”
The backup drive has no room left to store the next backup. Time Machine needs to delete old backups to make space. Fix 1 and Fix 2 address this immediately.
🔌 “Backup disk not available” or drive not found
Time Machine can’t reach its backup drive — the drive is disconnected, asleep, or (for network backups) the NAS is offline. Fix 3 and Fix 4 cover connection and network issues.
🚫 “Unable to complete backup. An error occurred while creating the backup folder”
The backup folder or bundle on the drive is corrupted. Fix 6 (repair the backup) and Fix 7 (start fresh) address this.
⏳ Backup stuck “Preparing backup” for hours
The backup is calculating what to back up but never starts transferring data. Usually caused by a stuck indexing process or a very large change in files. Fix 5 and Fix 8 resolve this.
📊 Backup starts but fails partway through
The backup begins but stops before completing — often a disk write error, a connection drop, or insufficient space emerging during the backup. Fix 1, Fix 3, and Fix 6 are the relevant steps.
📅 “Time Machine hasn’t backed up in X days/weeks”
The notification indicating Time Machine has given up retrying. The backup drive may have been unavailable for an extended period, or each attempted backup has been failing silently. Work through Fix 3, Fix 4, and Fix 5 in sequence.
For the most precise diagnosis, open Console.app (Applications → Utilities → Console), type “TimeMachine” in the search bar, and read the most recent entries. The log shows the exact reason the last backup failed — including specific error codes and file paths — which makes it much faster to target the correct fix. This is especially useful for persistent failures where the general error message isn’t giving you enough information.
Common Time Machine Error Messages — Decoded
Know What You’re Dealing With| Error Message | What It Means | Go To |
|---|---|---|
| “Backup disk is full” | No space left on the backup drive | Fix 1, Fix 2 |
| “Backup disk not available” | Drive disconnected or NAS offline | Fix 3, Fix 4 |
| “Unable to complete backup” | Backup folder or disk corruption | Fix 6, Fix 7 |
| “Not enough disk space” | Mac’s internal drive too full to stage backup | Fix 9 |
| “Preparing backup…” (stuck) | Indexing process or mds stuck | Fix 5, Fix 8 |
| “An error occurred creating the backup folder” | Permissions or sparsebundle corruption | Fix 6, Fix 10 |
| “Time Machine completed a verification of your backups” | Backup integrity check found an issue | Fix 6, Fix 7 |
| Error code -43 or -45 | File not found / permission denied during backup | Fix 10, Fix 11 |
Fix 1: Free Up Space on Your Backup Disk
Immediately Fixes “Backup Disk Is Full”Time Machine is designed to manage backup drive space automatically — when the drive fills up, it deletes the oldest backup snapshots to make room for new ones. This automatic deletion sometimes fails when the drive is completely full and can’t even write the metadata needed to remove old backups. Manually deleting old backups gives Time Machine the breathing room it needs.
Deleted Time Machine snapshots cannot be recovered. Before removing old backups, consider whether any files from that period might still be needed — particularly if you deleted something months ago and might want to restore it. If in doubt, keep backups from key dates and delete the ones in between.
Fix 2: Set Time Machine to Auto-Delete Old Backups
Prevents the Full Disk Problem From RecurringTime Machine’s default behaviour is to automatically manage backup space. If this has somehow been disabled or isn’t working as expected, confirming the right settings prevents the backup disk from filling up again after you’ve manually freed space.
Time Machine keeps hourly backups for the past 24 hours, daily backups for the past month, and weekly backups for all previous months — until the drive is full. When full, it deletes the oldest weekly backup to make room. If the backup drive is very close in size to your Mac’s used storage, this cycle happens frequently and can eventually lead to the drive being too full to maintain the deletion metadata. Ideally, your backup drive should be at least 2x — and ideally 3x — the size of the data you’re backing up.
Fix 3: Fix Connection Issues With the Backup Drive
For “Backup Disk Not Available” ErrorsA disconnected, sleeping, or intermittently connected backup drive is one of the most common reasons a Mac Time Machine backup failed situation keeps recurring. The fix isn’t always as simple as replugging — power management, cable condition, and USB port choice all matter.
Prevent the drive from sleeping mid-backup:
Unpowered USB hubs can struggle to deliver consistent current to an external drive during heavy backup operations, causing the drive to appear connected but behave erratically. Always connect your Time Machine backup drive directly to a port on your Mac or to a powered USB hub with its own power supply.
Fix 4: Fix Network Backup Issues (NAS / AirPort Time Capsule)
For Network-Based Time Machine BackupsIf your Time Machine backup target is a NAS drive (Synology, QNAP, Western Digital) or an older AirPort Time Capsule rather than a directly connected drive, the failure causes are different. Network-based backups are more sensitive to WiFi drops, DNS resolution failures, and NAS firmware updates that change how the network share responds.
The very first network Time Machine backup can be enormous — potentially hundreds of gigabytes over WiFi — and takes many hours. During this time, any network interruption (WiFi reconnection, router restart, Mac going to sleep) cancels the backup and forces it to restart. For the initial backup, use Ethernet if possible, disable sleep in System Settings, and allow uninterrupted time overnight.
Fix 5: Fix “Preparing Backup” Stuck for Hours
When the Backup Never Gets Past the Preparation StageTime Machine’s “Preparing backup…” phase involves scanning your Mac for files that have changed since the last backup. If Spotlight’s indexing service (mds) is stuck or overloaded, this scan can take an extraordinarily long time — or never complete at all — leaving the backup permanently stuck at “Preparing.”
mds or mdworker processes are consuming a very high percentage of CPUsudo killall -KILL mdsAfter a major macOS update, Time Machine may need to re-examine every file on your Mac because the update modified a large number of system files. The first post-update backup preparation can take 30–90 minutes even on a fast Mac — this is expected behaviour, not a failure. Let it run overnight if necessary before concluding it’s stuck.
Fix 6: Repair a Corrupted Backup With Disk Utility
For Corruption Errors and Verification FailuresWhen Time Machine reports that it “completed a verification of your backups and needs to create a new backup” — or when it fails with folder creation errors — the backup bundle (the .backupbundle or .sparsebundle file on your drive) has become corrupted. Disk Utility’s First Aid can repair many types of corruption before resorting to starting a new backup from scratch.
- ✅ “The volume was repaired successfully” — try a Time Machine backup now
- ⚠ “Errors were found but could not be repaired” — the corruption is too deep for First Aid, proceed to Fix 7
In Disk Utility, click View → Show All Devices to see the full disk hierarchy. Run First Aid on the backup disk’s container (the parent of the volume) as well as the volume itself — some corruption exists at the container level rather than the volume level and won’t be caught if you only check the volume.
Fix 7: Delete the Corrupted Backup and Start Fresh
When First Aid Cannot Repair the BackupIf Disk Utility reports errors it can’t fix, or if Time Machine repeatedly fails immediately after each repair attempt, the backup bundle itself is beyond recovery. Starting fresh — deleting the corrupted backup and letting Time Machine begin a new one — is the cleanest path forward. You lose your backup history but gain a working backup system going forward.
.backupbundle or [Your Mac Name].backupbundle folderOnce the backup bundle is deleted and Trash is emptied, you cannot restore any previous versions of files or recover deleted files from Time Machine. Before proceeding, confirm you have copies of any important files you might want to recover from old backups — either in iCloud, on another drive, or by restoring them from Time Machine before deleting.
Fix 8: Reset Time Machine Preferences
For Persistent Failures That Survive Drive ReconnectionTime Machine stores its configuration — backup schedule, disk association, exclusions — in preference files. When these become corrupted or inconsistent (most often after a macOS update or an unexpected shutdown during a backup), Time Machine can fail in ways that don’t respond to simple fixes because the configuration itself is the problem.
/Library/Preferencescom.apple.TimeMachine.plist to your Desktop as a backupFix 9: Free Up Space on Your Mac’s Internal Drive
For “Not Enough Disk Space” During Backup PreparationTime Machine needs temporary space on your Mac’s internal drive to stage certain parts of the backup process — particularly when creating local snapshots before transferring to the backup disk. If your Mac’s internal storage is critically low, the backup can fail before data ever reaches the external drive.
sudo tmutil deletelocalsnapshots /Fix 10: Fix Permissions on the Backup Drive
For “Unable to Create Backup Folder” ErrorsmacOS applies strict permission controls to Time Machine backup folders. If the permissions on the backup drive or backup bundle become misaligned — sometimes after a disk repair, a drive format change, or a macOS update — Time Machine cannot write to its designated backup location, producing folder creation errors.
BackupDriveName with the actual name of your backup drive as it appears in Finder:
sudo chown root:wheel /Volumes/BackupDriveNamesudo chmod 775 /Volumes/BackupDriveNameThe drive name in the chown and chmod commands must match exactly what appears in Finder — including capitalisation and spaces. If your drive is named “My Backup Drive,” use /Volumes/My\ Backup\ Drive with backslashes escaping the spaces, or wrap the path in quotes: "/Volumes/My Backup Drive".
Fix 11: Exclude Problem Files and Folders
For Backups That Fail on the Same Files Every TimeOccasionally a specific file — a locked virtual machine disk, a file with corrupted metadata, or a file held exclusively open by another app — consistently causes the backup to fail at the same point. Identifying and excluding that file allows backups to complete for everything else while you deal with the problem file separately.
Several file types are large, frequently changing, and not useful to restore from Time Machine. Consider permanently excluding: ~/Library/Caches (app caches, easily rebuilt), Dropbox/Google Drive/OneDrive sync folders (already backed up in the cloud), virtual machine files (.parallels, .vmwarevm), and large media export caches from apps like Final Cut Pro or DaVinci Resolve. Excluding these dramatically reduces backup size and duration without meaningfully affecting your ability to restore important data.
Fix 12: Use Terminal to Verify and Repair the Backup
Advanced — For Stubborn FailuresThe tmutil command in Terminal gives direct control over Time Machine — including the ability to manually verify backup integrity, trigger backups, and diagnose specific issues that the System Settings interface doesn’t expose.
tmutil statustmutil listbackupstmutil startbackuptmutil stopbackupsudo tmutil deletelocalsnapshots YYYY-MM-DDtmutil listbackups
Pro Tips: Keeping Time Machine Running Without Failures
Use a drive that’s at least 2x your Mac’s used storage. The most common root cause of recurring Mac Time Machine backup failed errors is a backup drive that’s too small. When the drive is always nearly full, Time Machine barely has room to add new backups before needing to delete old ones — and any slight miscalculation leaves it with nowhere to write. A drive that’s 2–3x your Mac’s used storage gives Time Machine the breathing room to work reliably for years.
Run Disk Utility First Aid on your backup drive every few months. Minor filesystem inconsistencies on the backup drive don’t always immediately cause backups to fail — they accumulate quietly until they do. A quick First Aid check every few months catches problems while they’re still minor and repairable, rather than discovering them when a backup starts failing completely.
Exclude large, cloud-synced folders from Time Machine. Files already backed up in iCloud, Dropbox, or Google Drive don’t need to be duplicated in Time Machine — they’re already protected. Excluding these folders reduces backup duration significantly and keeps the backup drive from filling up as quickly. For other ways to keep your Mac lean, see our guide on freeing up MacBook storage without deleting files.
Check the Time Machine menu bar icon regularly. The icon in the menu bar rotates when a backup is in progress and shows the last backup time when idle. A quick glance every few days tells you whether backups are running normally or have been failing silently. Many users discover a Mac Time Machine backup failed situation that’s been going on for weeks only when they check this for the first time in a while.
Consider a second backup method alongside Time Machine. Time Machine is excellent but it’s only as reliable as the drive it backs up to. A second layer — iCloud Drive for key documents, or a Finder/iTunes backup for your full Mac state — means you’re never relying on a single backup system. Our hidden Mac features guide covers several built-in backup capabilities many users don’t know about.
Common Mistakes to Avoid
A single backup failure is usually a minor hiccup. Three or more failures in a row means something specific is wrong and isn’t going to fix itself. Every day that passes without a successful backup is a day of unprotected data. Address recurring failures promptly.
Ejecting the Time Machine backup drive while a backup is in progress leaves the backup bundle in an incomplete state — this is one of the most common causes of backup corruption that then requires Fix 6 or Fix 7. Always click Stop Backup from the Time Machine menu before ejecting the drive.
Formatting the backup drive and starting fresh immediately seems like the simplest fix, but it destroys all your backup history — including potentially the only copies of files you’ve deleted in the past months or years. Always try Disk Utility First Aid and the preference file reset before reaching for the nuclear option.
Network Time Machine backups are designed for local network connections — they send large amounts of data continuously and are not suitable for cellular or mobile hotspot connections. If you’re on the road, it’s expected that network backups won’t run until you’re back on your home or office network.
FAQ: Mac Time Machine Backup Failed
Why does my Mac Time Machine backup keep failing?
The most common recurring causes of Mac Time Machine backup failed errors are: the backup disk is too small and runs out of space frequently, the drive connection is intermittent (bad cable or USB port), the backup bundle has become corrupted and needs First Aid or a fresh start, a specific file on your Mac is blocking the backup, or — for network backups — the connection to the NAS or Time Capsule is dropping. Check the Time Machine log in Console.app for the exact error and cross-reference it with the error table in this guide to identify which cause applies.
Time Machine says “Backup disk not available” — how do I fix it?
Disconnect and reconnect the backup drive, ensuring it’s connected directly to the Mac rather than through a hub. If the drive appears in Finder but Time Machine still says it’s not available, go to System Settings → General → Time Machine, remove the backup disk, and re-add it. For network drives, restart the NAS and confirm the Mac is on the same WiFi network. Also check System Settings → Energy Saver and disable “Put hard disks to sleep when possible” to prevent the drive from entering sleep mode between backups.
My Time Machine backup has been “Preparing” for hours — is this normal?
The preparation phase can legitimately take 30–90 minutes after a macOS update or when many files have changed. But if it’s been stuck for more than 2–3 hours, it’s likely stalled. Open Activity Monitor and check whether mds or mdworker is consuming very high CPU — if so, run sudo killall -KILL mds in Terminal to restart the indexing service. Then click Stop Backup in the Time Machine menu and try Back Up Now again. Also consider whether excluding large, rapidly-changing folders (like Dropbox or video project files) would reduce what Time Machine needs to prepare.
Will I lose my backup data if I restart Time Machine?
Simply removing the backup disk in System Settings and re-adding it does not delete any backup data — your existing backups remain intact on the drive. Only physically deleting the .backupbundle folder or formatting the drive removes backup data. Resetting Time Machine preferences, restarting the backup service, or running First Aid on the drive are all non-destructive operations that don’t touch your actual backup content.
How do I know if my Time Machine backup succeeded?
Look at the Time Machine menu bar icon — hover over it to see the timestamp of the last successful backup. In System Settings → General → Time Machine, the status section shows the last backup time and whether the most recent backup completed successfully. For a quick check in Terminal, run tmutil latestbackup to see the path and timestamp of the most recent successful backup. If the timestamp is more than 24 hours ago for an always-connected external drive, investigate why recent backups haven’t been running.
Mac Time Machine Backup Failed — Complete Fix Checklist
- 1Free up space on backup disk — delete old snapshots via the Time Machine interface
- 2Add large folder exclusions — reduce backup size, prevent drive filling up
- 3Fix drive connection — reconnect, try different port and cable, disable disk sleep
- 4Fix network backup issues — restart NAS, re-add drive in Time Machine settings
- 5Fix stuck “Preparing backup” — restart mds via Terminal, stop and restart backup
- 6Repair with Disk Utility First Aid — check backup volume and container for corruption
- 7Delete corrupted backup and start fresh — remove .backupbundle, re-add drive
- 8Reset Time Machine preferences — delete com.apple.TimeMachine.plist
- 9Free up internal Mac storage — need 10–15 GB free; delete local snapshots
- 10Fix backup drive permissions — use chown and chmod in Terminal
- 11Exclude problem files — identify from Console logs, add to Time Machine Options
- 12Use tmutil commands — check status, manually trigger, delete stuck snapshots
One Last Thing
A Mac Time Machine backup failed notification is always worth taking seriously and resolving the same day — not because the situation is usually catastrophic, but because data protection is only useful when it’s current. Working through this checklist from the top takes less time than it feels like it should, and the majority of Mac Time Machine backup failed situations are resolved by one of the first five fixes. If the drive needs replacement or the backup needs to start fresh, those are recoverable situations — the only genuinely bad outcome is discovering a Mac Time Machine backup failed weeks ago right when you need to restore something.
The CrazyErrors team is happy to help if you’re seeing a specific error message not covered here — share the exact wording from the Time Machine notification or the Console log, and we can usually identify the cause quickly.
Wrapping Up
Time Machine backup failures have a reputation for being mysterious and hard to diagnose, but the actual causes are a fairly short list — a full drive, a connection issue, a corrupted backup bundle, or a permission problem — and every one of them is fixable. The error message and the Console log narrow it down to one or two likely causes, and the fixes in this guide address each one methodically without unnecessary steps.
Get the backup running again, confirm it completes successfully, and then take five minutes to set things up in a way that prevents it from failing again — a larger backup drive, appropriate folder exclusions, and a regular check of that Time Machine menu bar icon are all it takes to keep your backup protection reliable long-term.
ⓘ Disclaimer: This article is for informational purposes only. CrazyErrors is not affiliated with Apple Inc. Terminal commands should be followed carefully as written. Deleting backup data is permanent and irreversible — always confirm you have copies of important files before removing any backup. For official Apple Time Machine support, visit support.apple.com/en-us/104984.