
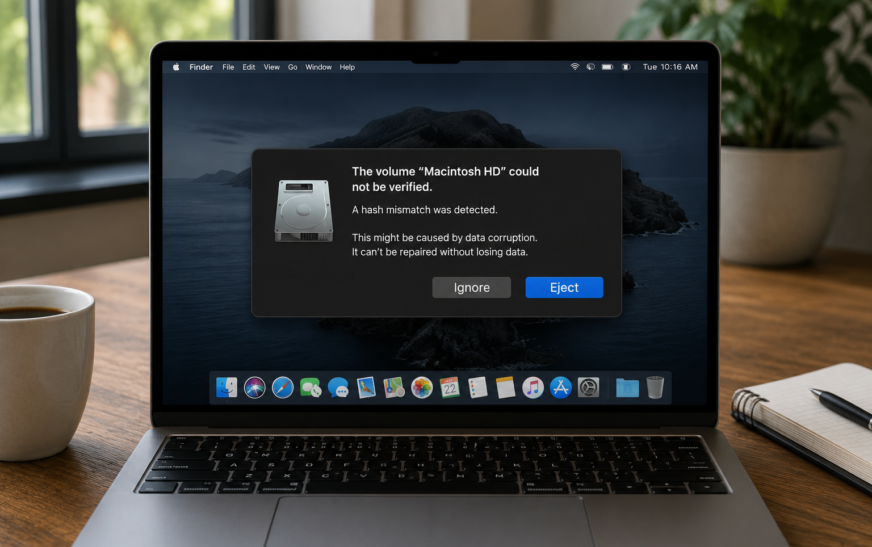
A “Volume Hash Mismatch” error on Mac means macOS detected that a stored checksum value for part of your APFS volume doesn’t match the actual data — a sign of filesystem-level inconsistency. In most cases no data is lost. The fastest safe fix is to run Disk Utility → First Aid on the affected volume. If that doesn’t resolve it, booting into Recovery Mode and running First Aid from there (where the startup disk can be unmounted) is the next step. Deleting orphaned APFS snapshots via Terminal is the fix for cases where First Aid finds no errors but the mismatch persists.
You open Disk Utility, run First Aid, or see an alert from macOS — and somewhere in the output you spot the words “volume hash mismatch.” Your stomach drops. It sounds catastrophic. Hash mismatch, integrity failure, checksum error — these are the kinds of phrases that make you wonder whether your entire drive just failed.
The reality is much less dramatic in most cases. APFS — Apple’s file system used on all modern Macs — continuously verifies the integrity of data stored on your drive using cryptographic checksums called hashes. When it finds a value that doesn’t match what it expects, it reports a hash mismatch. This can mean the data genuinely changed without macOS knowing — but more commonly on Macs running macOS Tahoe and other recent versions, it means a snapshot or system file got into an inconsistent state that can be repaired without touching any of your actual documents, photos, or apps.
This guide explains exactly what the error means, why it happens, and how to fix it without losing your data — working through safe options first and progressively to more thorough recovery steps only if needed.
Before Anything Else: Back Up Right Now
Do Not Skip This StepIf your Mac is still booting and you can access it, create a backup before applying any fix. This is not optional advice — it is the most important action in this entire guide.
A volume hash mismatch error means there is something anomalous about your filesystem’s integrity. Even though data loss is not common with this specific error, any filesystem repair operation carries a small risk. Protect yourself before you start.
If the hash mismatch is causing your Mac to fail to start up, do not attempt any fix that could alter the drive before recovering your data. The safest path is to connect your Mac to another Mac in Target Disk Mode and copy your critical files first, then proceed with repair. Data recovery is always the priority over fixing the error.
What Does “Volume Hash Mismatch” Actually Mean?
Understanding the ErrorTo understand what you’re dealing with, a little context on how APFS works is helpful.
APFS uses a technology called data integrity verification. When files and filesystem structures are written to your drive, APFS computes a cryptographic hash — a short fingerprint of the data’s content. These hashes are stored alongside the data. When the data is read later, APFS recomputes the hash and compares it to the stored value. If they match, the data is intact. If they don’t match, a hash mismatch is reported.
A mismatch can mean several things, from most benign to most serious:
- An APFS snapshot became inconsistent — macOS and Time Machine create snapshots (point-in-time copies) regularly. If a snapshot is left in an incomplete or orphaned state — common after unexpected shutdowns, power interruptions, or interrupted macOS updates — its hash records don’t match the current filesystem state. This is the most common cause and is usually fixable without any data loss.
- Filesystem metadata corruption — The structures APFS uses to track where files are stored (B-trees, extent records) can become inconsistent after interrupted write operations. This is more serious but still often repairable by First Aid.
- Physical hardware issue — Rarely, a failing SSD can write incorrect data, causing hash mismatches that point to a hardware problem rather than a software one. This is the most serious scenario and requires urgent data recovery.
The “volume hash mismatch” error can appear in several places: in Disk Utility after running First Aid, in the macOS Console log, during a Time Machine backup that fails with a cryptic error, during a macOS update that fails partway through, or at startup when macOS’s own integrity check flags an issue. Each context points to slightly different causes but the fixes are largely the same.
Fix 1: Run First Aid in Disk Utility
Start Here — Safe and Non-DestructiveDisk Utility’s First Aid is Apple’s built-in filesystem repair tool. It checks the APFS volume structure, verifies metadata, repairs inconsistencies it can fix automatically, and reports anything beyond its scope. For hash mismatch errors caused by snapshot inconsistencies or minor filesystem issues, First Aid often resolves the problem completely in a single pass.
- ✅ “The volume was repaired successfully” — the error was fixed, monitor for recurrence
- ⚠ “Errors were found but could not be repaired” — the issue is beyond what First Aid can fix while the volume is mounted; continue to Fix 2
- ✅ “No errors found” — the mismatch may have been a one-time transient event; restart and monitor
When you run First Aid on your Mac’s startup disk (the disk the Mac is currently running from), it performs a limited check because the volume is actively in use. It can repair some issues but not all. For a thorough repair, you need to run First Aid from Recovery Mode, where the startup disk is unmounted and accessible for full repair — that’s Fix 2.
Fix 2: Run First Aid From Recovery Mode
More Thorough — Works on Unmounted VolumeRunning First Aid from Recovery Mode is significantly more effective than running it from the normal macOS desktop. Because macOS itself is not running from the startup disk in Recovery Mode, the disk can be accessed in a fully unmounted state — allowing First Aid to repair structures that it cannot safely touch when the disk is in active use.
Boot Into Recovery Mode
Apple Silicon Macs (M1/M2/M3/M4):
Intel Macs:
Run First Aid in Recovery Mode
It’s a well-known Mac troubleshooting practice to run First Aid twice on a problem volume. The first pass repairs issues it can reach. Occasionally, those repairs reveal additional inconsistencies that the second pass can then address. If the first run reports it repaired something, run it again before concluding the fix is complete.
Fix 3: Run fsck From Recovery Mode Terminal
More Thorough Than First Aid GUIfsck_apfs is the command-line filesystem checker for APFS — the same underlying tool that First Aid calls, but accessible with more control and more verbose output. Running it manually in Terminal from Recovery Mode gives you the ability to see exactly what’s being checked and repaired, which can be valuable when First Aid’s summary output isn’t telling you enough.
diskutil listdisk1s1 or disk3s1. Note the identifier for the volume labelled “Macintosh HD” or whatever your startup disk is namedfsck_apfs -y /dev/disk1s1disk1s1 with your actual volume identifier from the previous step
-y flag tells fsck to automatically answer “yes” to any repair prompts. Watch the output — it will report each check performed and any repairs madeIn addition to checking the volume (disk1s1), also run fsck on the container itself (disk1 — the number without the “s” and slice number). APFS container-level metadata is separate from volume metadata and hash mismatches can exist at either level. Run:
fsck_apfs -y /dev/disk1
This checks the container-level structures independently of the volume content.
Fix 4: Delete Orphaned APFS Snapshots
Fix for Persistent Mismatch After Successful First AidOne of the most common causes of volume hash mismatch errors that survive First Aid is an orphaned or incomplete APFS snapshot. macOS and Time Machine create APFS snapshots regularly — Time Machine uses them for local backups, and macOS creates them before updates. An interrupted update or a Time Machine session that didn’t complete cleanly can leave a snapshot in a state where its stored hash values don’t match the current volume data.
First Aid sometimes can’t automatically resolve this because it involves deleting a snapshot, which it treats conservatively to avoid removing data that might be needed for recovery. The Terminal commands below let you safely list and remove these orphaned snapshots.
tmutil listlocalsnapshots /com.apple.TimeMachine.2024-11-15-082031.local
com.apple.TimeMachine.2025-01-03-194512.localdiskutil apfs listSnapshots disk1s1disk1s1 with your actual volume identifier
sudo tmutil deletelocalsnapshots /sudo tmutil deletelocalsnapshots [DATE]2025-01-03-194512)
Local APFS snapshots are not the same as your Time Machine backup on an external drive. Deleting local snapshots removes the versions of your data stored locally on your Mac’s internal drive — used by Time Machine to restore recent versions when your external backup drive isn’t connected. Your actual Time Machine backup on the external drive is completely unaffected. After deleting local snapshots, plug in your Time Machine drive to create a fresh backup.
Fix 5: Check the macOS Sealed System Volume
For Hash Mismatches on System Volume SpecificallySince macOS Big Sur, Apple uses a concept called the Sealed System Volume (SSV) — a cryptographically sealed, read-only copy of macOS itself, separate from your data volume. The SSV has its own hash tree, and a mismatch on this volume specifically means something has changed in macOS’s own system files, which should never happen in normal operation.
A hash mismatch specifically on the SSV is a more serious finding because it suggests either a partial macOS update, a software modification, or hardware-level data corruption in the system area of the drive.
diskutil apfs listSnapshots disk1s1com.apple.os.update-* — this is the sealed system snapshot
When you choose “Reinstall macOS” from Recovery Mode — as opposed to “Erase Mac” or a full restore — macOS reinstalls its own system files (the System Volume) while leaving your data, applications, and user settings completely untouched. This is fundamentally different from a factory reset. Your files are in a separate APFS volume (the Data Volume) and the reinstall process does not touch them.
Fix 6: Use Time Machine to Restore to Before the Error
If First Aid Cannot Repair and Data Appears AffectedIf First Aid runs successfully but reports that some filesystem structures couldn’t be repaired, or if you’ve noticed any files that appear corrupted or missing, restoring from a Time Machine backup made before the hash mismatch error appeared is the safest path to a known-good state.
A Time Machine restore replaces all current content on your startup disk with the content from the selected backup point. Any files created or changes made since that backup will be lost. Before restoring, if your Mac is still functional, copy any recently created or modified files that matter to you to a separate external drive — not the Time Machine drive — so they’re preserved through the restore process.
Fix 7: Reinstall macOS While Keeping Data
Best Option When First Aid Fails but Mac Still WorksIf Disk Utility First Aid cannot fully resolve the hash mismatch and your Mac is still functional, reinstalling macOS from Recovery Mode is the cleanest fix that doesn’t require restoring from a backup. It rewrites all macOS system files from scratch, rebuilds the Sealed System Volume and its hash tree, and fixes many kinds of filesystem inconsistencies — all without touching your applications, documents, photos, or settings.
Recovery Mode typically reinstalls the macOS version that was on your Mac when you entered Recovery Mode, downloading from Apple’s servers. Make sure you have a stable internet connection before starting. If you want to reinstall the same version of macOS without downloading it, and you have a bootable macOS installer created on a USB drive, you can use that instead.
Fix 8: Check for Underlying Hardware Problems
If the Error Returns After RepairsIf you’ve run First Aid, deleted snapshots, and possibly reinstalled macOS — and the volume hash mismatch keeps coming back — the error is almost certainly being caused by a hardware issue rather than a software one. A failing SSD can write incorrect data that causes persistent hash mismatches that software repair can temporarily fix but not permanently prevent.
If First Aid reports a hash mismatch, you repair it, and it comes back within days or weeks — treat this as a strong warning sign of hardware degradation. Back up everything immediately, stop using the Mac for any work that generates new data you can’t afford to lose, and have the drive inspected or replaced. A failing SSD in a Mac is not repairable through software.
Pro Tips: Preventing Volume Hash Mismatch Errors
Always back up before a macOS update. A significant portion of hash mismatch errors occur during or immediately after a macOS update — a power interruption, unexpected shutdown, or update failure can leave the filesystem in an inconsistent state. Having a fresh backup before every major update means you have a clean restore point if the update goes wrong.
Don’t interrupt your Mac during updates or First Aid. Both macOS updates and First Aid repair sessions involve writing to filesystem metadata. Interrupting either process — by force-shutting down, letting the battery die, or pulling a power cable — is one of the most reliable ways to create a hash mismatch. Always run these on AC power or with a full battery.
Run First Aid from Disk Utility periodically as preventive maintenance. Running First Aid every few months gives you early warning of filesystem inconsistencies before they become serious problems. A hash mismatch caught early is far easier to repair than one that’s been silently compounding for months. Make it part of your regular Mac maintenance alongside clearing storage space — see our guide on freeing up MacBook storage without deleting files for complementary maintenance steps.
Keep Time Machine backing up reliably. Time Machine local snapshots are specifically what get used by fsck_apfs to reconstruct consistent filesystem states after errors. An up-to-date Time Machine backup also gives you a clean recovery option if a hash mismatch escalates into something First Aid can’t repair.
Don’t force-shutdown your Mac. Holding the power button for 10 seconds to force a shutdown is sometimes necessary, but every forced shutdown is an uncontrolled interruption of whatever the operating system was writing to disk at that moment. Use proper shutdown through the Apple menu wherever possible, and when force-shutting down is unavoidable, run First Aid afterward as a precaution.
Common Mistakes to Avoid
Every fix in this guide — including First Aid — modifies the filesystem. Most of the time these modifications repair the problem. Occasionally they can worsen an already-compromised filesystem state. Backup first, repair second. This is not optional when your filesystem has been flagged as inconsistent.
First Aid from the normal macOS desktop can only do a limited repair on the startup disk because that disk is in use. The Recovery Mode version has full access to the unmounted volume and consistently fixes issues that the desktop version reports as “could not be repaired.” If First Aid from the desktop says it can’t repair something, Recovery Mode First Aid is always the next step — not skipping ahead to reinstall or erase.
A hash mismatch that appears, gets repaired, and then returns within a short period is not a software issue being poorly fixed — it’s almost certainly a symptom of failing hardware. A software-cause hash mismatch stays repaired. A hardware-cause one comes back because the underlying storage is writing data incorrectly. Act on a recurring error urgently.
From Recovery Mode, both options exist and both are irreversible once confirmed — but they are completely different operations. “Reinstall macOS” keeps all your data and only replaces system files. “Erase Mac” (or erasing the drive first) removes everything. Always double-check which option you’re clicking before confirming any action in Recovery Mode.
FAQ: Mac Volume Hash Mismatch Error
What does “volume hash mismatch” mean on a Mac?
A volume hash mismatch means APFS (Apple’s file system) detected that a stored checksum value for part of your drive’s data doesn’t match the actual data. APFS continuously verifies data integrity using cryptographic hashes, and this error is its way of flagging an inconsistency. The most common cause is an orphaned or incomplete APFS snapshot — particularly from an interrupted Time Machine backup or a partial macOS update — rather than actual data corruption or hardware failure. Running First Aid in Disk Utility or from Recovery Mode resolves the majority of cases.
Will I lose data because of a volume hash mismatch error?
In most cases, no. The volume hash mismatch error most commonly affects filesystem metadata and APFS snapshots rather than your actual files. Your documents, photos, and applications are typically completely intact even when this error is present. That said, always back up before attempting any repair — there is a small risk in any filesystem repair operation, and having a backup means you’re protected regardless of what happens during the fix.
Can First Aid fix a volume hash mismatch?
Yes, in many cases. First Aid from Disk Utility in Recovery Mode is the most effective single step for this error — it checks APFS metadata, verifies the container and volume structures, and repairs inconsistencies it can reach. Running it while the startup disk is unmounted (possible only from Recovery Mode) gives it full access to make repairs. If First Aid reports “No errors found” but the mismatch persists, deleting orphaned APFS snapshots via Terminal is the next step.
Why does the volume hash mismatch keep coming back after I fix it?
A hash mismatch that returns after being repaired is a significant warning sign. Software-cause hash mismatches — from orphaned snapshots or interrupted writes — typically stay fixed after First Aid or snapshot deletion. A mismatch that keeps returning points to hardware writing incorrect data, which is a sign of a failing SSD. Run Apple Diagnostics to check for hardware errors, back up everything immediately, and have the drive inspected if diagnostics confirm an SSD issue.
Does reinstalling macOS fix a volume hash mismatch without deleting my files?
Yes. Reinstalling macOS from Recovery Mode rewrites all macOS system files and rebuilds the Sealed System Volume with its hash tree, but leaves your data, applications, and settings completely untouched. This is because macOS stores its system files on a separate, sealed APFS volume that’s entirely distinct from where your personal data lives. Reinstalling resolves hash mismatches in the system area of the drive without any risk to your documents or photos.
Volume Hash Mismatch Error — Fix Checklist
- 1Back up immediately — Time Machine or manual copy of critical files before any repair
- 2Run First Aid in Disk Utility — from the desktop, select the APFS Container
- 3Run First Aid from Recovery Mode — more thorough, works on unmounted volume
- 4Run fsck_apfs in Terminal — from Recovery Mode for maximum repair control
- 5Delete orphaned APFS snapshots — via
tmutil deletelocalsnapshots /in Terminal - 6Check the Sealed System Volume — if mismatch is on the system volume specifically
- 7Restore from Time Machine — if First Aid can’t repair and data appears affected
- 8Reinstall macOS — from Recovery Mode, keeps all data, fixes system volume hash
- 9Run Apple Diagnostics — if mismatch recurs, to check for hardware fault
One Last Thing
If you’ve worked through this guide and the hash mismatch keeps returning, or if Apple Diagnostics returns an SSD-related error code, please act quickly. A recurring hash mismatch with hardware involvement is a warning that can escalate — the window for clean data recovery is much wider when you act early than when you wait until the drive fails completely.
The CrazyErrors team is here if you need help interpreting what Disk Utility or fsck_apfs reported, or if you’re not sure whether your specific error output indicates a software or hardware cause — the exact wording of the error matters, and we’re happy to help you make sense of it.
Wrapping Up
A volume hash mismatch on your Mac looks frightening but resolves safely in the majority of cases. Orphaned APFS snapshots and interrupted filesystem operations are the most common cause — both of which First Aid in Recovery Mode and snapshot deletion handle cleanly without touching your data.
Backup first. Run First Aid from Recovery Mode. If that doesn’t fully resolve it, delete local snapshots and run First Aid again. If the mismatch returns after repair, take it seriously as a potential hardware warning. In all other cases, your files almost certainly remain intact throughout this entire process.
ⓘ Disclaimer: This article is for informational purposes only. CrazyErrors is not affiliated with Apple Inc. Terminal commands and filesystem repair operations should be followed carefully as described — incorrect use can result in data loss. Always back up data before performing any disk repair. For official Apple support and hardware diagnostics, visit support.apple.com.