
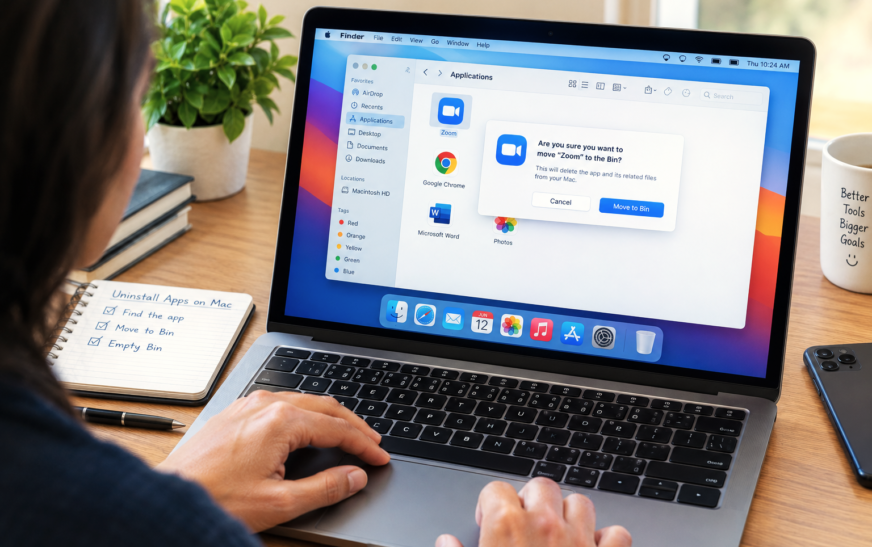
To delete or uninstall apps on Mac, the fastest methods are: open Launchpad, click and hold any app icon until they wiggle, then click the X on the app you want to remove (works for App Store apps); or open Finder → Applications, right-click the app, and select Move to Trash, then empty the Trash. For a complete removal that also deletes leftover preference files and caches, use the free tool AppCleaner — drag the app onto AppCleaner’s window and it finds and removes all associated files in one step. Some apps like Adobe Creative Cloud, Microsoft Office, and Parallels require their own dedicated uninstallers rather than the standard drag-to-trash method.
Knowing how to delete or uninstall apps on Mac completely — not just drag them to the Trash — is one of the most useful Mac maintenance skills you can have. Hundreds of megabytes of cache files, preferences, logs, and support data accumulate from apps you installed years ago and forgot about, taking up space you didn’t know you were losing.
Unlike Windows, macOS doesn’t have a centralised Add/Remove Programs panel. There’s no single place to see everything installed and remove it cleanly. Instead, there are several methods — each suited to different types of apps — and the standard “drag to Trash” method most users know leaves behind a collection of support files in hidden Library folders that macOS never cleans up automatically.
This guide covers every method available, when to use each one, how to find and delete the leftover files that survive a standard uninstall, which apps need their own dedicated uninstallers, and which system apps cannot be removed at all.
Why Dragging an App to the Trash Isn’t Always a Complete Uninstall
Understanding What Gets Left BehindWhen you drag an app to the Trash on Mac, you delete the application bundle — the .app package that lives in your Applications folder. That single file can be anywhere from a few megabytes to several gigabytes, and removing it does immediately free that space.
What it doesn’t remove are the supporting files macOS stores in hidden system and user Library folders. These include:
| File Type | Location | Typical Size |
|---|---|---|
| Preferences (.plist files) | ~/Library/Preferences/ |
A few KB each |
| Application Support (data, licenses, saved state) | ~/Library/Application Support/ |
MB to several GB |
| Caches (temporary data) | ~/Library/Caches/ |
MB to several GB |
| Logs | ~/Library/Logs/ |
A few MB |
| Containers (sandboxed app data) | ~/Library/Containers/ |
MB to GB |
| Application Scripts | ~/Library/Application Scripts/ |
Small |
| Saved Application State | ~/Library/Saved Application State/ |
Small to MB |
| System-level support files | /Library/Application Support/ |
Varies by app |
| Launch Agents/Daemons (startup processes) | /Library/LaunchAgents//Library/LaunchDaemons/ |
Small — but keeps processes running |
For a lightweight utility app, these leftovers might be 5–10 MB — inconsequential. For creative suites, cloud storage apps, productivity platforms, and development tools, leftover data can reach several gigabytes. The leftover Launch Agents and Daemons are particularly notable — they can keep background processes running after an app is “deleted,” slowing the Mac down and consuming CPU even though the app is gone.
Throughout this guide, paths starting with ~ (tilde) refer to your personal home folder — the one named after your Mac username, usually at /Users/yourname/. So ~/Library/Preferences means /Users/yourname/Library/Preferences. The Library folder is hidden by default. To access it quickly: in Finder, click the Go menu in the menu bar and hold the Option key — Library appears in the menu.
Which Method Should You Use? — Quick Reference
Match Your App Type to the Right Removal Method📦 App Store app (downloaded from Mac App Store)
Use Method 1 (Launchpad) — the X button method works cleanly for App Store apps and removes the app and its sandboxed container in one step. Method 2 (Finder drag to Trash) also works but may leave minor supporting files.
💾 Standard third-party app (downloaded from developer’s website)
Use Method 2 (Finder drag to Trash) to remove the app, followed by Method 5 (AppCleaner) or Method 4 (manual Library cleanup) to remove leftover files. This two-step combination ensures a complete removal.
🖨️ Adobe, Microsoft Office, Parallels, or another app that includes an uninstaller
Use Method 3 (dedicated uninstaller) — these apps install deeply into multiple system locations and their own uninstallers are the only reliable way to remove them completely. Dragging to Trash leaves significant amounts of data behind.
🔒 App that won’t move to Trash — “app is open” or permission error
Use Method 6 (Terminal) — the sudo rm -rf command bypasses Finder restrictions and removes the app regardless of whether a background process thinks it’s still running.
🧹 Want to remove an app AND all its leftover files in one step
Use Method 5 (AppCleaner) — the fastest way to get a complete, clean removal in a single drag-and-drop operation with a visual confirmation of everything being deleted.
Method 1: Delete Apps From Launchpad Best for App Store Apps
Quickest Method — Works Exactly Like iPhone and iPadLaunchpad on Mac works identically to the iPhone home screen for deleting App Store apps — click and hold until apps wiggle, then click the X. This method works specifically for apps downloaded from the Mac App Store and gives you the most complete removal for those apps because macOS also removes the app’s sandboxed data container automatically.
When you delete an App Store app via Launchpad, macOS also removes the app’s sandboxed container in ~/Library/Containers/ — which can be the largest leftover data store for some apps. This makes the Launchpad method more thorough than simply dragging the same app’s icon to the Trash from the Applications folder.
Method 2: Delete Apps From Finder’s Applications Folder Most Versatile
Works for All App Types — The Standard Uninstall MethodThe Applications folder in Finder is where every installed Mac application lives. Deleting an app from here removes the application itself — the main executable and all its bundled resources. This works for every app regardless of whether it came from the App Store or was downloaded directly from a developer’s website. For many lightweight apps, this is sufficient; for heavier apps, follow up with Method 4 or Method 5 to remove leftover files.
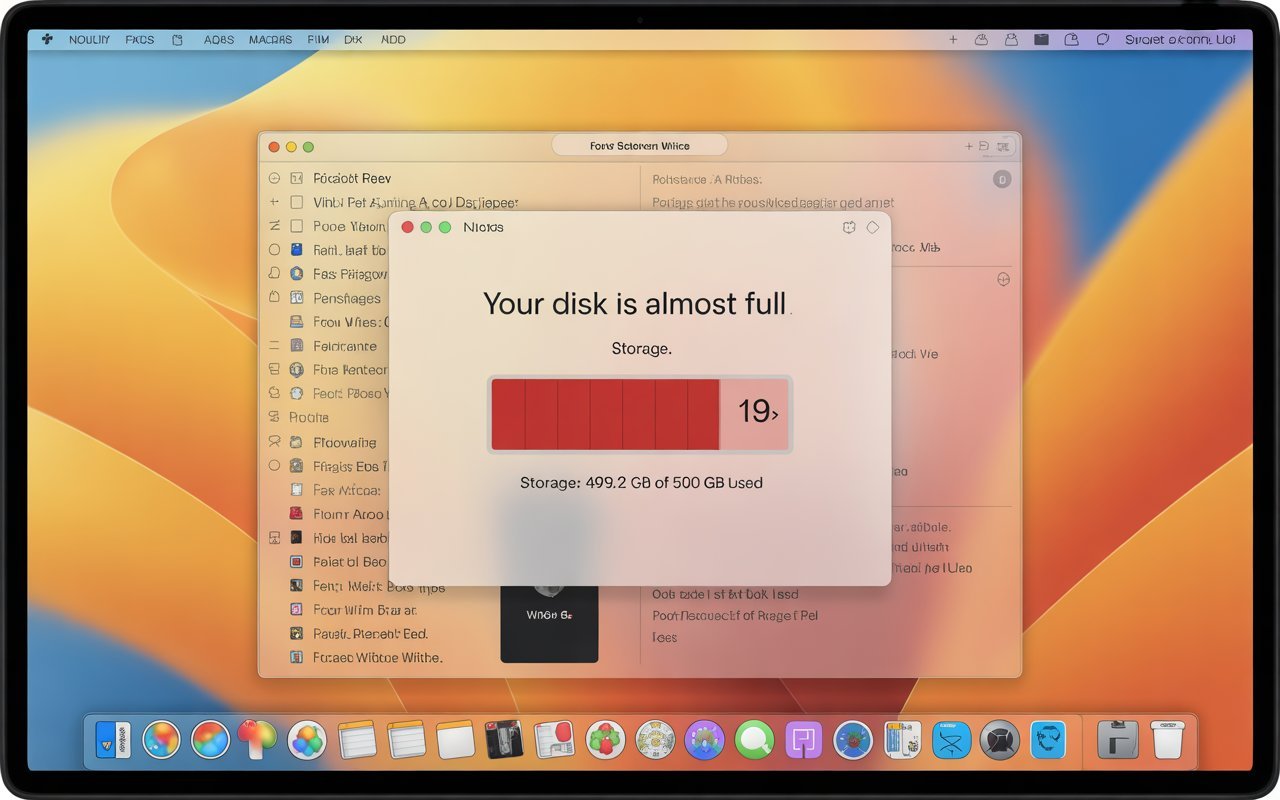
An app in the Trash still occupies disk space — the file is marked for deletion but not yet removed. If you’re trying to free up space on a nearly full Mac, emptying the Trash after moving apps to it is essential. A common mistake is moving several large apps to the Trash and wondering why storage hasn’t improved, only to find 20 GB sitting in an unemptied Trash.
Most Mac apps appear as a single icon in the Applications folder, but some apps — particularly those that include multiple components, plugins, or helper utilities — install as a folder containing several files. If you see a folder with the app’s name rather than a single icon, the entire folder needs to be moved to Trash to remove all of it. Examples include some music software suites, developer tools, and creative applications.
Method 3: Use the App’s Own Uninstaller Required for These Apps
Mandatory for Adobe, Microsoft, Parallels, and Similar Heavy AppsCertain applications install far more than a single .app file — they install kernel extensions, system frameworks, browser plugins, helper tools in /Library, and sometimes modify system files. For these apps, simply dragging to Trash leaves a large amount of data behind and can sometimes leave background processes running indefinitely. Their own uninstallers are the only reliable way to get a clean removal.
Apps that require their own uninstaller:
- Adobe Creative Cloud apps (Photoshop, Premiere, Illustrator, etc.) — use the Creative Cloud desktop app to uninstall each individual Adobe app
- Microsoft Office for Mac — Microsoft provides a dedicated Office Removal Tool
- Parallels Desktop — includes a built-in uninstaller accessible from the application itself
- VMware Fusion — drag to Trash removes the app but a cleanup tool handles the system files
- Antivirus software (Norton, McAfee, Avast, Bitdefender) — always use their own uninstallers; dragging antivirus software to Trash almost never removes the kernel extensions and background daemons they install
- Dropbox, Google Drive, OneDrive — have their own clean removal processes to disconnect the sync engine correctly
- Cisco VPN client and similar networking tools — install kernel extensions that require their own removal scripts
How to find and use the built-in uninstaller:
.dmg or installer package from when you first installed the app, mount it and look for an uninstaller optionAntivirus and security applications on Mac install kernel extensions — deep system components that run before the OS fully loads. Dragging these apps to the Trash removes the interface but leaves the kernel extension active. This can cause performance issues, kernel panics, and conflicts with other security software. Every major antivirus vendor provides an uninstaller specifically to handle the kernel extension removal — always use it rather than the Trash method.
Method 4: Use AppCleaner for a Complete One-Step Removal Recommended
The Best Free Tool for a Thorough, Safe UninstallAppCleaner is a free, lightweight Mac utility that finds all the files associated with any app — the application bundle plus every preference file, cache, log, container, and support file — and presents them in a list so you can review and delete them all at once. It’s the most practical tool for users who want complete app removal without navigating hidden Library folders manually, and without paying for a premium utility like CleanMyMac.
Paid utilities like CleanMyMac X cost $40–100/year and bundle app removal with many other features. AppCleaner does the app removal part — the most important part — for free, and does it just as thoroughly. For users who primarily want clean app uninstalls without paying for a subscription, AppCleaner handles the job completely. The paid tools add value if you want a comprehensive Mac maintenance suite including malware detection, memory optimisation, and startup item management — but for uninstalling apps alone, AppCleaner is the best tool available.
Method 5: Manually Delete Leftover Files From Library Folders Advanced
For Complete Control Over What Gets RemovedIf you prefer not to use a third-party tool like AppCleaner, you can manually find and delete leftover files after moving an app to the Trash. This requires navigating to hidden Library folders — which macOS hides by default — and searching for folders named after the app or its developer. It takes a few extra minutes but gives you complete visibility and control over every file being deleted.
Step 1: Access the hidden Library folder
~/Library folder in FinderStep 2: Search these folders for the app’s leftovers
In each of the following locations, look for folders or files named after the app or its developer. Delete any you find by right-clicking and selecting Move to Trash:
~/Library/Caches/[App Name or developer bundle ID]
~/Library/Preferences/com.[developer].[appname].plist
~/Library/Logs/[App Name]
~/Library/Containers/com.[developer].[appname]
~/Library/Application Scripts/com.[developer].[appname]
~/Library/Saved Application State/com.[developer].[appname].savedState
/Library:
/Library/LaunchAgents/com.[developer].[appname].plist
/Library/LaunchDaemons/com.[developer].[appname].plist
The Library folders contain critical files for macOS and every application on your Mac. Never delete anything in Library that you don’t specifically identify as belonging to the app you’re uninstalling. Deleting the wrong preference files or application support data can break other applications. When in doubt, use AppCleaner (Method 4) rather than manually searching Library folders — AppCleaner’s matching algorithm is more precise than a manual search.
Method 6: Force Delete Apps Using Terminal Advanced
For Apps That Won’t Move to Trash — Requires Admin PasswordOccasionally the Finder refuses to move an app to the Trash — showing “The operation can’t be completed because the item is in use” even after quitting the app, or requiring administrator permissions that a standard drag-to-Trash doesn’t provide. Terminal’s rm command bypasses these restrictions and removes the application directly at the filesystem level.
sudo prefix grants administrator permissions and -rf removes the app and all its contents recursively:
sudo rm -rf sudo rm -rf /Applications/AppName.appThe sudo rm -rf command permanently deletes files with no Trash and no undo. Always use the drag-into-Terminal method to fill in the path rather than typing it manually — this prevents typos that could delete the wrong application. The command shown above targets /Applications/AppName.app specifically. Never modify the path to target a broader location like /Applications/ (which would delete every app on your Mac) or / (which would delete everything).
Method 7: Remove Login Items and Background Processes Often Forgotten
Stops Deleted Apps From Running in the Background After RemovalMany apps add themselves to the Mac’s startup sequence — as Login Items (apps that launch when you log in) or as background agents and daemons (processes that run continuously in the background). When you delete an app without cleaning up these entries, macOS tries to launch the now-missing app every time you log in and may display error messages or consume CPU searching for files that no longer exist. Cleaning these up is the most commonly skipped step in a thorough app removal.
Remove Login Items in macOS Tahoe / Ventura and later:
Remove LaunchAgent and LaunchDaemon files (leftover background processes):
~/Library/LaunchAgents/ and look for any .plist files with the deleted app’s name or the developer’s name. Move them to the Trash/Library/LaunchAgents/ and /Library/LaunchDaemons/ (the system-level versions) — these require administrator permission to deleteEvery Login Item adds startup time when you log into your Mac. A Mac that takes 30+ seconds to become responsive after login often has 10–15 Login Items queued up — many from apps installed years ago. Reviewing System Settings → General → Login Items even without deleting any apps is a worthwhile maintenance step. Removing items for apps you no longer use frequently results in noticeably faster Mac startup.
Method 8: Remove Browser Extensions and System Settings Panes Final Cleanup
Removes App Remnants That Survive All Other Deletion MethodsSome applications install components outside the Applications folder — browser extensions that add capabilities to Safari, Chrome, or Firefox, and System Settings panes that add controls to macOS’s preferences. These don’t get removed by any of the previous methods and require specific removal steps in the browser and System Settings separately.
Remove Safari Extensions:
Remove Chrome Extensions:
chrome://extensions in the address barRemove System Settings Panes (older preference panes):
.prefPane files: navigate to ~/Library/PreferencePanes/ and delete any that belong to apps you’ve removedApps You Cannot Delete — Built-In macOS Apps
Know Which Apps Are System-Protected Before Trying to Remove ThemmacOS protects a set of built-in system applications from deletion. These apps are part of the macOS installation and are protected by System Integrity Protection (SIP) — a security feature that prevents even administrator users from deleting or modifying them. Attempting to move them to the Trash produces a “This item is required by macOS” error, or they simply don’t respond to deletion attempts.
| App | Can Be Removed? | Notes |
|---|---|---|
| Safari | No — SIP protected | Can be hidden from Dock but not deleted |
| No — SIP protected | Use a different email client but can’t remove Mail | |
| Messages | No — SIP protected | System app, cannot be removed |
| Maps, Weather, Stocks | No — SIP protected | Can be removed from Dock but not from system |
| App Store | No — SIP protected | Required for system updates |
| Finder | No | Core macOS component |
| FaceTime | No — SIP protected | Integrated with system calling |
| iMovie, GarageBand | Yes — removable | Pre-installed but not system-protected; can be deleted via Launchpad X button |
| Pages, Numbers, Keynote | Yes — removable | Pre-installed Apple apps; delete via Launchpad X or Finder |
iMovie and GarageBand are pre-installed on every new Mac but aren’t system-protected — they can be deleted if you don’t use them. iMovie is approximately 2.9 GB and GarageBand (with its sound library) can be 6–8 GB. If you’ve never opened either app, removing them is a straightforward way to recover substantial storage. Use the Launchpad X-button method — both show an X when you click and hold in Launchpad. They can be re-downloaded for free from the Mac App Store at any time.
After Uninstalling — Quick Post-Removal Checklist
Confirm the Removal Was CompleteAfter deleting an app by any method, run through this brief checklist to confirm the removal is complete and nothing is left behind consuming resources:
Pro Tips: Uninstalling Apps on Mac More Efficiently
Enable AppCleaner’s SmartDelete feature for automatic cleanup. Once AppCleaner is installed, enable SmartDelete in its preferences — this watches for apps being moved to the Trash and automatically offers to find and remove their associated files at the same time. You drag an app to the Trash as usual, and AppCleaner pops up immediately asking whether to also remove the support files. It turns every future app deletion into a two-click complete removal without any extra steps.
Review your Applications folder periodically — you probably have apps you forgot about. Open Finder → Applications and switch to List view (Command + 2). Sort by Date Modified — apps at the bottom with modification dates from 2020 or earlier are almost certainly ones you stopped using and forgot. Each of those is potentially 500 MB to several GB of space waiting to be recovered. A quarterly review of the Applications folder is one of the best storage maintenance habits on Mac. Our guide on freeing up MacBook storage without deleting files covers additional space recovery methods for Macs running low.
Check the Dock for apps that no longer exist in the Applications folder. After removing multiple apps, the Dock can hold icons for apps that are no longer installed — clicking these produces an error. Right-click any Dock icon and look at the Options submenu — if Show in Finder produces no result or greys out, the app is gone from Applications and its Dock icon can be removed. Right-click → Options → Remove from Dock.
Some of the biggest storage savings come from app caches, not the apps themselves. After removing heavy creative and developer apps, their cache folders in ~/Library/Caches/ can persist indefinitely and accumulate gigabytes. Xcode’s derived data alone can reach 10–20 GB. If you’ve ever had developer tools or creative suites installed and later removed them, manually checking ~/Library/Caches/ and ~/Library/Application Support/ for leftover folders is worth the few minutes it takes. Discover more hidden Mac maintenance tools in our hidden Mac features guide.
Common Mistakes to Avoid
Moving a running app to the Trash either fails with “the item is in use” error or moves the icon but leaves the process running in the background. Always quit an app before deleting it: click the app in the Dock, press Command + Q, then wait for it to disappear from the Dock before proceeding with deletion. For apps that don’t respond to Command + Q, use Activity Monitor to force-quit the process first.
Moving an app to the Trash doesn’t reclaim any storage — the files remain on disk until the Trash is emptied. This is the most common reason someone deletes several large apps and sees no change in available storage. After moving apps to the Trash, always empty it: right-click the Trash icon in the Dock and select Empty Trash, or press Shift + Command + Delete in Finder.
Apps protected by System Integrity Protection (Safari, Mail, Messages, Maps, and others) cannot be deleted by any standard method, including Terminal with sudo. Attempting it either produces an error or appears to work but the app reappears after a restart. If you want these apps out of sight, remove them from the Dock (right-click → Options → Remove from Dock) and optionally move them to a sub-folder in the Applications folder — this hides them from casual view while leaving them available to macOS when needed.
The Terminal removal method is powerful and permanent. If you type the app path incorrectly — for example, a typo that targets /Applications instead of /Applications/AppName.app — you could delete multiple or all apps on the Mac. Always use the drag-and-drop method to insert paths into Terminal rather than typing them manually, and read the complete command carefully before pressing Return.
FAQ: How to Delete or Uninstall Apps on Mac
What is the best way to completely uninstall an app on Mac?
The best way to completely uninstall an app on Mac — removing both the application and all its leftover files — is to use AppCleaner (free from freemacsoft.net). Drag the app from your Applications folder onto the AppCleaner window, review the list of associated files it finds, and click Remove to delete everything at once. This is more thorough than dragging to Trash (which leaves support files behind) and simpler than manually navigating hidden Library folders. For apps with dedicated uninstallers — Adobe Creative Cloud apps, Microsoft Office, Parallels, and antivirus software — always use the developer’s own uninstaller instead.
Why is there no Add/Remove Programs on Mac like Windows?
Mac uses a different application architecture than Windows. Most Mac apps are self-contained bundles — a single .app file containing everything the app needs to run. This design means no installation “registry” entry is created when you install most apps, so there’s nothing for a centralised uninstall panel to track. The tradeoff is that supporting files (preferences, caches, application support data) are stored separately in Library folders and don’t automatically get cleaned up when the app bundle is deleted. This is why third-party tools like AppCleaner exist — to do the cleanup that macOS’s simple drag-to-Trash method doesn’t handle.
How do I uninstall an app on Mac that won’t move to Trash?
When an app on Mac won’t move to Trash, the most common causes are: the app is still running (quit it first with Command + Q, or force-quit via Activity Monitor), or the deletion requires administrator permission. For the permission issue: right-click the app in the Applications folder, select Move to Trash, and enter your Mac administrator password when prompted. If this still fails, use Terminal: open Terminal, type sudo rm -rf (with a space at the end), drag the app from Finder into the Terminal window to fill in the path, then press Return and enter your password.
Does deleting an app on Mac free up storage immediately?
No — moving an app to the Trash on Mac doesn’t free storage immediately. The file is moved to the Trash folder but remains on disk until you empty the Trash. After moving apps to the Trash, right-click the Trash icon in the Dock and select Empty Trash (or press Shift + Command + Delete in Finder) to actually reclaim the space. You can verify the storage was freed by checking System Settings → General → Storage — the available space should increase by approximately the app’s size after emptying the Trash.
How do I delete app leftover files on Mac after uninstalling?
To delete leftover files after uninstalling an app on Mac, the fastest method is to use AppCleaner before the deletion — it finds and removes all associated files in one step. If you’ve already deleted the app, open Finder, click Go in the menu bar while holding Option to reveal the Library option, and navigate to ~/Library/Application Support/, ~/Library/Caches/, and ~/Library/Preferences/. Search each folder for any items named after the removed app or its developer and move them to the Trash. Also check ~/Library/Containers/ for sandboxed app data, which can be the largest leftover for App Store apps.
How do I uninstall Adobe apps on Mac?
To uninstall Adobe apps on Mac, use the Adobe Creative Cloud desktop application — do not drag Adobe apps to the Trash directly. Open the Creative Cloud app, click the Apps section, find the app you want to remove, click the three-dot menu icon next to it, and select Uninstall. This removes the application and all its associated components correctly. Dragging an Adobe app to the Trash leaves large amounts of data behind in /Library/Application Support/Adobe/ and other locations, and sometimes causes issues with other Adobe apps. If the Creative Cloud desktop app is also being removed, Adobe provides a dedicated CC Cleaner Tool downloadable from their support page.
How to Delete or Uninstall Apps on Mac — All 8 Methods at a Glance
- 1Launchpad (App Store apps) — click and hold icon until wiggle; click X; confirm Delete; best method for App Store apps
- 2Finder Applications folder — right-click app; Move to Trash (or Command + Delete); empty Trash to free space
- 3App’s own uninstaller — required for Adobe, Microsoft Office, Parallels, antivirus; check the app folder or developer website
- 4AppCleaner — free tool from freemacsoft.net; drag app onto window; review file list; click Remove for complete one-step uninstall
- 5Manual Library cleanup — Go → Hold Option → Library; search ~/Library/Application Support, Caches, Preferences, Containers, Logs for app name; move to Trash
- 6Terminal force delete — type
sudo rm -rf; drag app into Terminal for path; press Return; enter password; permanent and immediate - 7Remove Login Items and background processes — System Settings → General → Login Items; remove app entries; also clean LaunchAgents folders
- 8Remove browser extensions and Settings panes — Safari/Chrome extension settings; right-click System Settings panes; check ~/Library/PreferencePanes
One Last Thing
Deleting apps on Mac is genuinely simple once you know which method to use for which type of app. For everyday third-party apps, Method 4 (AppCleaner) handles everything in two clicks and is the one method worth installing regardless of which other methods you use. For App Store apps, the Launchpad X method is faster and cleaner than dragging to Trash. For Adobe and Microsoft products, the dedicated uninstaller is not optional — it’s the only path to a clean removal.
The real storage gains on most Macs come from the Library cleanup step — the support files and caches that accumulate from years of app usage that a simple Trash deletion never touches. Running AppCleaner on your five or ten most-used apps from the past few years often recovers more storage than deleting the apps themselves.
Wrapping Up
macOS gives you more control over app removal than Windows in some ways and less in others — no centralised uninstaller, but a clean application bundle architecture that makes most removals a simple drag-and-drop. The key insight is that “moved to Trash” and “completely uninstalled” are two different things, and knowing how to do the latter — either with AppCleaner or via Library folder cleanup — keeps your Mac lean and responsive over the long term.
ⓘ Disclaimer: This article is for informational purposes only. CrazyErrors is not affiliated with Apple Inc., Adobe Systems, Microsoft Corporation, or any other software vendor mentioned. System Settings navigation paths reflect macOS Tahoe (2026) and may vary across macOS versions. AppCleaner is a third-party tool — always download it from the official site (freemacsoft.net). Exercise caution with Terminal commands involving sudo rm -rf — these permanently delete files with no recovery option. For official macOS support, visit support.apple.com/mac.