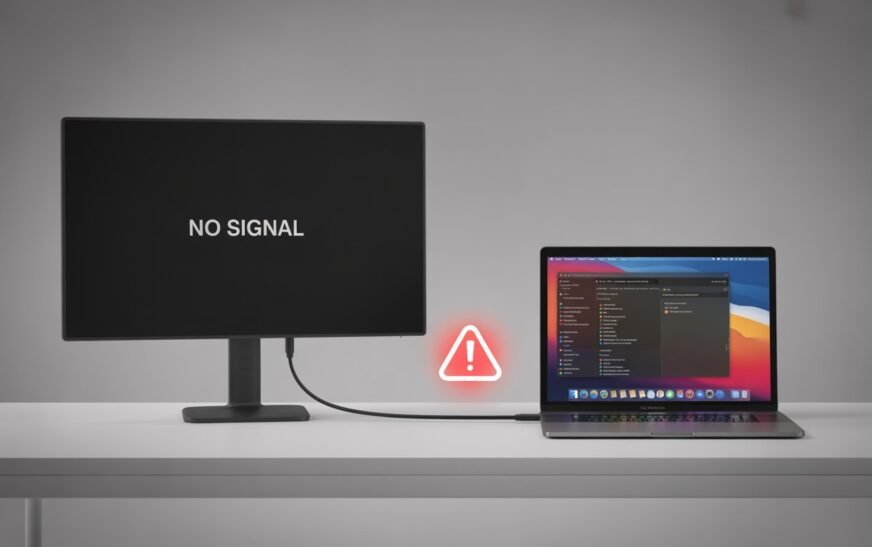

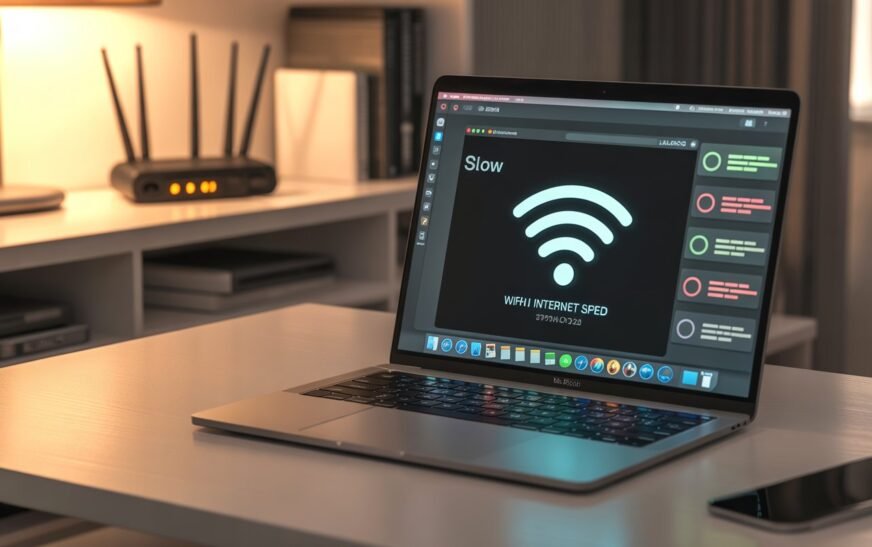
MacBook WiFi slowing down when USB-C or Thunderbolt devices are plugged in is a real, documented hardware interference issue — particularly on M3 and M4 MacBooks. USB 3.0 and Thunderbolt cables emit electromagnetic interference that overlaps directly with the 2.4 GHz WiFi band. The fastest fix is to switch your router to the 5 GHz band and connect your MacBook to it. Other effective fixes include using a USB-C hub with better shielding, changing the WiFi channel on your router, and repositioning cables away from the MacBook’s antenna area.
You plug in your external hard drive, USB-C hub, or monitor and suddenly everything on the internet slows to a crawl. Web pages take longer to load, video calls start dropping frames, file uploads stall. You unplug the device — and the connection snaps back immediately. It happens every single time, reliably, with the same hardware.
This isn’t a coincidence, and it isn’t your imagination. You’ve stumbled onto one of the least-discussed but most frustrating Mac performance issues of the Apple Silicon era — and it affects M3 and M4 MacBooks more noticeably than earlier models because of how the antenna placement and Thunderbolt architecture evolved across the chip generations.
The good news is that this is entirely fixable. You don’t need new hardware, you don’t need to stop using your USB-C accessories, and you don’t need to wait for Apple to release an update. The solutions are practical and most of them take under five minutes to implement.
Watch: 9 Things Your Mac Does Automatically — Most People Still Do Them Manually
While you’re here fixing your WiFi, this video is worth a watch — it covers nine things your Mac already handles on its own that most users waste time doing manually. A few of them are directly relevant to network and performance issues like the one in this guide.
Why Does This Happen? The Real Explanation
Understanding the Root CauseThis issue comes down to a well-known but rarely explained principle called electromagnetic interference (EMI) — specifically, USB 3.0 and Thunderbolt cables acting as unintentional radio frequency transmitters that jam your WiFi signal.
Here’s what’s happening in plain terms:
USB 3.0 operates at 5 Gbps, which requires the cable to carry extremely rapid electrical switching. That switching generates radio frequency emissions — essentially unintentional radio noise — that peak in the 2.4 GHz frequency range. The 2.4 GHz frequency range is also where your WiFi router broadcasts if you’re on the older WiFi band.
Thunderbolt 3 and 4 (used in all M-series MacBooks) operate at even higher speeds — up to 40 Gbps — producing correspondingly stronger interference. On M3 and M4 MacBooks, the Thunderbolt ports are located close to where Apple positioned the WiFi antenna for industrial design reasons, making the antenna more susceptible to interference from plugged-in cables.
This isn’t a bug Apple can patch away with a software update — it’s a physical reality of radio frequency physics. Intel and the USB Implementers Forum have both published documentation acknowledging it. The solution is to work around the interference rather than waiting for it to disappear.
On M1 and M2 MacBooks, the Thunderbolt ports and WiFi antenna were in positions that gave slightly more physical separation. The M3 and M4 chassis redesigns moved the antenna closer to the port cluster for thermal and internal layout reasons — making the proximity between the interference source (USB-C cable) and the receiver (WiFi antenna) smaller, and therefore the impact larger. It’s not that the WiFi hardware is worse; the geometry changed.
Confirm It’s the USB-C Interference Issue
Quick Diagnosis — 2 MinutesBefore applying fixes, confirm this is actually your problem — the symptoms are specific enough to be definitive:
🔍 Test 1 — Unplug and retest
Run a speed test at fast.com with your USB-C device plugged in. Note the speed. Unplug the device, wait 10 seconds, and run the test again. If speed jumps significantly — often 3x to 10x — USB-C interference is confirmed.
🔍 Test 2 — Check which WiFi band you’re on
Hold Option and click the WiFi icon in your menu bar. Look for “Channel” in the dropdown — channels 1–13 are 2.4 GHz, channels 36 and above are 5 GHz, and channels 1–233 starting at 6 GHz band are Wi-Fi 6E. If you’re on a channel below 14, you’re on 2.4 GHz and are vulnerable to this interference.
🔍 Test 3 — Move the cable
With the USB-C device still plugged in, try positioning the cable so it hangs away from the MacBook body rather than lying across it or coiling near the chassis. If speed improves noticeably just from repositioning the cable, interference is definitively the cause.
You have a classic USB-C / Thunderbolt WiFi interference issue. Work through the fixes below in order — Fix 1 (switch to 5 GHz) alone resolves this for the majority of users in under two minutes.
Fix 1: Switch Your MacBook to the 5 GHz WiFi Band
Most Effective Fix — Try This FirstThis is the single most effective solution for the majority of users. Because USB 3.0 and Thunderbolt interference peaks at 2.4 GHz, moving your WiFi connection to the 5 GHz band completely sidesteps the interference — like changing radio stations to avoid static. Your router almost certainly supports 5 GHz already.
Many modern routers use “band steering” — they broadcast a single network name and automatically assign devices to 2.4 GHz or 5 GHz. The problem is that band steering sometimes assigns your Mac to 2.4 GHz even when 5 GHz is available and better. Log into your router’s admin panel (usually at 192.168.1.1 or 192.168.0.1 in a browser) and look for a setting to split the bands into separate network names — this lets you manually connect your Mac to 5 GHz every time.
The 5 GHz band is faster and immune to USB interference, but it has a shorter effective range than 2.4 GHz and doesn’t penetrate walls as well. If your Mac is far from your router or separated by thick walls, 5 GHz may not provide a strong enough signal. In that case, Fix 4 (changing the 2.4 GHz channel) becomes more relevant.
Fix 2: Change the WiFi Channel on Your Router
For 2.4 GHz Users or Weak 5 GHz CoverageIf switching to 5 GHz isn’t practical — because you’re too far from the router or your router doesn’t support it — you can reduce the interference by choosing a 2.4 GHz channel that has the least overlap with USB 3.0 emissions. Not all 2.4 GHz channels are equally affected.
USB 3.0 interference is strongest in the 2400–2500 MHz range, which covers channels 1 through 6 most intensely. Channel 11 (2462 MHz) sits at the high end of the 2.4 GHz band and experiences noticeably less USB interference than channels 1–6.
192.168.1.1 or 192.168.0.1. Check the label on the back of your router if you’re unsureBefore choosing a channel manually, it helps to see what channels your neighbours are using — if everyone nearby is on channel 11, there may be channel congestion. On Mac, you can use the free Wireless Diagnostics tool: hold Option, click the WiFi icon, select “Open Wireless Diagnostics,” then go to Window → Scan to see all nearby networks and which channels they’re using. Pick a channel that’s least congested in your area.
Fix 3: Use a Better-Shielded USB-C Hub or Cable
Hardware Fix — High ImpactNot all USB-C hubs and cables are created equal when it comes to electromagnetic shielding. Cheap, unbranded USB-C hubs — the kind that flood online marketplaces — often use minimal shielding to cut costs. The result is significantly more radio frequency leakage from the cable and hub housing, making the interference much worse than it needs to be.
Upgrading to a well-shielded hub or cable can meaningfully reduce interference without changing your WiFi setup at all.
What to look for in a hub or cable:
- Aluminium housing on the hub body — aluminium acts as a Faraday cage and blocks RF emissions from escaping
- Braided cable construction — braided cables have better shielding than smooth plastic-coated cables USB-IF certification — cables certified by the USB Implementers Forum meet minimum shielding standards
- Reputable brands — Anker, Belkin, CalDigit, OWC, and Apple’s own accessories consistently produce better-shielded products than generic alternatives
Cable length matters too: Longer cables act as longer antennas and radiate more interference. If you’re using a 2-metre USB-C cable when a 0.5-metre cable would reach, switching to the shorter cable reduces the effective antenna length and the interference it produces.
Not all cables marketed as “USB-C” are Thunderbolt-capable or built to the same standard. For Thunderbolt peripherals (docks, external SSDs, monitors), use cables specifically labelled as Thunderbolt 3 or Thunderbolt 4 — these are more tightly spec’d and typically better shielded. Using a generic USB-C cable with a Thunderbolt device can actually increase interference because the cable isn’t engineered for the signal frequencies involved.
Fix 4: Reposition the Cable Away From the Antenna
Free Fix — Worth Doing ImmediatelyOn M3 and M4 MacBooks, the WiFi antenna sits along the top edge of the display lid — the hinge area and upper corners of the screen are where Apple routes antenna traces for the best signal. The Thunderbolt ports sit at the sides of the chassis, and cables plugged into them often lie across the keyboard, coil on the desk near the Mac, or drape toward the back.
Simply routing cables so they hang away from the MacBook body — particularly away from the display hinge area — can meaningfully reduce how much interference the antenna picks up.
On MacBook Air M3 and MacBook Pro M4, the primary WiFi antenna runs along the top edge of the display assembly — roughly the top 10–15mm of the screen lid. This is why Apple uses non-conductive material in the display lid border. Keeping cables and hubs physically away from the display lid, particularly the corners, reduces how much interference couples directly into the antenna.
Fix 5: Use a Thunderbolt Dock Instead of a USB-C Hub
Desk Setup UpgradeIf you regularly work at a desk with multiple peripherals — external display, external drive, keyboard, mouse, card reader — consider replacing a USB-C hub with a proper Thunderbolt dock that connects to your Mac via a single cable.
A quality Thunderbolt dock has several advantages over a basic USB-C hub when it comes to interference:
- It sits on your desk away from the Mac body, putting physical distance between the interference source and the antenna
- Premium docks (CalDigit, OWC, Belkin) use proper metal shielding in their enclosures
- A single well-shielded Thunderbolt cable to the dock produces less total interference than multiple USB-C cables plugged directly into the MacBook’s ports
- Many docks include ferrite cores on the cable — small cylindrical components that suppress high-frequency emissions
Ferrite cores — small snap-on cylindrical clips that clamp around a cable — suppress high-frequency RF emissions from the cable. They’re available for a few dollars online and work with any USB-C or Thunderbolt cable. Clip one near the MacBook end of your cable (within about 5 cm of the port) and another midway along the cable for best results. This is the same technique used in professional audio/video setups to control cable-borne interference.
Fix 6: Renew Your DHCP Lease and Flush DNS
If Speed Is Slow Even After Physical FixesSometimes what looks like a WiFi speed problem caused by USB-C interference is actually a stale network configuration issue that got triggered when you plugged in a device and the network interface reset. Renewing the DHCP lease and flushing the DNS cache takes two minutes and costs nothing.
Renew DHCP lease:
Flush DNS cache via Terminal:
sudo dscacheutil -flushcache; sudo killall -HUP mDNSResponderDHCP renewal gets your Mac a fresh IP address assignment from the router, clearing any addressing conflicts. Flushing DNS clears your Mac’s stored list of website-to-IP-address mappings — useful if slow DNS lookups are making websites feel slow even when the raw network speed is actually fine.
Fix 7: Delete Saved WiFi Network and Reconnect
For Persistent Connection DropsIf your Mac keeps dropping WiFi or switching between bands unexpectedly when you plug in USB-C devices, the saved network profile may have become corrupted — causing macOS to reconnect with suboptimal settings each time. Removing the network and reconnecting fresh forces macOS to negotiate a clean connection.
Fix 8: Create a New Network Location
Advanced — Clears Network ConfigurationmacOS stores all of your network configuration — WiFi preferences, interface order, proxy settings, DNS overrides — in a “Location” profile. If this profile became corrupted during a macOS update or after a hardware change, creating a fresh location resets all of it to clean defaults while preserving your other Mac data.
Don’t delete your old “Automatic” location right away. If the new location creates unexpected issues — VPN profiles missing, proxy settings lost — you can switch back to the old one instantly from the Location dropdown in Network settings. Once the new location is confirmed working well for a week, you can safely delete the old one.
Fix 9: Update macOS
Always Worth CheckingApple has issued driver and firmware updates in macOS point releases that specifically address Thunderbolt and WiFi coexistence on M-series Macs. If you’re running an older macOS version, there’s a reasonable chance a fix is already available and waiting for you to install it.
macOS updates sometimes bundle WiFi chip firmware updates that aren’t explicitly listed in the release notes. These are the most direct fixes for hardware-level interference issues. The only way to get them is to install the full macOS update — they don’t install separately.
Fix 10: Use Ethernet as the Primary Connection When Docked
The Permanent Solution for Desk UsersIf you work at a desk and have your MacBook connected to multiple USB-C devices regularly, the cleanest long-term solution is to run an Ethernet cable from your router or switch to your Mac — either via a USB-C to Ethernet adapter or through a Thunderbolt dock with a built-in Ethernet port.
Ethernet completely sidesteps the WiFi interference issue because you’re no longer using WiFi at all for your primary connection. The speed is better, the latency is lower, the connection is stable regardless of what’s plugged in, and you still have WiFi available as a fallback.
A Thunderbolt dock with built-in Gigabit Ethernet, connected to your router, means you get wired internet speed, all your USB-C peripherals, and external display support through a single cable to your MacBook. The interference issue becomes irrelevant. Brands like CalDigit TS4, OWC Thunderbolt Dock, and Belkin Connect Pro Thunderbolt 4 all include Ethernet and are well-shielded for M3 and M4 MacBooks.
Pro Tips: Keeping WiFi Fast With USB-C Devices Long-Term
Always connect to the 5 GHz or 6 GHz band as your Mac’s default. Once you’ve confirmed 5 GHz works well in your space, save only the 5 GHz network on your Mac and forget the 2.4 GHz version. This prevents macOS from automatically switching to the slower band when 5 GHz signal is temporarily weaker. Check our guide on hidden Mac features for more networking tricks built into macOS that most users never find.
Place your router at an equal or higher height than your MacBook. WiFi signal propagates horizontally and downward more effectively than it does upward through floors and ceilings. A router sitting on the floor behind furniture is already fighting against physics — add USB-C interference to the mix and the situation gets worse than it needs to be.
Consider a WiFi 6E or WiFi 7 router if you’re due an upgrade. The 6 GHz band introduced by WiFi 6E has zero overlap with USB 3.0 interference frequencies — it’s completely immune to this problem by design. If your router is more than four years old and you work with many Thunderbolt peripherals, upgrading to a WiFi 6E router future-proofs your setup against this class of interference entirely.
Keep USB 3.0 and USB 2.0 straight when buying cables. If a peripheral only needs USB 2.0 speeds — a keyboard, mouse, basic webcam, card reader for smaller cards — buying a USB 2.0 cable instead of USB 3.0 produces significantly less interference. USB 2.0 operates at lower frequencies and generates far less RF noise. Many people reflexively buy USB 3.0 cables for everything even when USB 2.0 would work identically.
Check whether your MacBook has a storage issue compounding the problem. When your Mac’s storage is nearly full, background processes become more active and generate more system bus traffic — which can amplify the interference effect. Keeping adequate free disk space is good practice for multiple reasons. See our guide on freeing up MacBook storage without deleting files if your drive is getting full.
Common Mistakes to Avoid
The clearest sign that USB-C interference is the cause is that the problem appears immediately when you plug in the device and disappears immediately when you unplug it. If your internet is slow regardless of what’s plugged in, the issue is elsewhere. But if it’s perfectly correlated with a specific device, it’s almost certainly interference — not your ISP or router.
The price difference between a branded, well-shielded USB-C hub and a generic one is usually $20–$40. The WiFi degradation from a poorly shielded hub in a critical work setup costs far more in lost productivity than that price difference. If you use a hub daily for work, it’s worth buying a quality one once.
Apple has issued targeted fixes for USB/Thunderbolt and WiFi coexistence in multiple macOS point releases. Staying on an older macOS version to “avoid changes” means missing fixes that directly address this problem. Check for updates before assuming the issue is purely hardware.
When set to “Auto,” most routers pick channels 1, 6, or 11 based on congestion from neighbouring networks — but they don’t account for USB interference in your specific environment. Manually setting channel 11 or 13 gives you control over minimising the overlap with USB interference frequencies.
FAQ: MacBook WiFi Slow With USB-C Devices
Why does my MacBook WiFi slow down when I plug in a USB-C device?
USB 3.0 and Thunderbolt cables emit radio frequency interference that peaks in the 2.4 GHz range — the same frequency used by the older WiFi band. When a USB-C or Thunderbolt device is plugged into your MacBook, the cable acts as an unintentional antenna that broadcasts interference directly into the WiFi antenna. On M3 and M4 MacBooks, the proximity between the Thunderbolt ports and WiFi antenna makes this more pronounced than on earlier models. Switching to 5 GHz WiFi sidesteps the interference completely.
Does this affect all MacBooks or just M3 and M4 models?
The interference issue affects all Macs with USB 3.0 or Thunderbolt ports — it’s a physics problem, not a Mac-specific bug. However, M3 and M4 MacBooks are more noticeably affected due to the physical proximity of the Thunderbolt port cluster to the WiFi antenna in Apple Silicon chassis designs. Users of Intel MacBooks and M1/M2 models report the issue less frequently, though it can still occur depending on the hub, cable, and WiFi band in use.
Will Apple release a fix for this in a macOS update?
Apple has addressed related issues in previous macOS point updates through firmware improvements to the WiFi chip and adjustments to how the Thunderbolt and WiFi subsystems share antenna resources. However, the core cause is physical — radio frequency interference from USB cables — which software can only partially mitigate. Switching to 5 GHz WiFi or using Ethernet when docked are permanent solutions that don’t depend on Apple releasing an update.
Which USB-C hub works best with MacBook M3 and M4 without causing WiFi interference?
Hubs with aluminium enclosures and proper RF shielding produce significantly less interference than plastic-bodied generic hubs. Consistently well-regarded options for M-series MacBooks include the CalDigit TS4 Thunderbolt dock, the OWC Thunderbolt 4 Hub, and Anker’s 12-in-1 Thunderbolt hub. For travel-sized hubs, Anker and Belkin’s aluminium models perform better than unbranded alternatives. Using a Thunderbolt-specific hub rather than a generic USB-C hub also helps since Thunderbolt cables are better shielded by specification.
My router only shows one WiFi network — how do I connect to 5 GHz?
Your router is likely using “band steering” — broadcasting one network name and automatically assigning devices to 2.4 GHz or 5 GHz. Log into your router admin page (usually 192.168.1.1 or 192.168.0.1 in a browser) and look in the wireless settings for an option to disable band steering or split the bands into separate network names. Once split, you’ll see two networks in your Mac’s WiFi list — connect to the one labelled “5G” or “5GHz.” Most modern routers support this.
Does the USB-C charger cause the same WiFi interference?
The charger cable itself (used for power delivery only) produces less interference than a cable actively carrying high-speed data — because power delivery at USB-PD frequencies doesn’t generate the same RF emissions as USB 3.0 data transfer. However, if your charger cable is also connected to a hub that’s simultaneously transferring data, the data side of the hub still produces the interference. Pure charging cables plugged directly into a wall adapter are generally not a significant WiFi interference source.
MacBook WiFi Slow With USB-C — Fix Summary
- 1Switch to 5 GHz WiFi — eliminates interference completely, fastest fix
- 2Change 2.4 GHz channel to 11 or 13 on your router for less overlap
- 3Use a better-shielded hub or cable — aluminium body, braided cable, reputable brand
- 4Reposition the cable away from the MacBook display and antenna area
- 5Use a Thunderbolt dock placed at a distance rather than a direct-attach hub
- 6Add ferrite cores to your existing cable near the MacBook port
- 7Renew DHCP and flush DNS if speed is slow even after physical fixes
- 8Delete saved network and reconnect to the 5 GHz band fresh
- 9Create a new Network Location to clear corrupted configuration
- 10Update macOS — firmware fixes are bundled in point releases
- 11Use Ethernet when docked — the permanent solution for desk setups
One Last Thing
If you’ve tried the fixes above and WiFi is still noticeably slower with USB-C devices plugged in — especially if you’ve already switched to 5 GHz and upgraded your cable — it’s worth checking whether a specific device is the primary offender. Try plugging in one device at a time and running a speed test after each one. Some external SSDs and hubs generate significantly more interference than others, and identifying the exact culprit lets you make a targeted replacement rather than changing everything at once.
The CrazyErrors team is happy to help if you’re still stuck — let us know which hub, cable, and MacBook model you’re using and we can point you toward a specific combination that works cleanly.
Wrapping Up
MacBook WiFi slowing down when USB-C devices are plugged in is a genuine hardware physics issue — not a software bug, not a router problem, and not something wrong with your MacBook. USB 3.0 and Thunderbolt cables emit interference at 2.4 GHz, and that’s where most people’s WiFi is running. The fix is straightforward: move to 5 GHz, use better-shielded hardware, or switch to Ethernet when you’re at a desk.
Most users resolve this in under five minutes by simply connecting to their router’s 5 GHz band. Everything else in this guide is for situations where 5 GHz alone isn’t enough — whether because of range limitations, router configuration, or a particularly interference-heavy hub. Pick the right combination for your setup and your USB-C accessories and your WiFi will coexist without issue.
ⓘ Disclaimer: This article is for informational purposes only. CrazyErrors is not affiliated with Apple Inc., any router manufacturer, or any peripheral brand mentioned. Product recommendations are based on publicly available information and general user experience. Interference characteristics vary by environment, cable quality, and router placement. For official Mac support, visit support.apple.com.